Welcome to Sentry. In this guide, we’ll walk through how to set up and launch a project using the Sentry dashboard.
Go to sentry.cloudresearch.com
1. Introduction
This quick start guide is designed to help new users launch their first project. We’ll walk through the basic, start-to-finish workflow, including setting up providers, creating and testing a project, and reviewing results. For more detailed guidance, be sure to visit the Sentry Help Center.
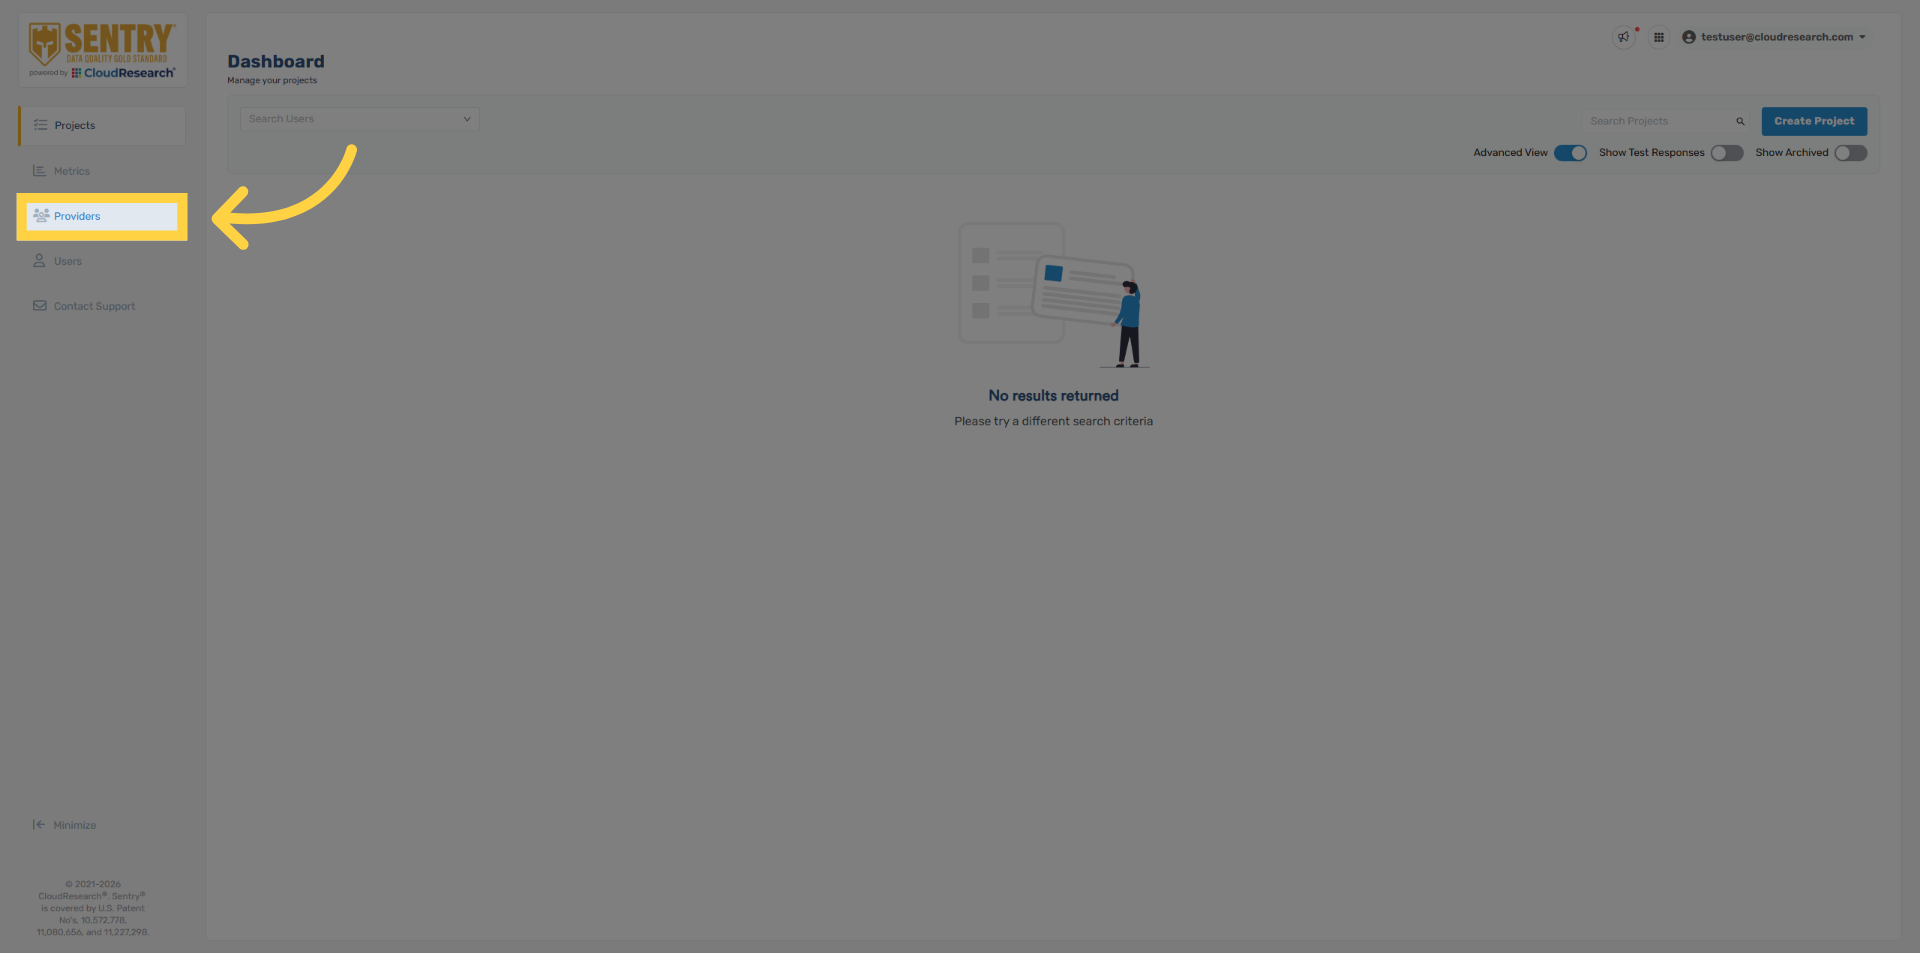
2. Navigate to Providers Tab
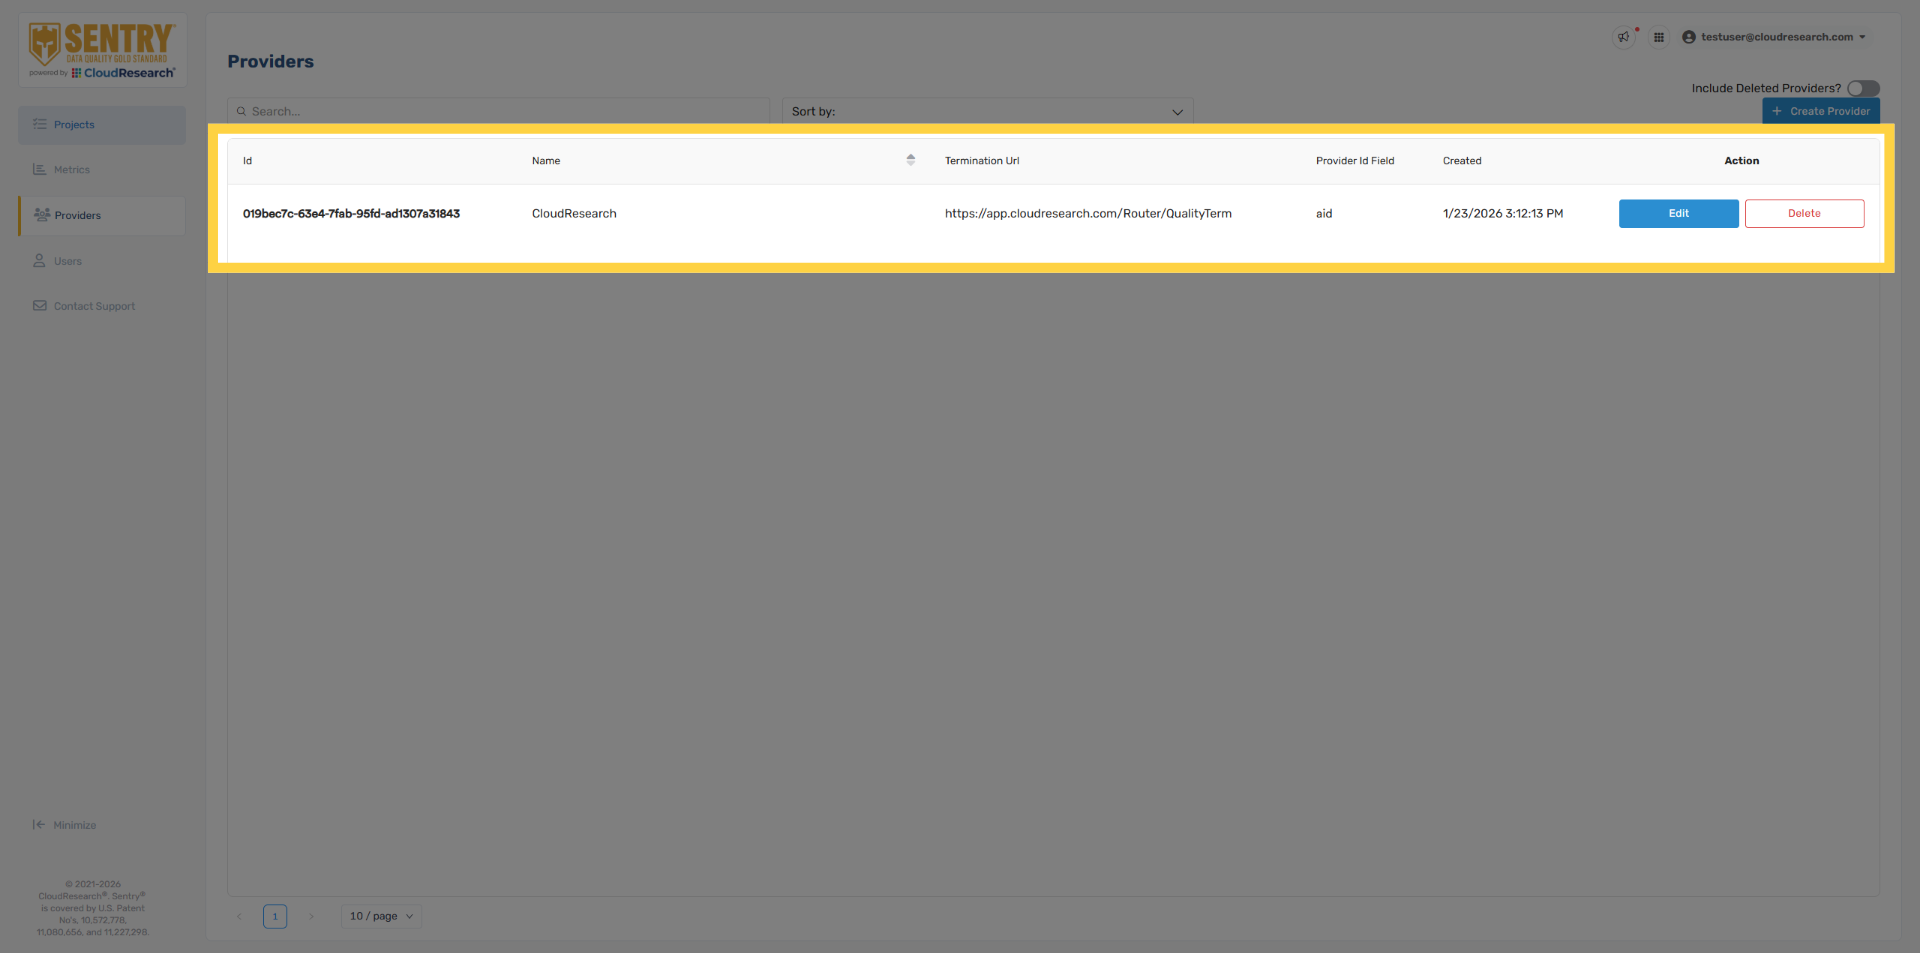
We first recommend setting up your sample providers by navigating to the providers tab on the left sidebar.
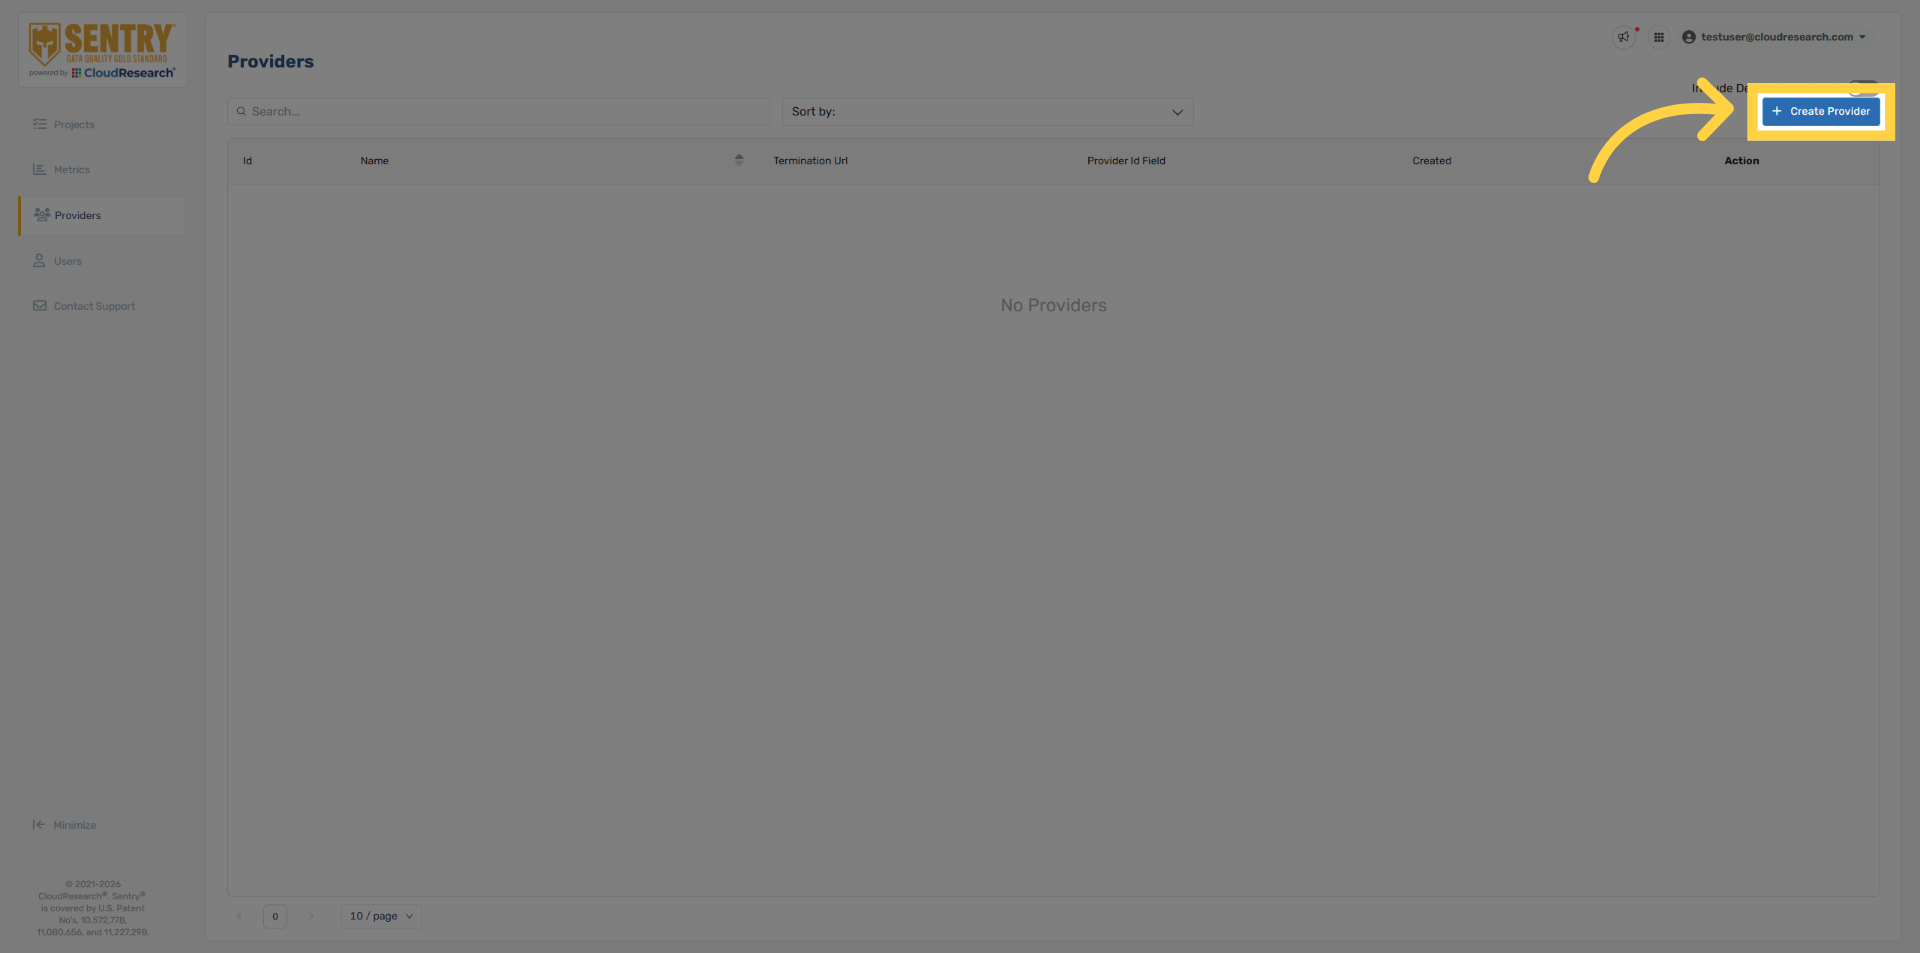
3. Select Create Provider
Select create provider in the top right.
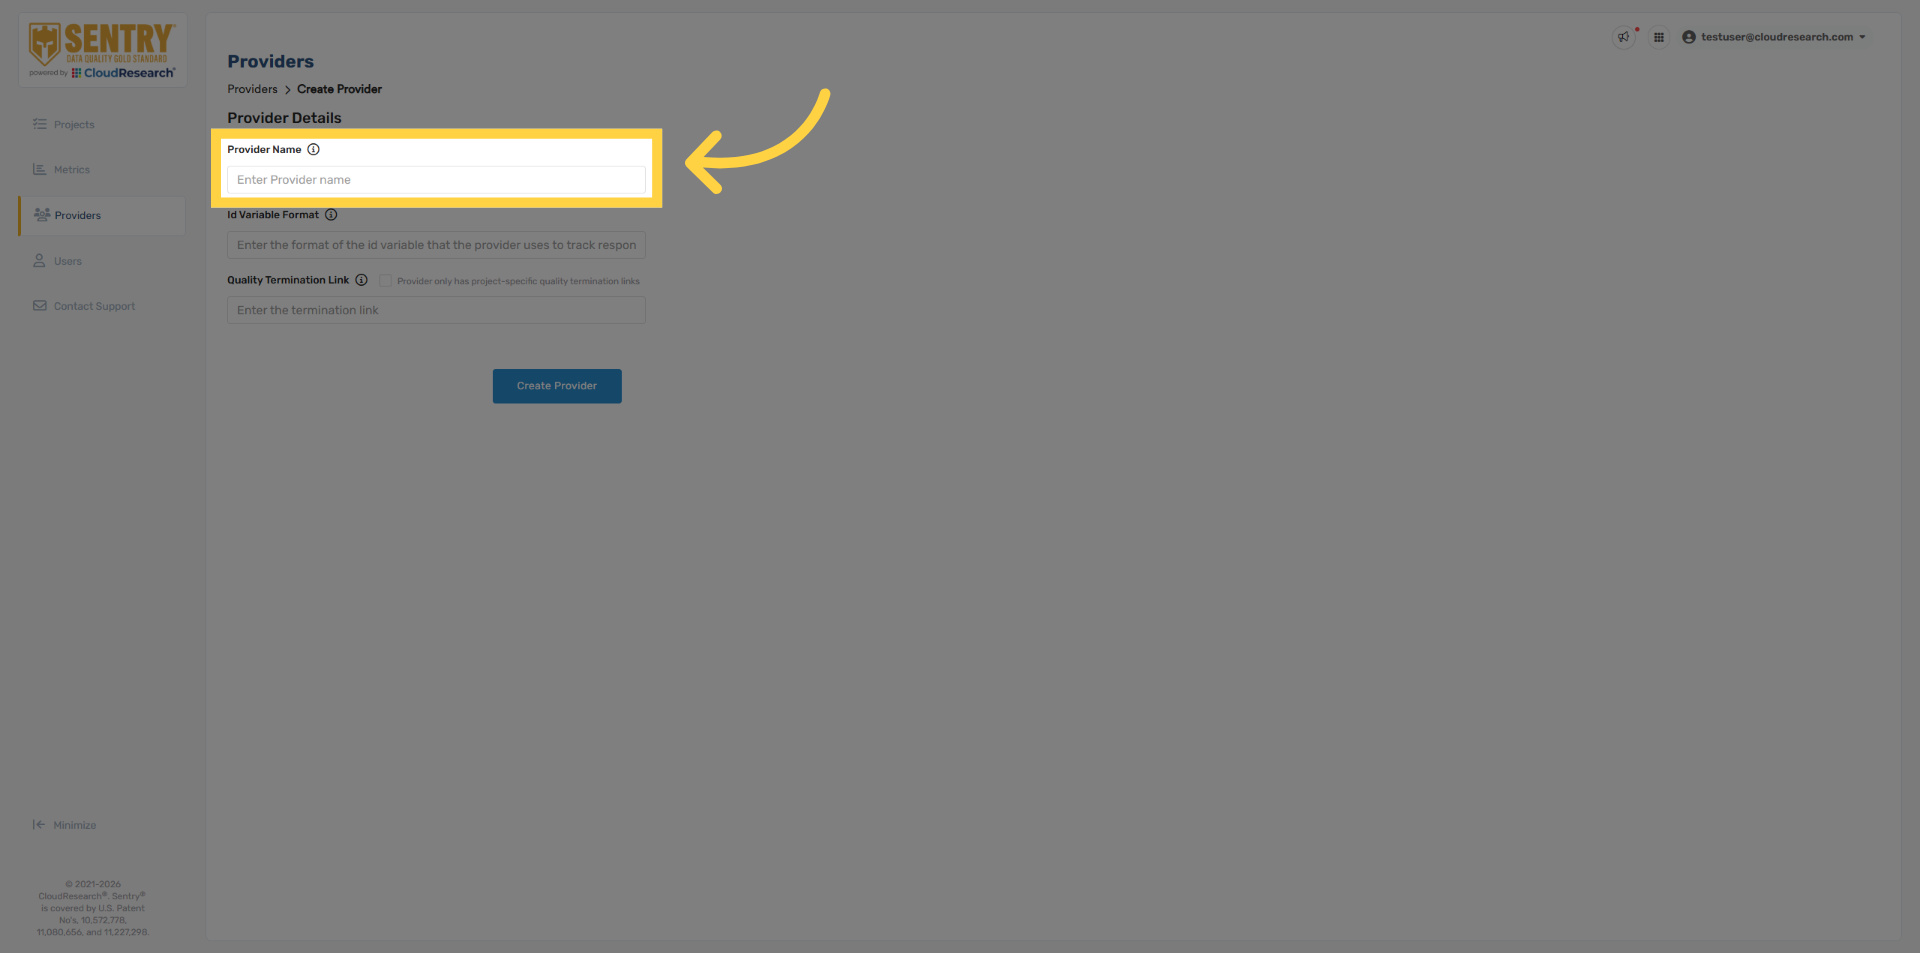
4. Enter Provider Name
Enter your provider name.
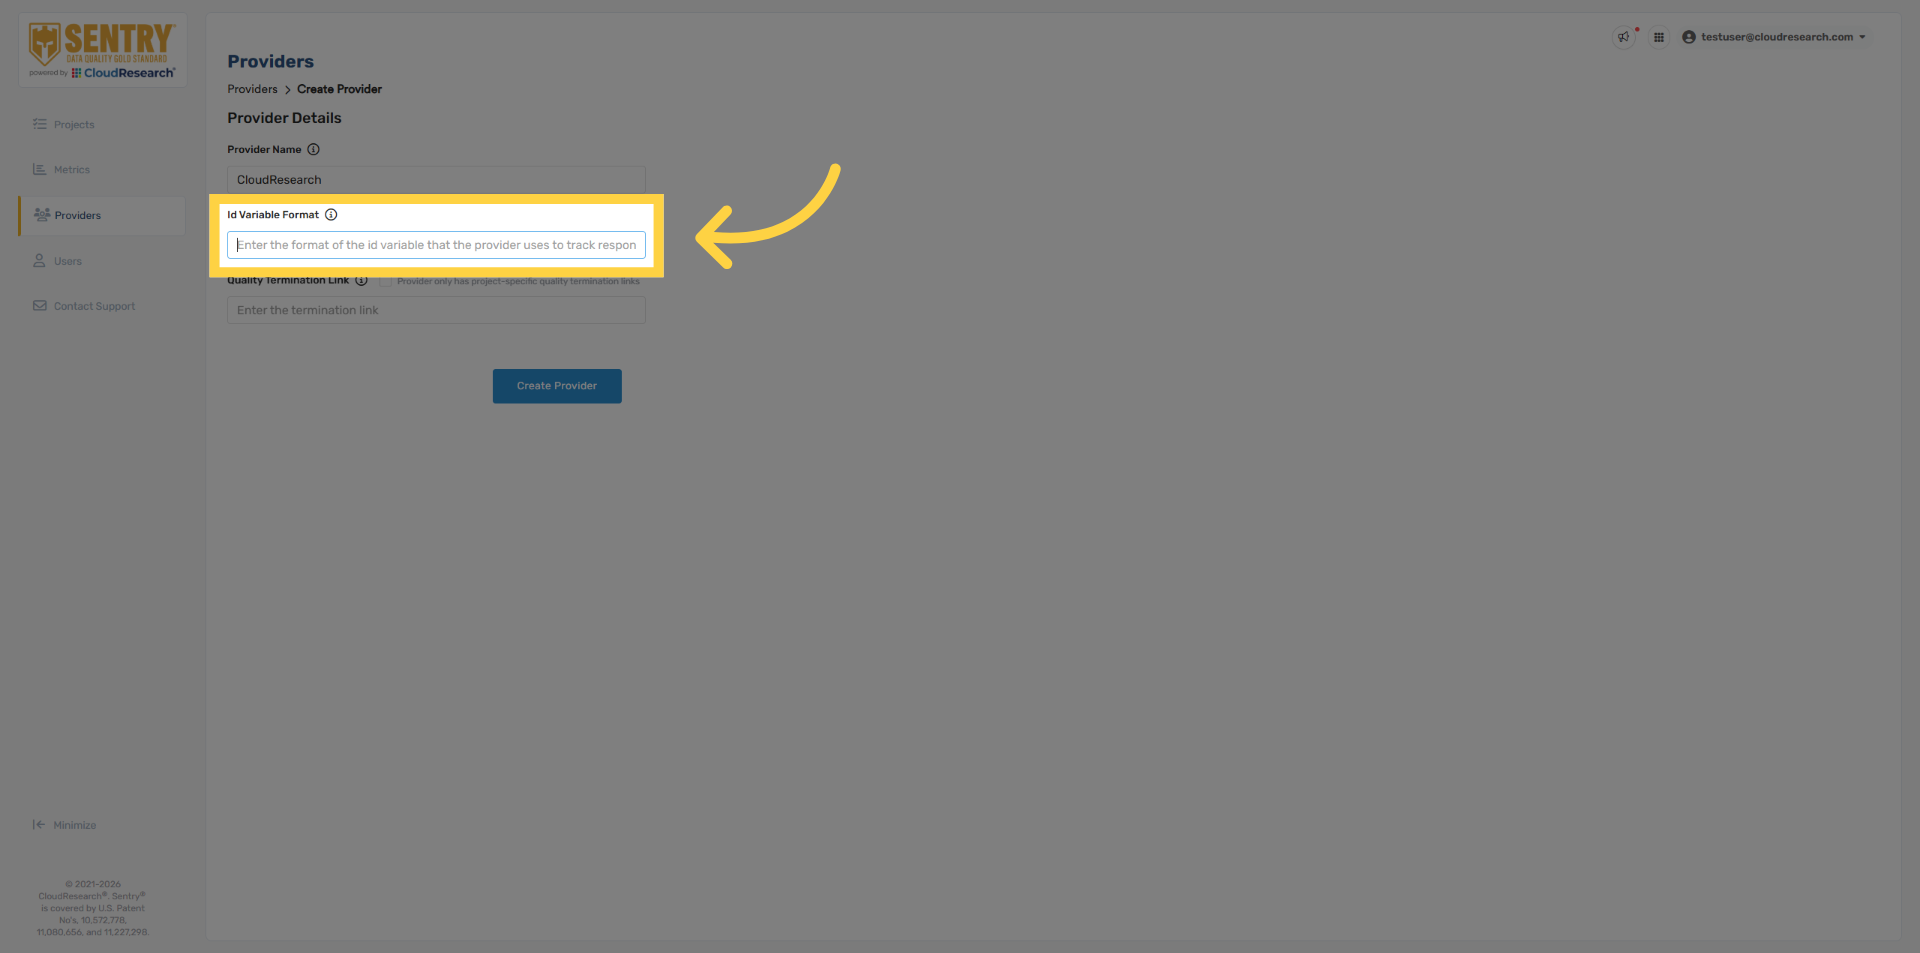
5. Specify Provider ID Variable
Add the providers respondent identification variable.
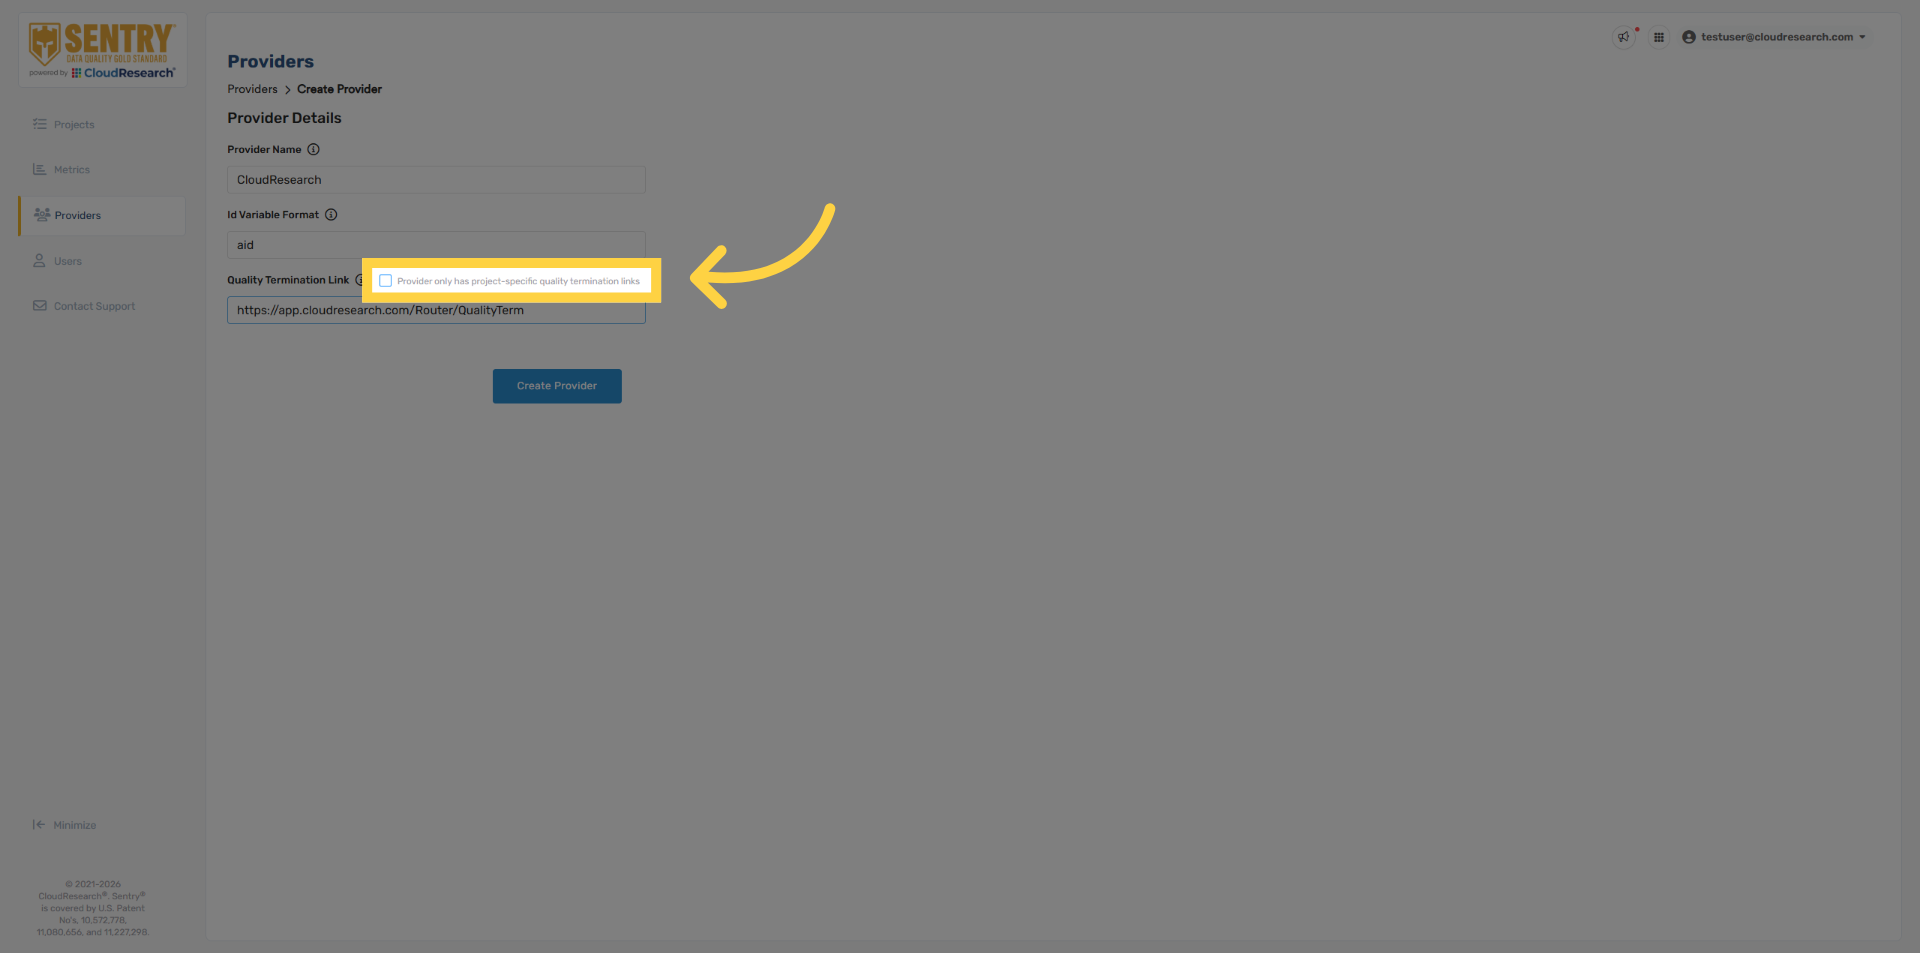
6. Enter Quality Termination Link
Next, add the provider quality termination redirect. Be sure to remove any variables that are automatically passed in by your sample provider, such as the respondent ID.
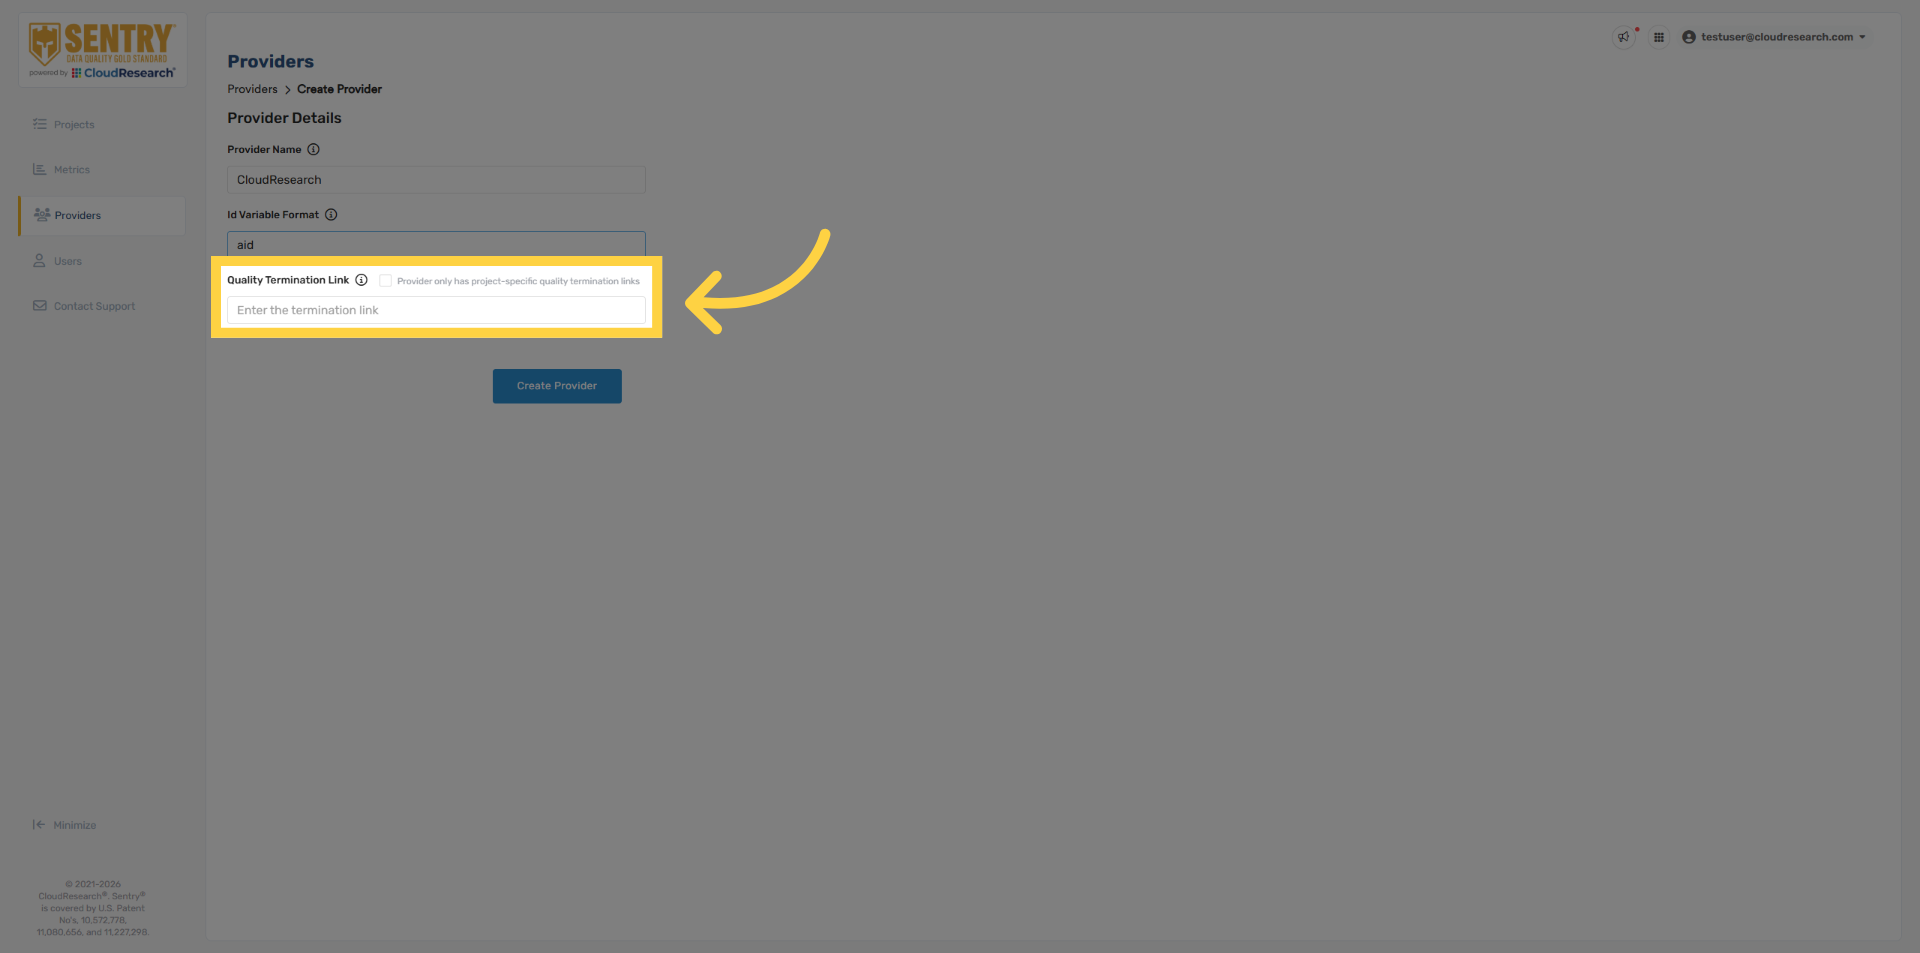
7. Enable Project-Specific Termination
If the sample provider uses project-specific quality termination links, click this checkbox. This tells Sentry to look for those redirects within the Sentry project. We’ll review this in more detail in a few minutes.
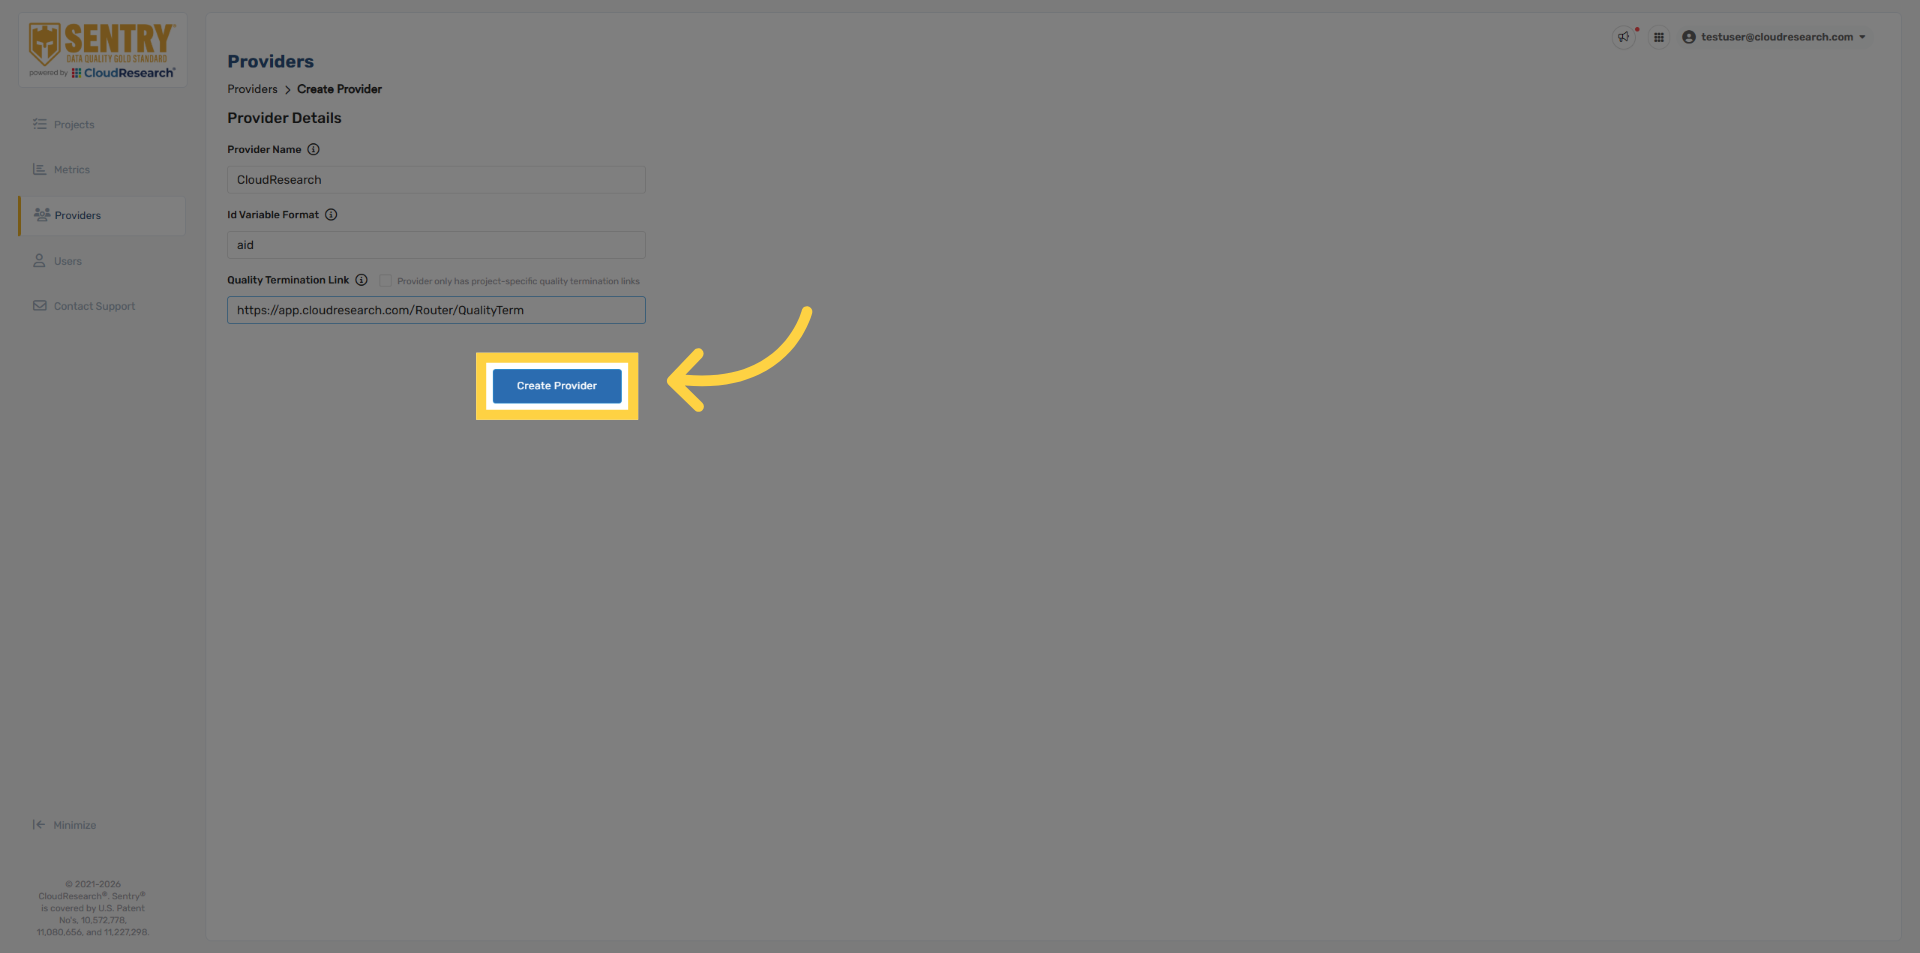
8. Create Provider
Click create provider to save your settings.
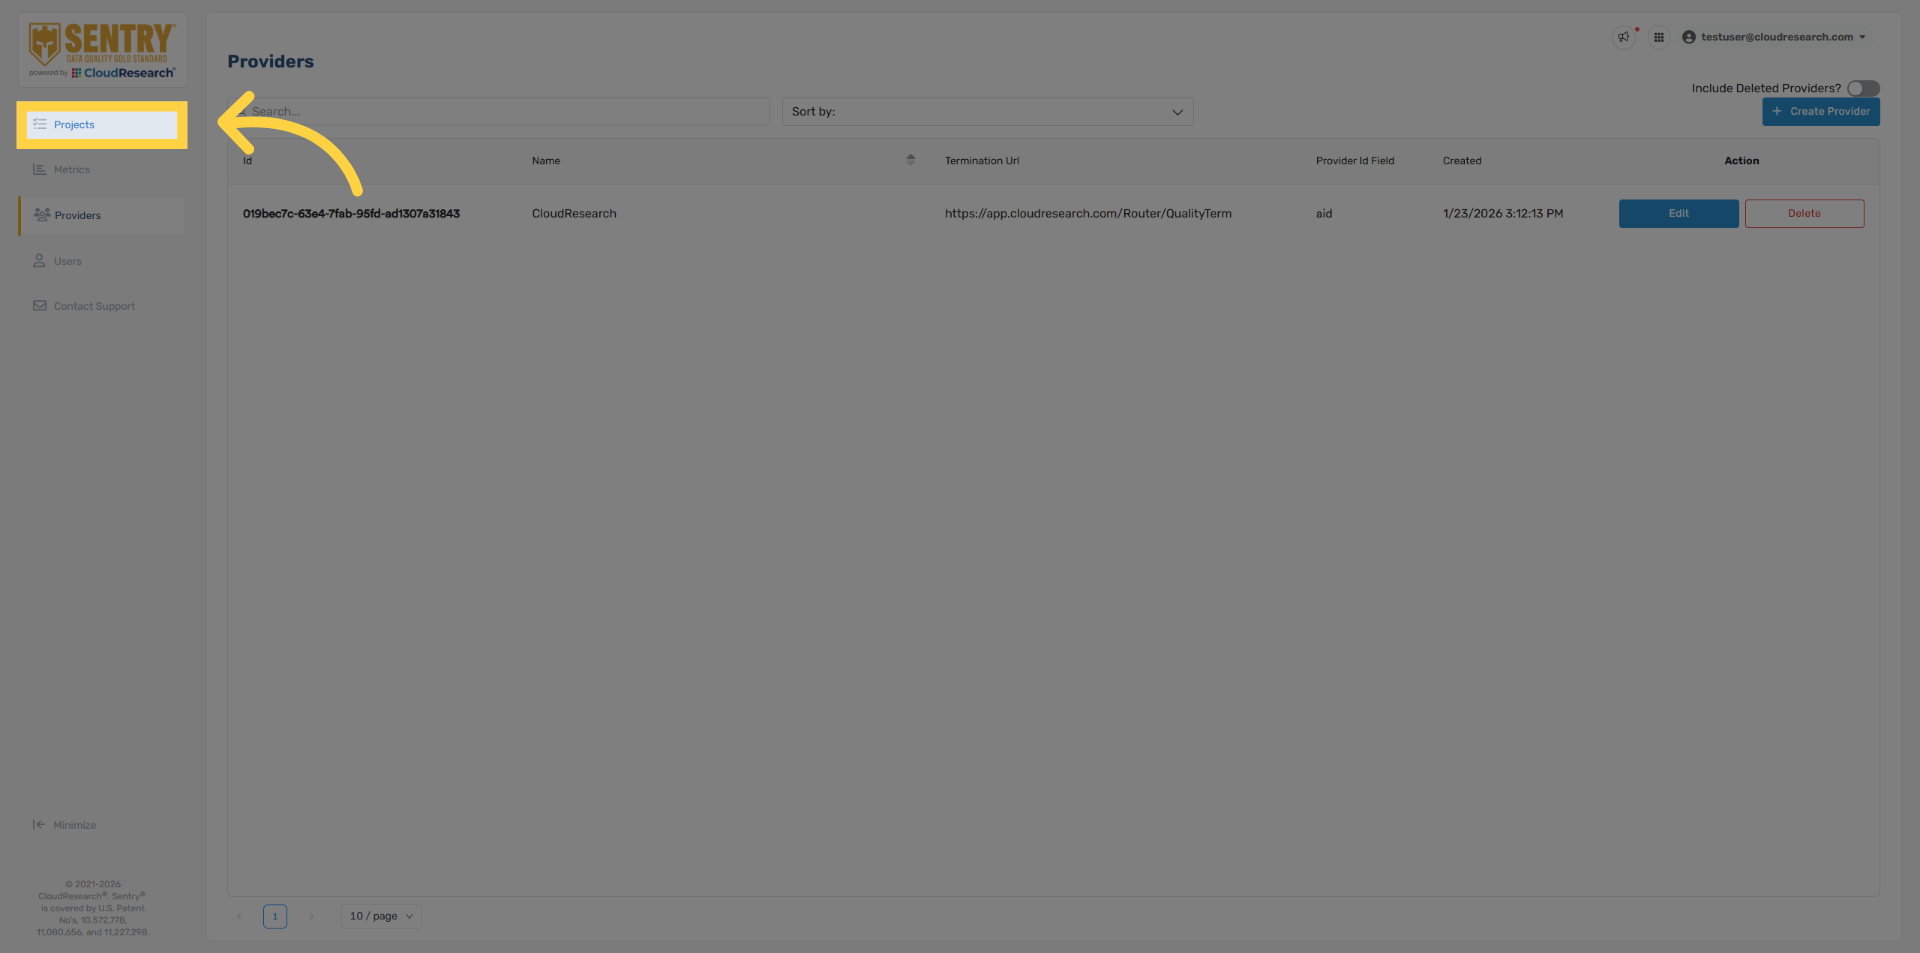
9. Navigate to Projects Tab
Once saved, this provider only needs to be set up once and will be available to everyone within your organization.
10. Navigate to Projects Tab
To create your project, navigate back to the project page.
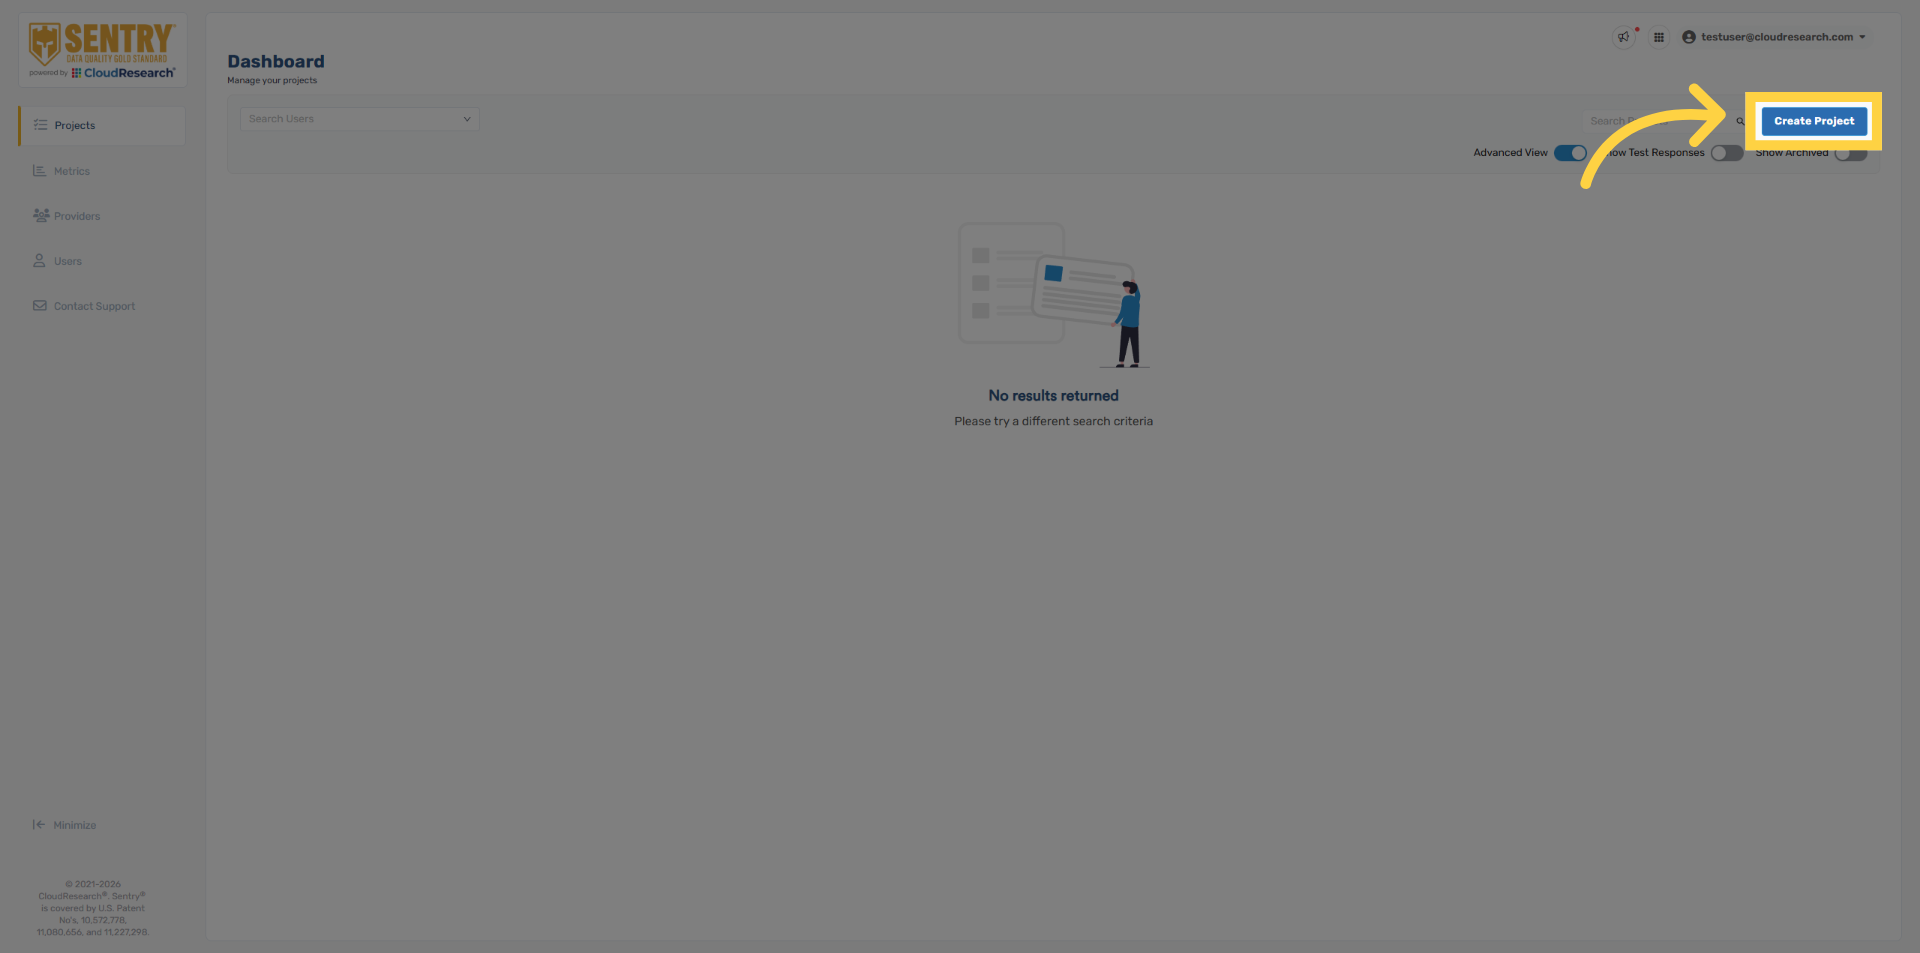
11. Select Create Project
Click create project in the top right.
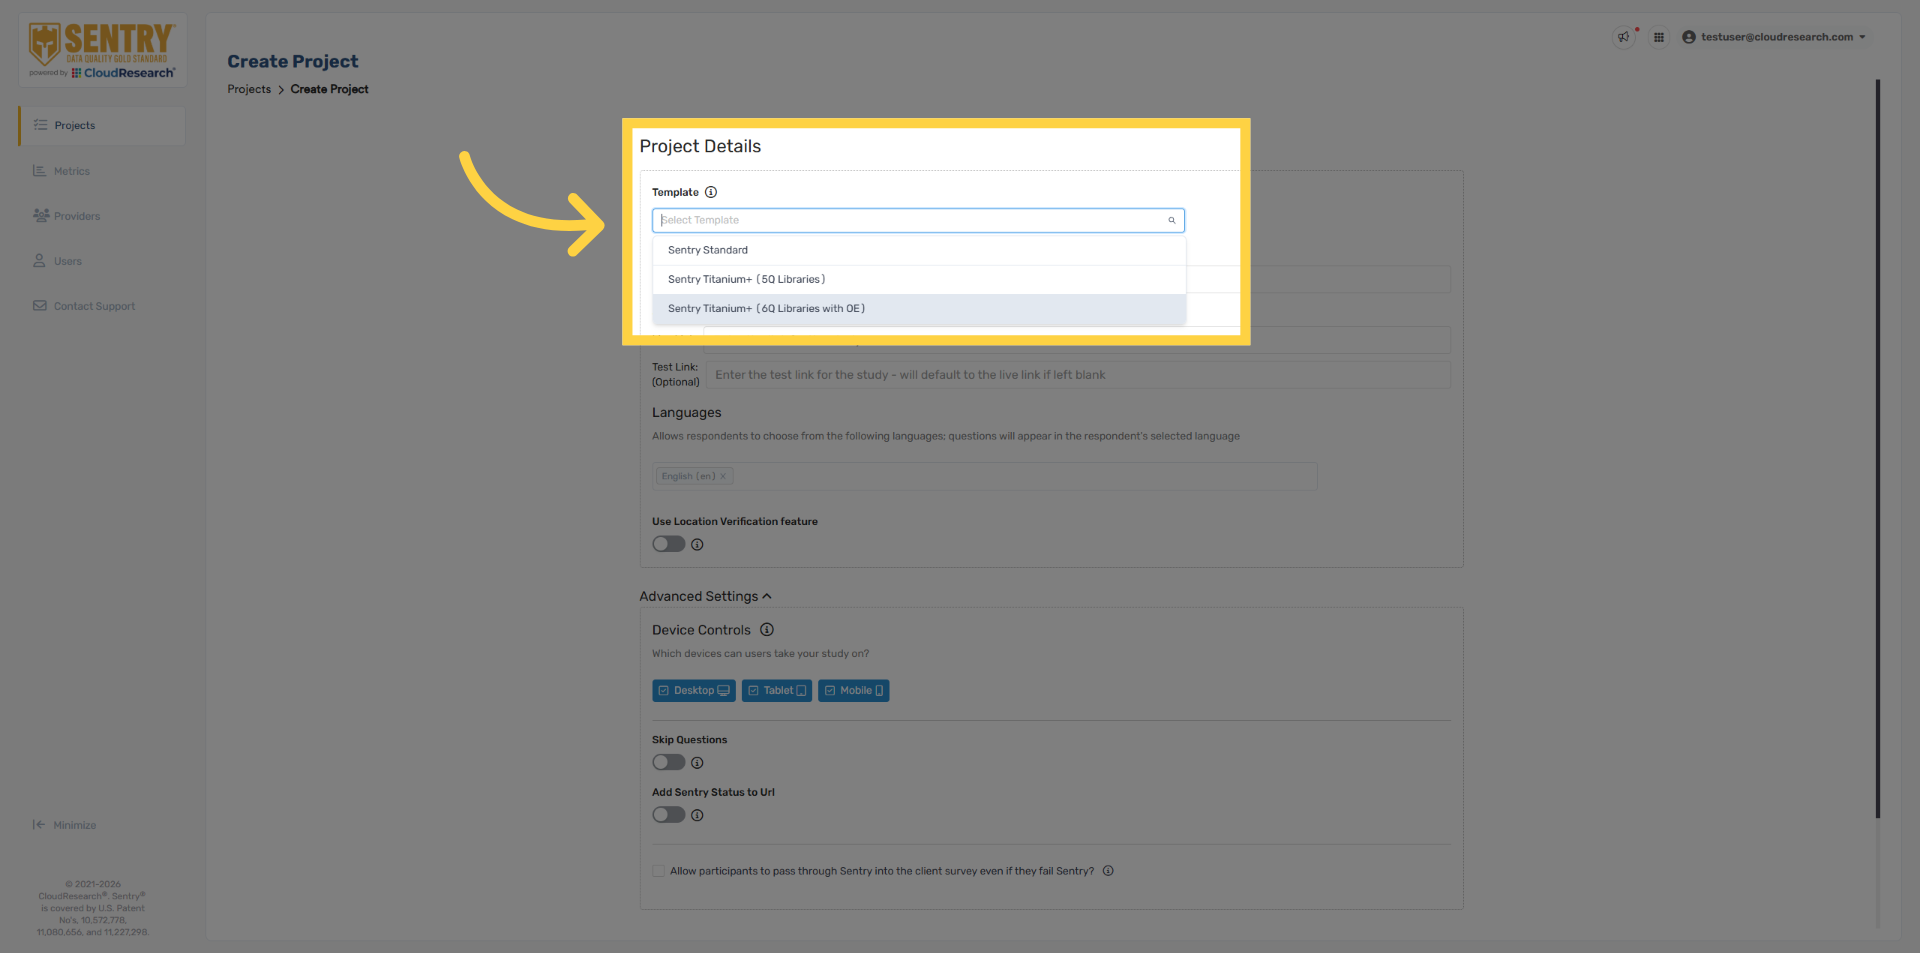
12. Choose Sentry Template
Select your Sentry template. Note that the Sentry template and all settings can be adjusted at any time while in field.
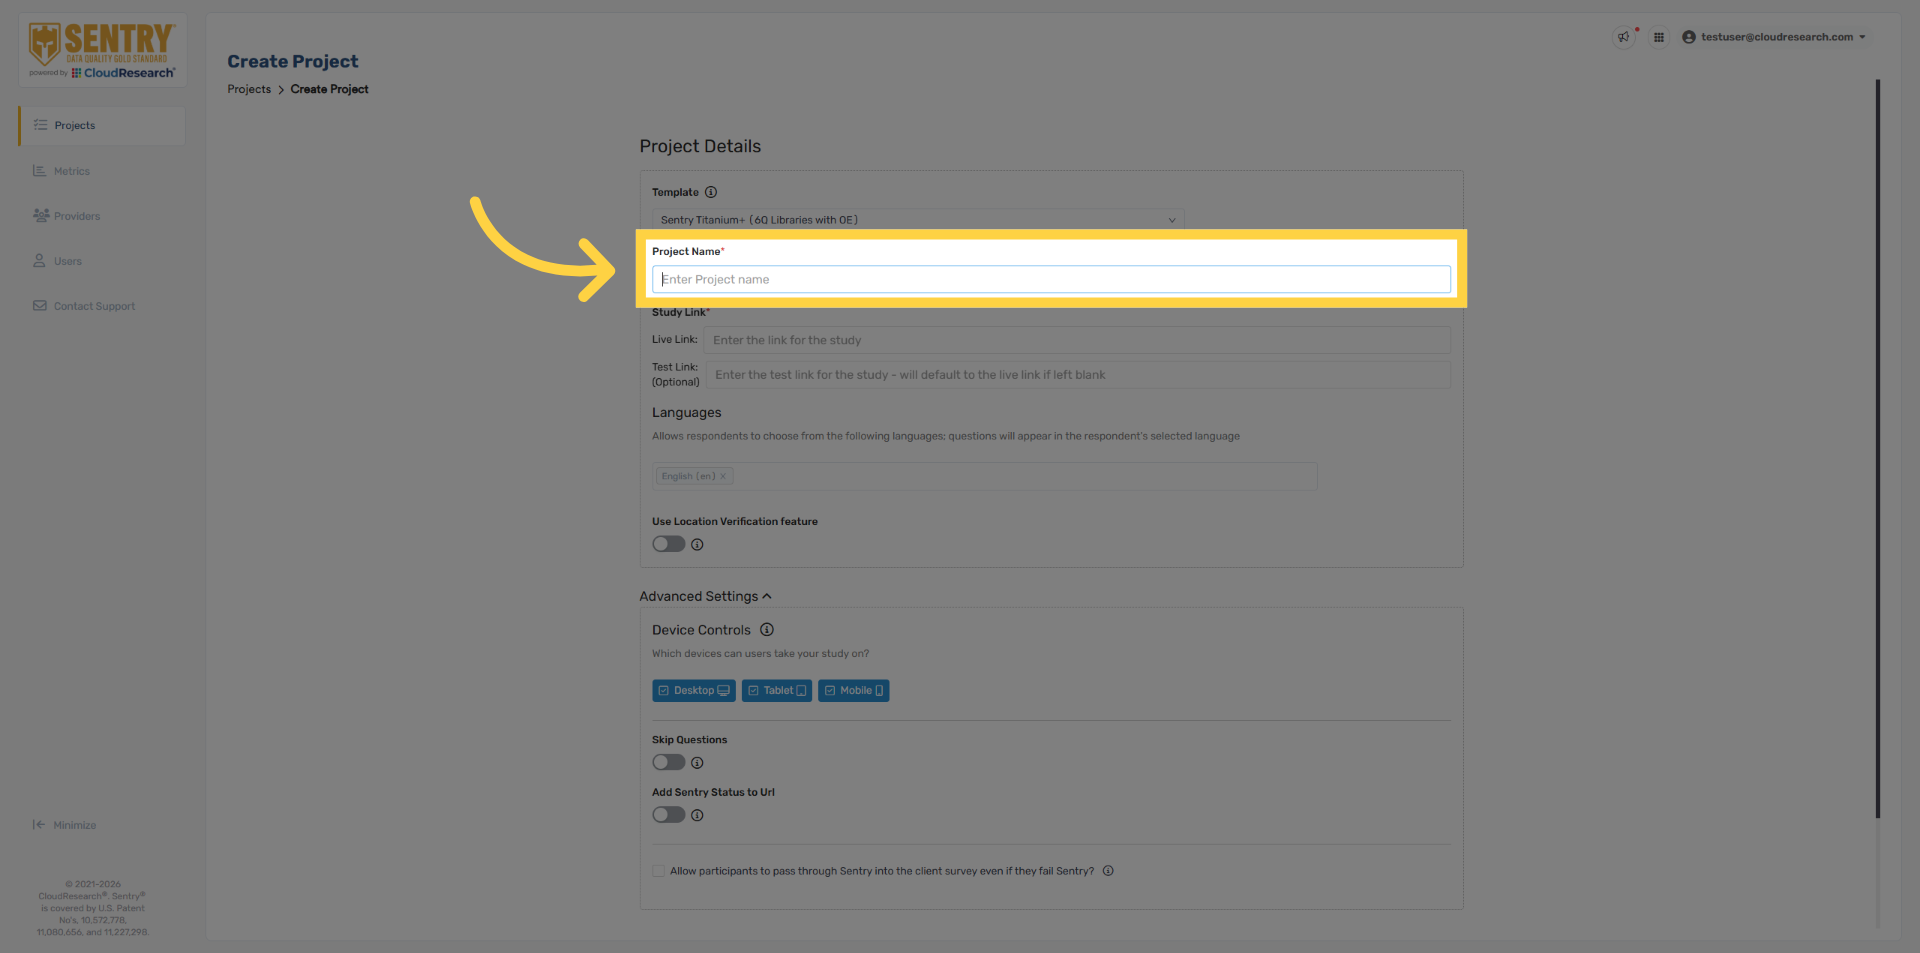
13. Enter Project Name
Add your project name.
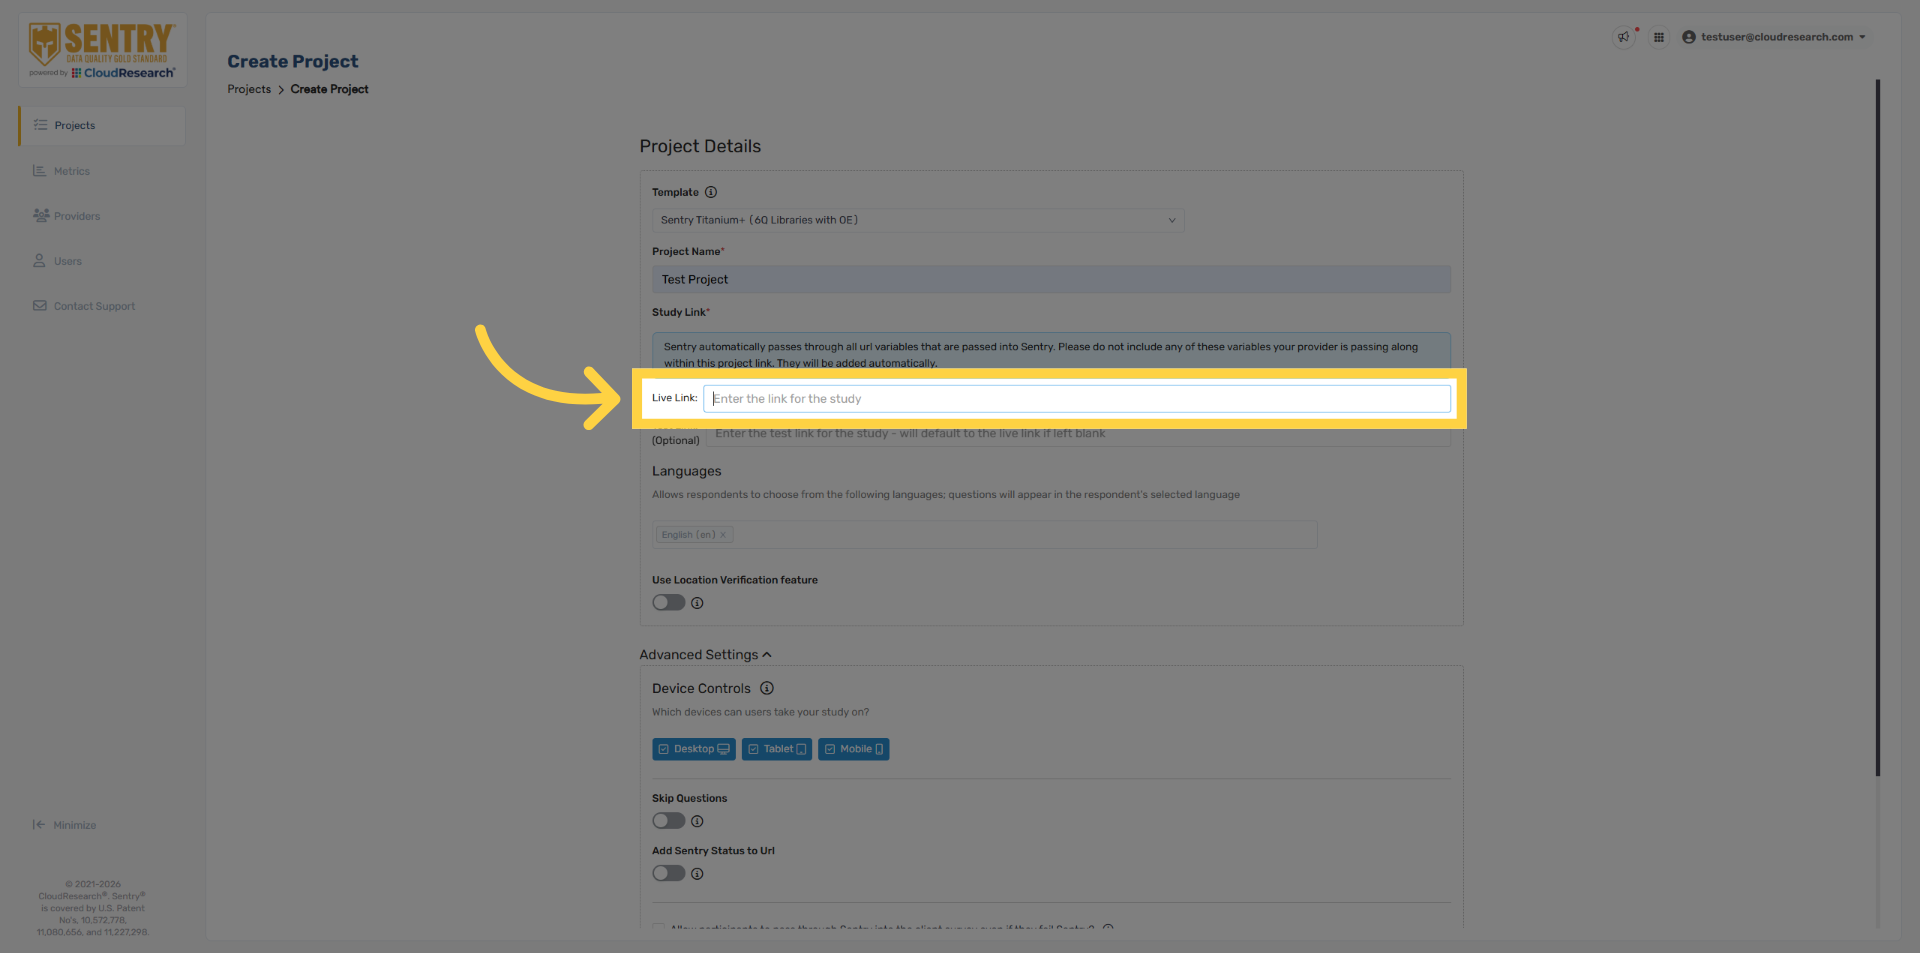
14. Enter Survey Link
Add your survey link.
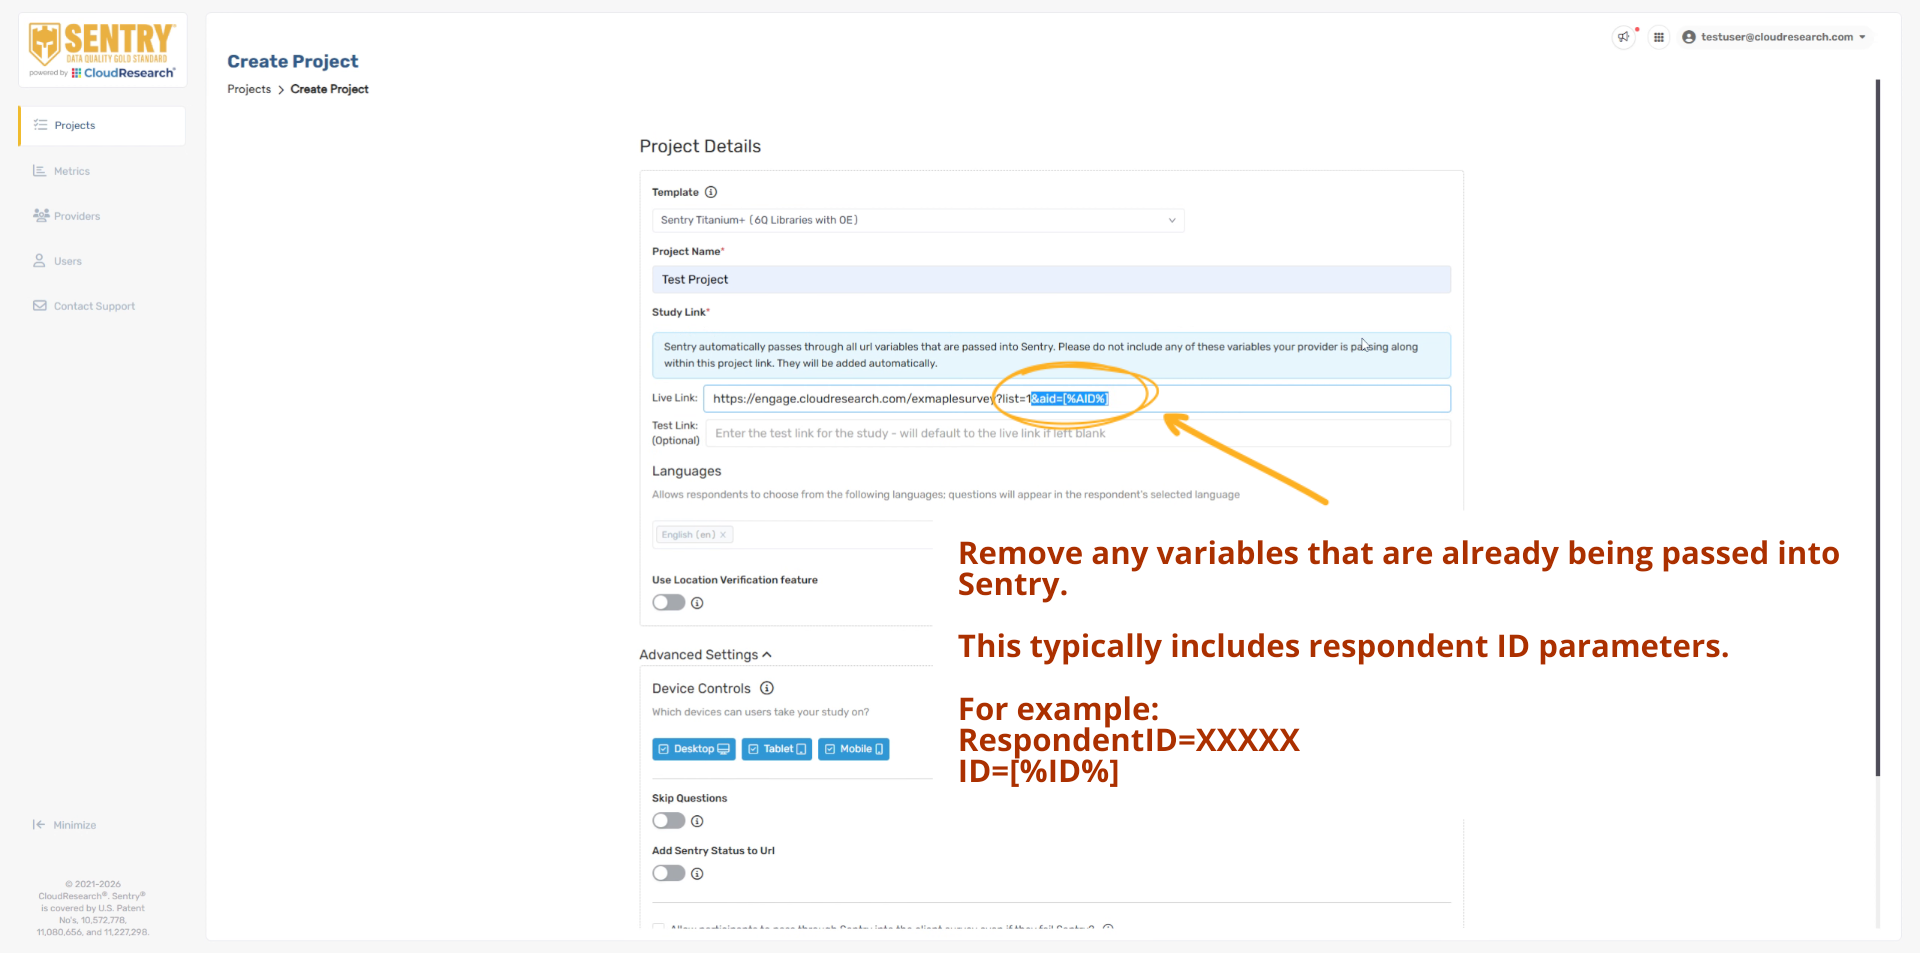
15. Fill Survey Link Without Variables
Make sure to remove any variables from the survey link that are automatically passed into Sentry. For example, the provider ID does not need to be hard-coded into the survey link. Any URL variables passed into Sentry will automatically be passed back out.
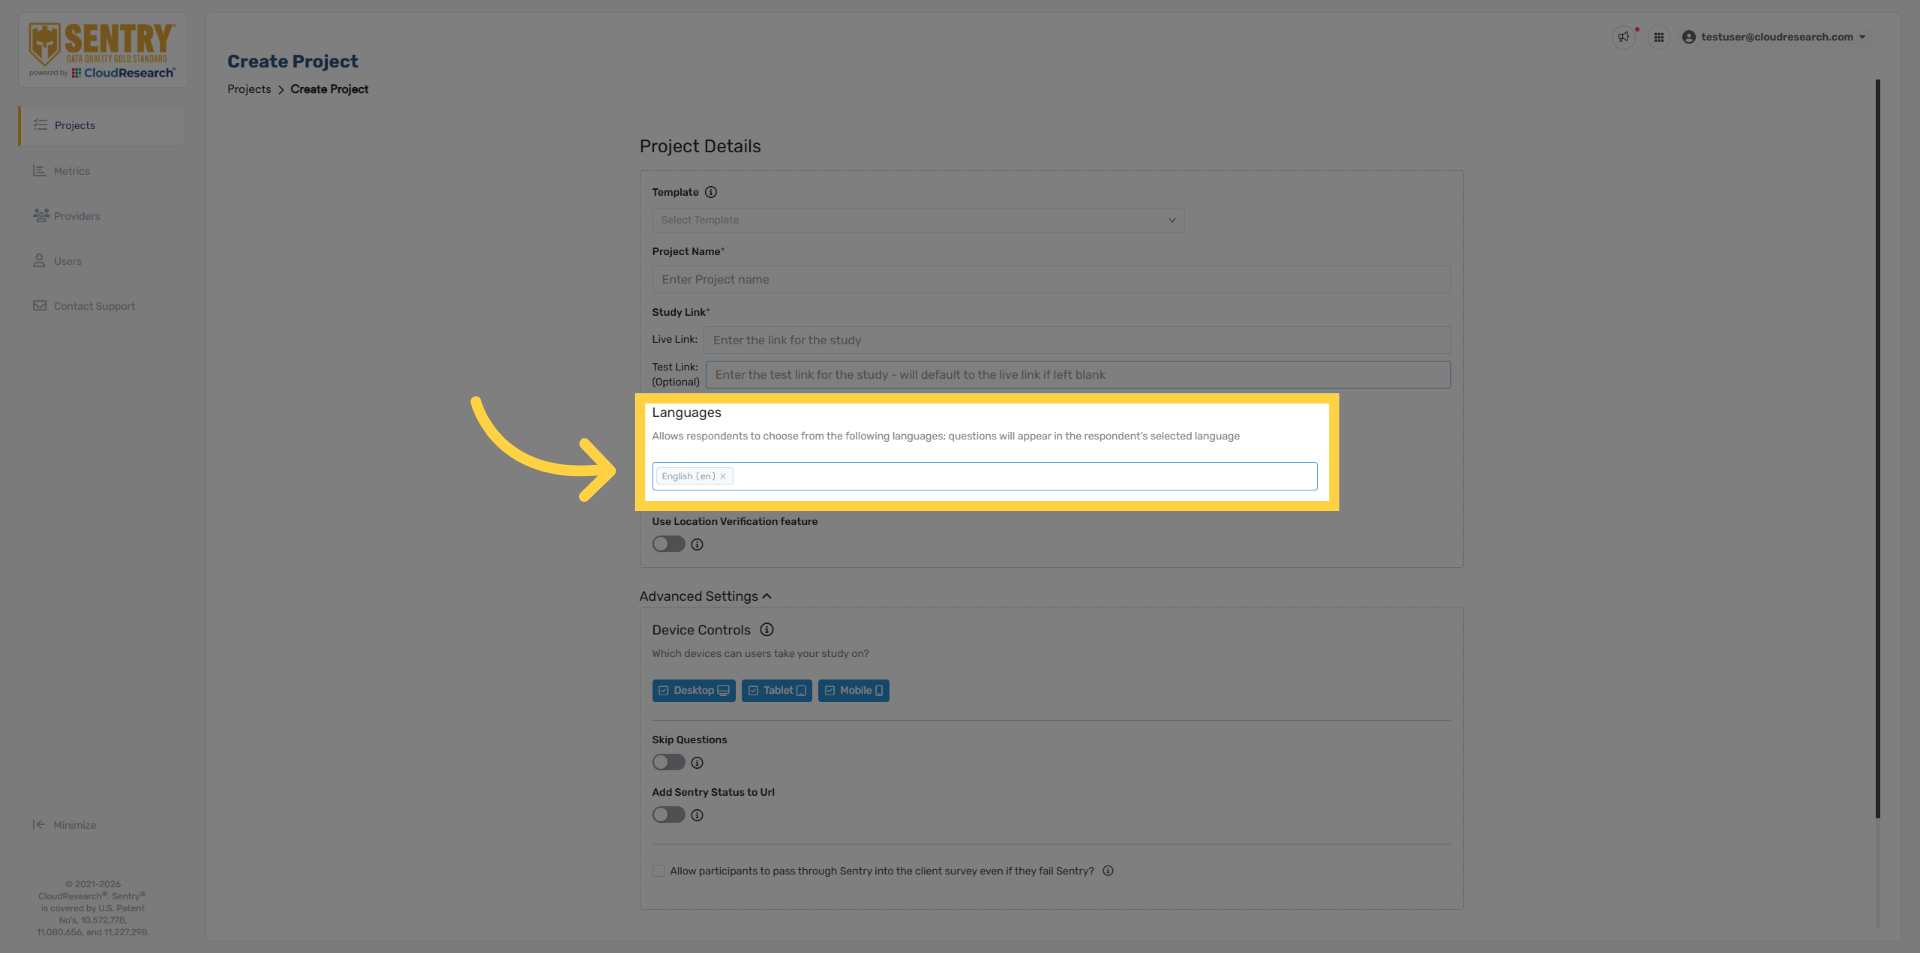
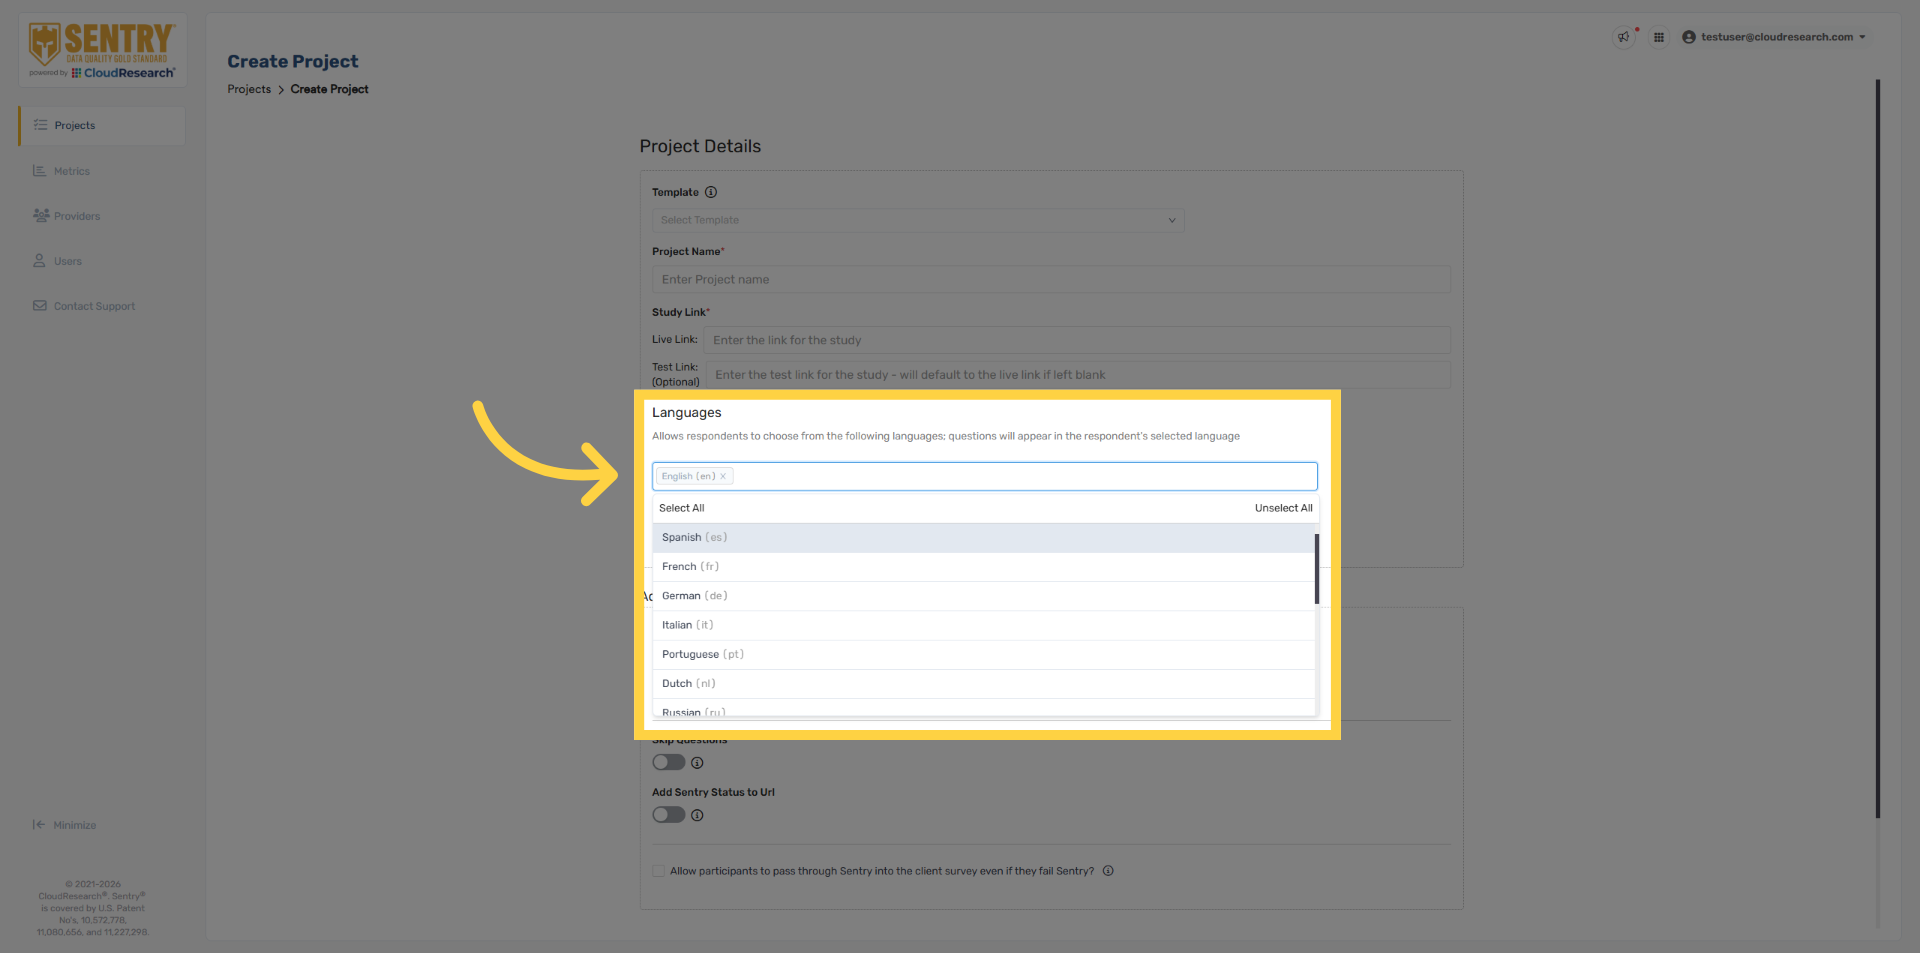
16. Language Selection
Next, select the language you want Sentry to appear in. If no language is selected, Sentry will default to English.
17. Multiple Languages
Sentry currently supports 38 languages, allowing you to improve data quality across more than 140 countries. You can also select multiple languages at once, giving respondents the option to complete Sentry in their preferred language.
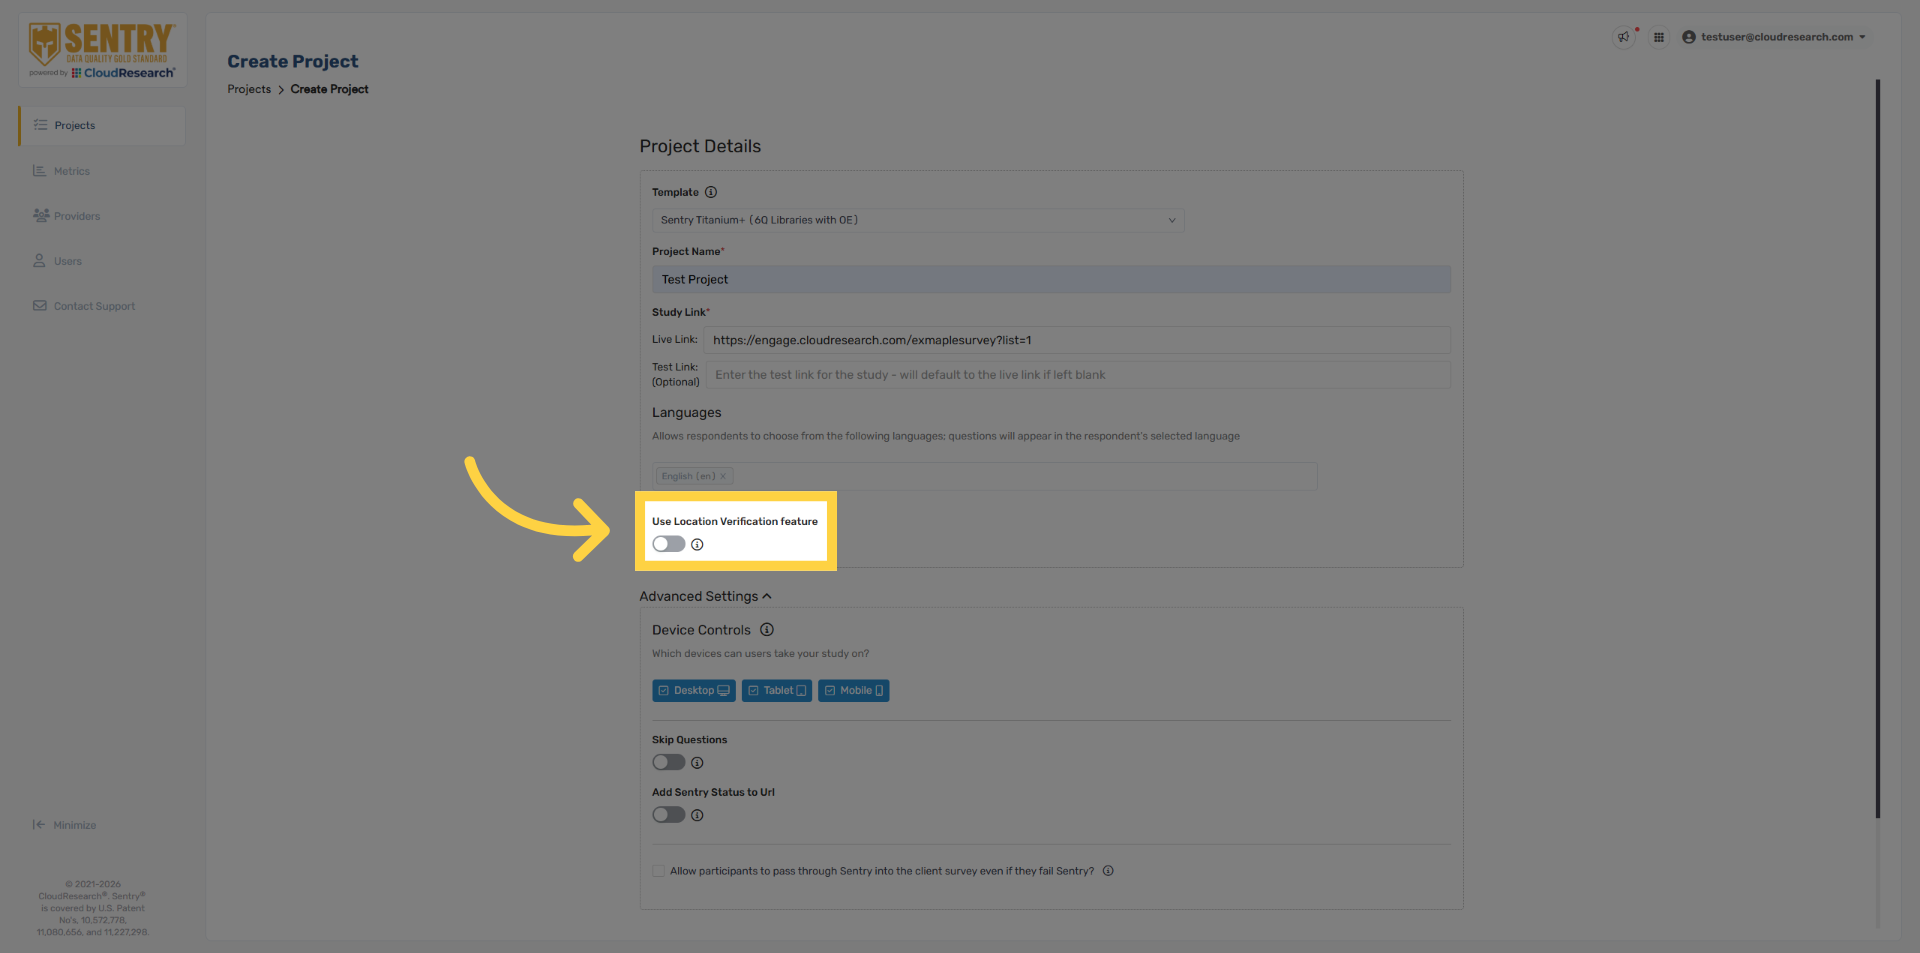
18. Access Location Verification
We recommend utilizing our Location Verification security, which is based on the respondents IP address.
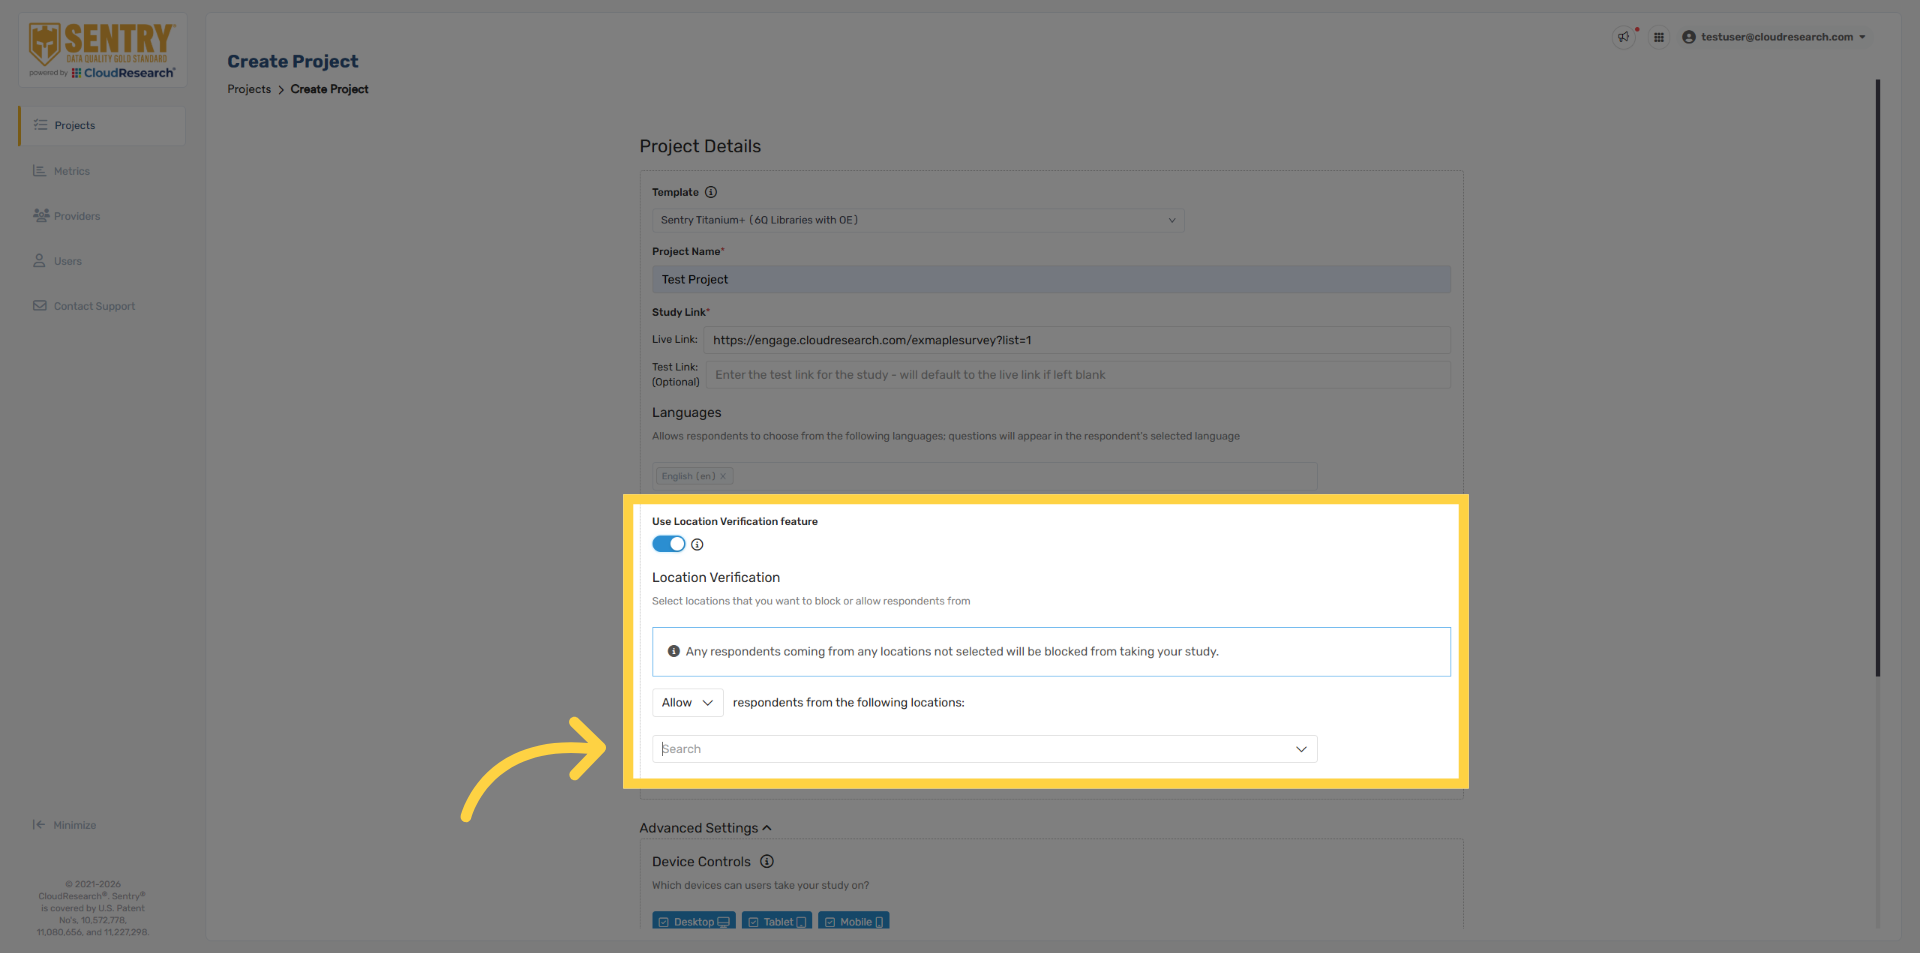
19. Search Location Verification
Select the target location you want to verify. Multiple locations can be selected, including individual states and provinces.
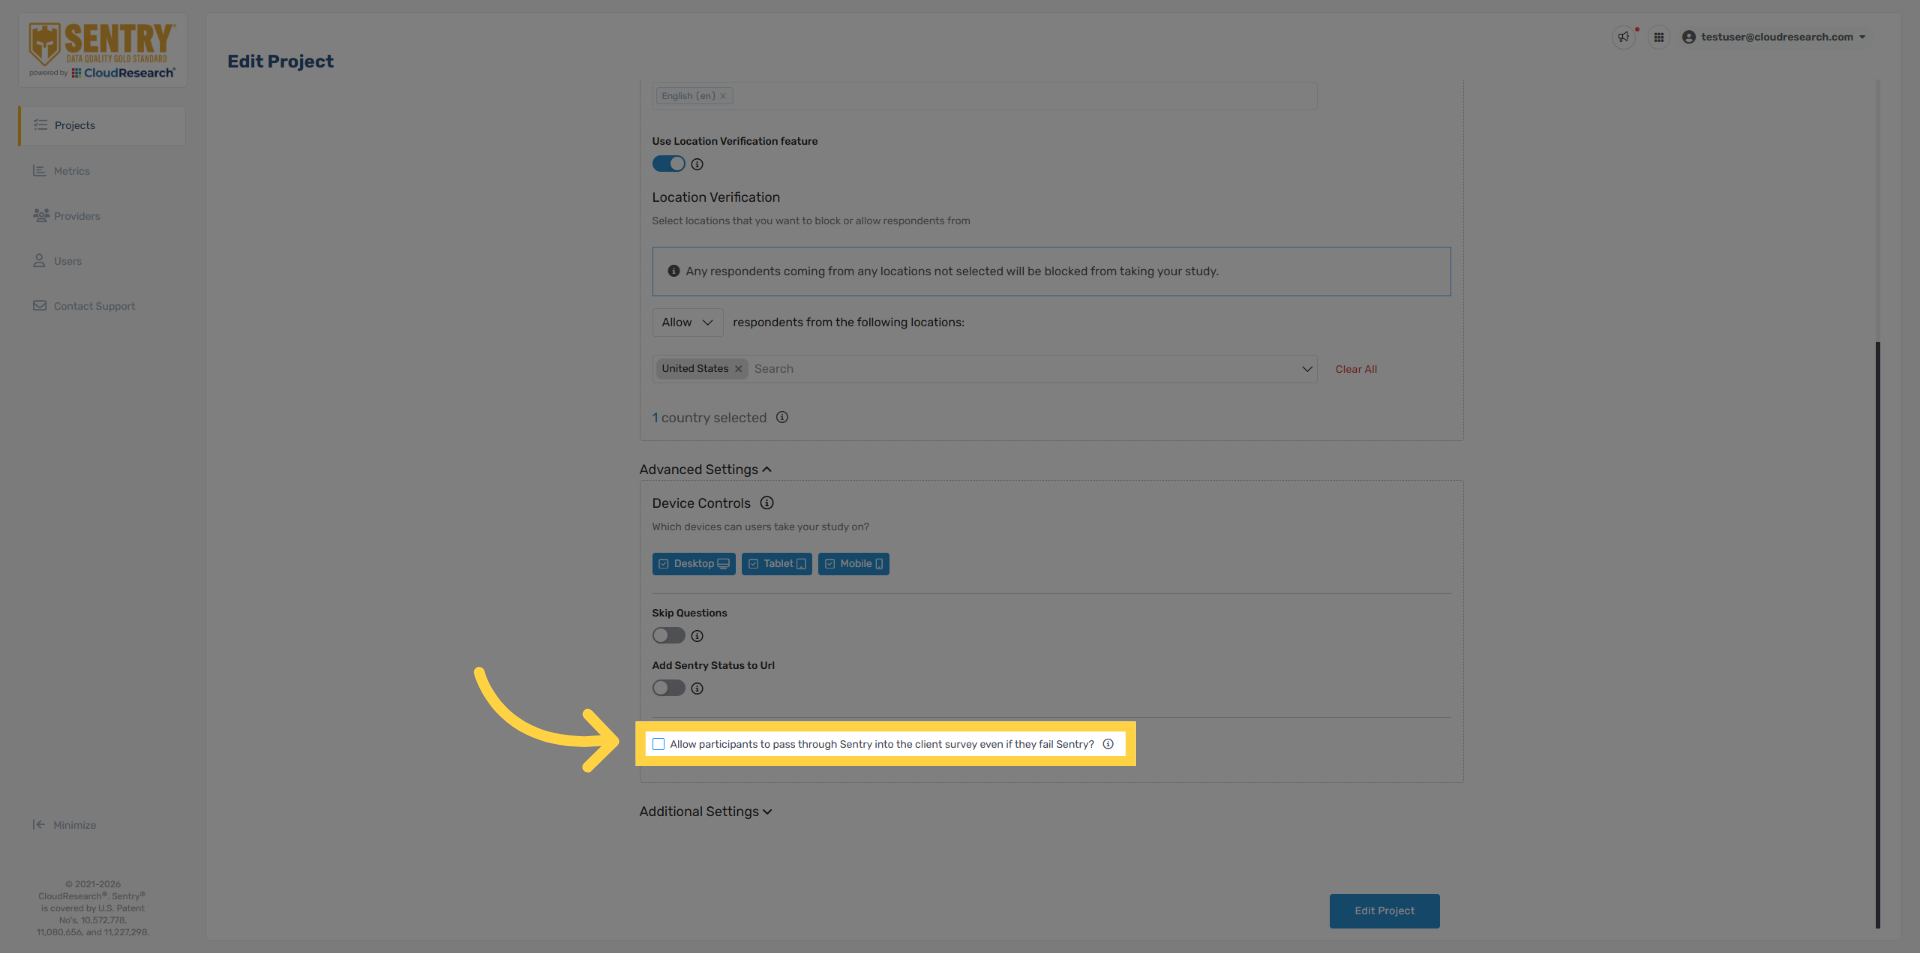
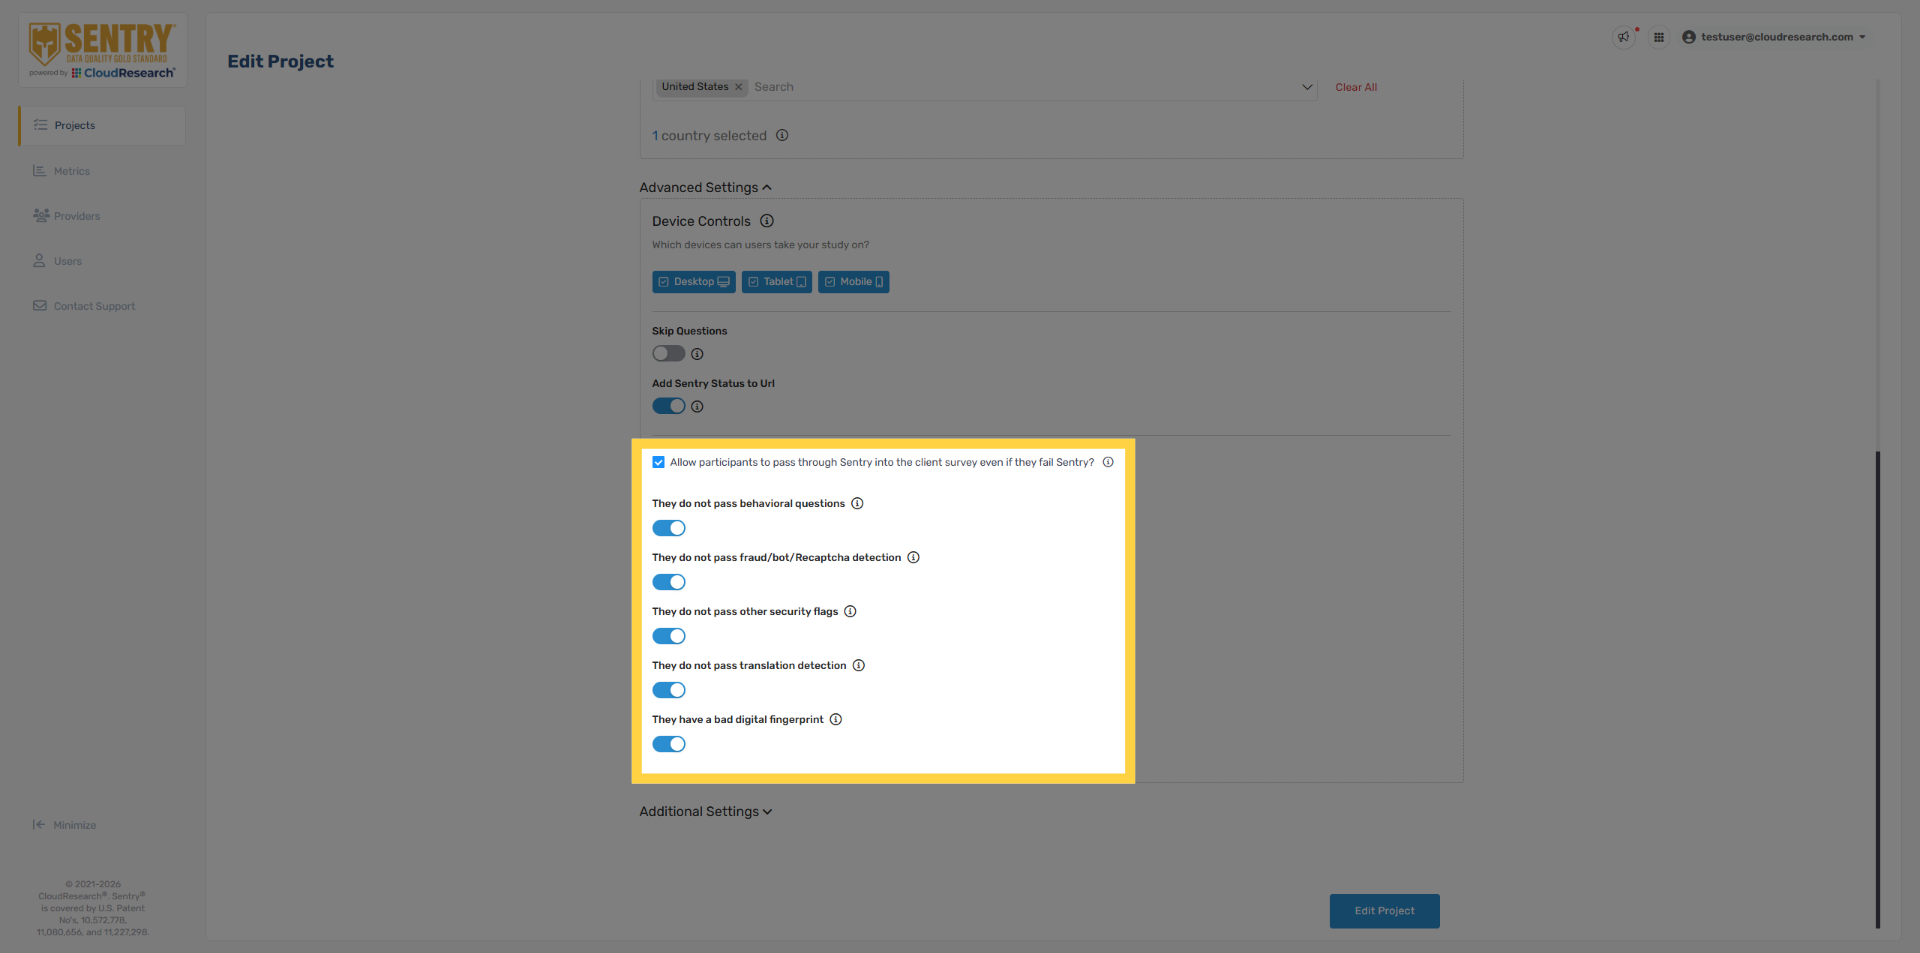
20. Security Settings
If you need to disable certain security checks for a project, you can do so by enabling the option to “Allow participants to pass through Sentry into the client survey even if they fail Sentry.”
21. Pilot Mode Settings
A menu will appear allowing you to toggle individual Sentry security features on or off. Turning off all security features, as shown here, puts Sentry into Pilot Mode, where respondents are still flagged but allowed to continue into the survey. This mode is intended for testing the effectiveness of Sentry—live projects should keep all security settings enabled.
22. Sentry Status
In Pilot Mode, Sentry automatically enables the Sentry Status variable, allowing you to capture the respondent performance within the survey data. A value of one indicates a Pass, two a Behavioral Fail, and three a Security Fail. This is generally used for piloting only and isn’t required for live projects.

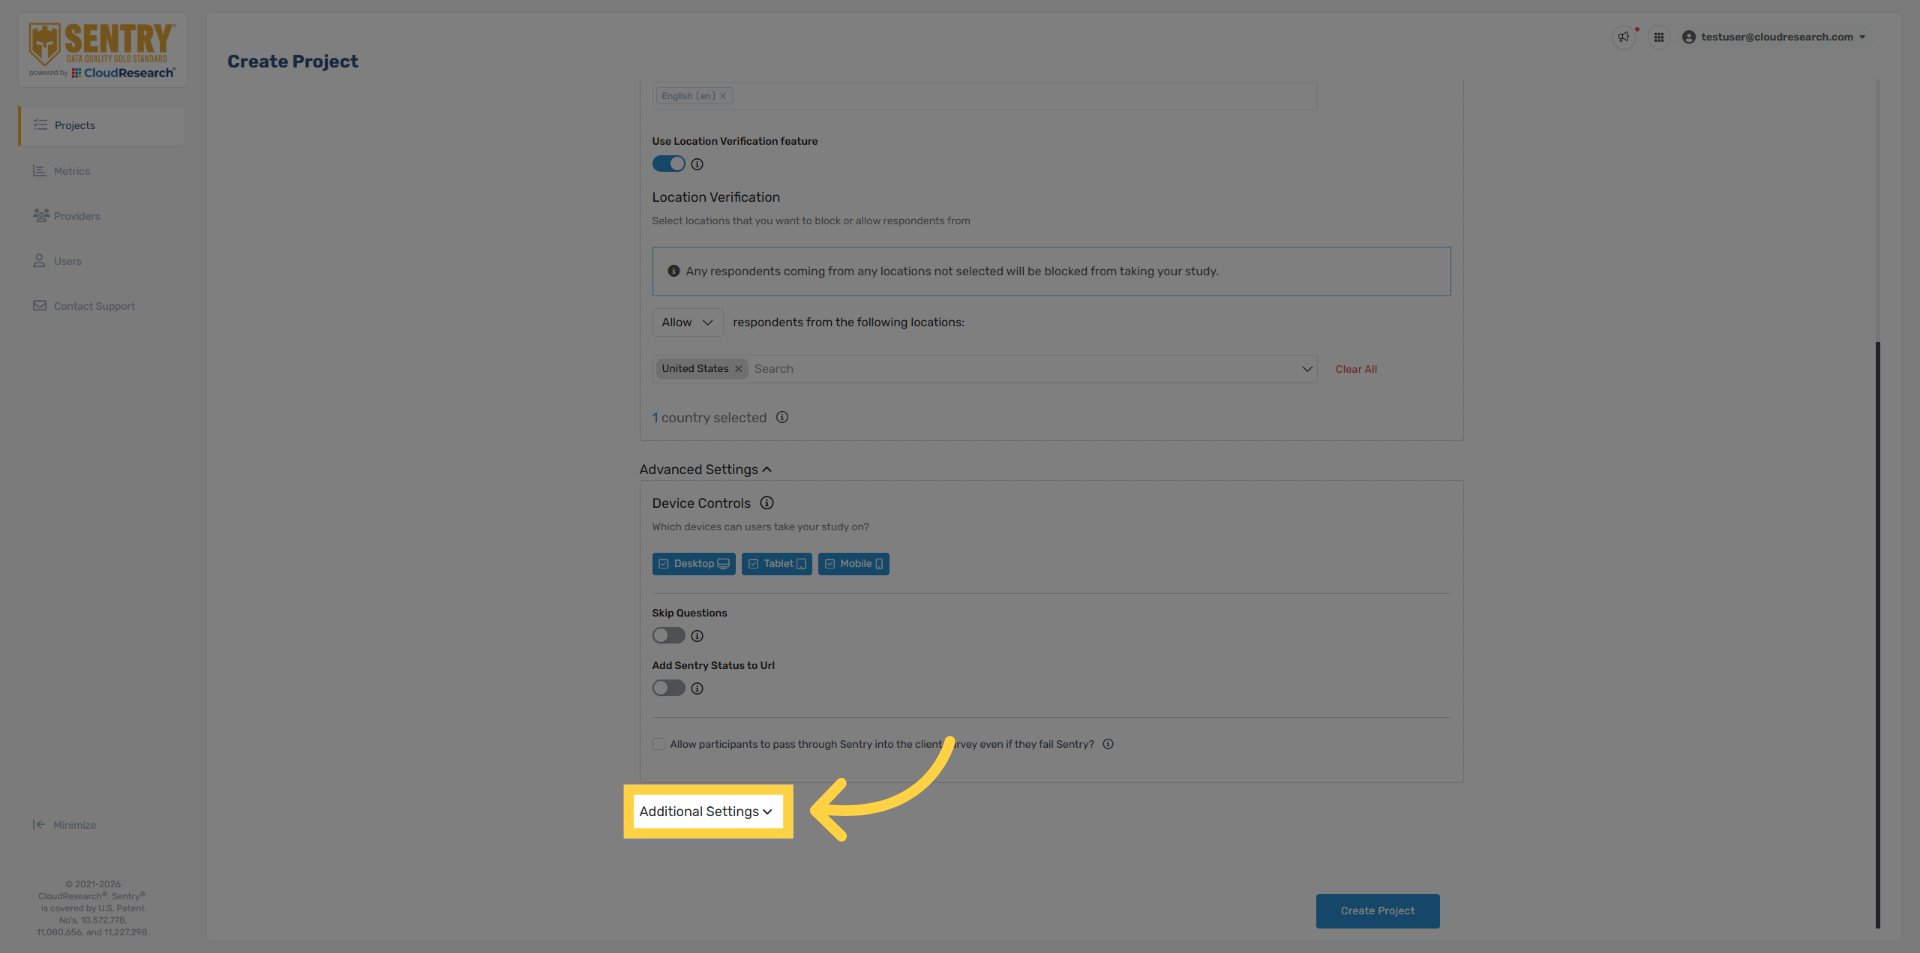
23. Open Additional Settings
If your sample provider uses project-specific redirects, you’ll need to add them in the Sentry project setup under Additional Settings.
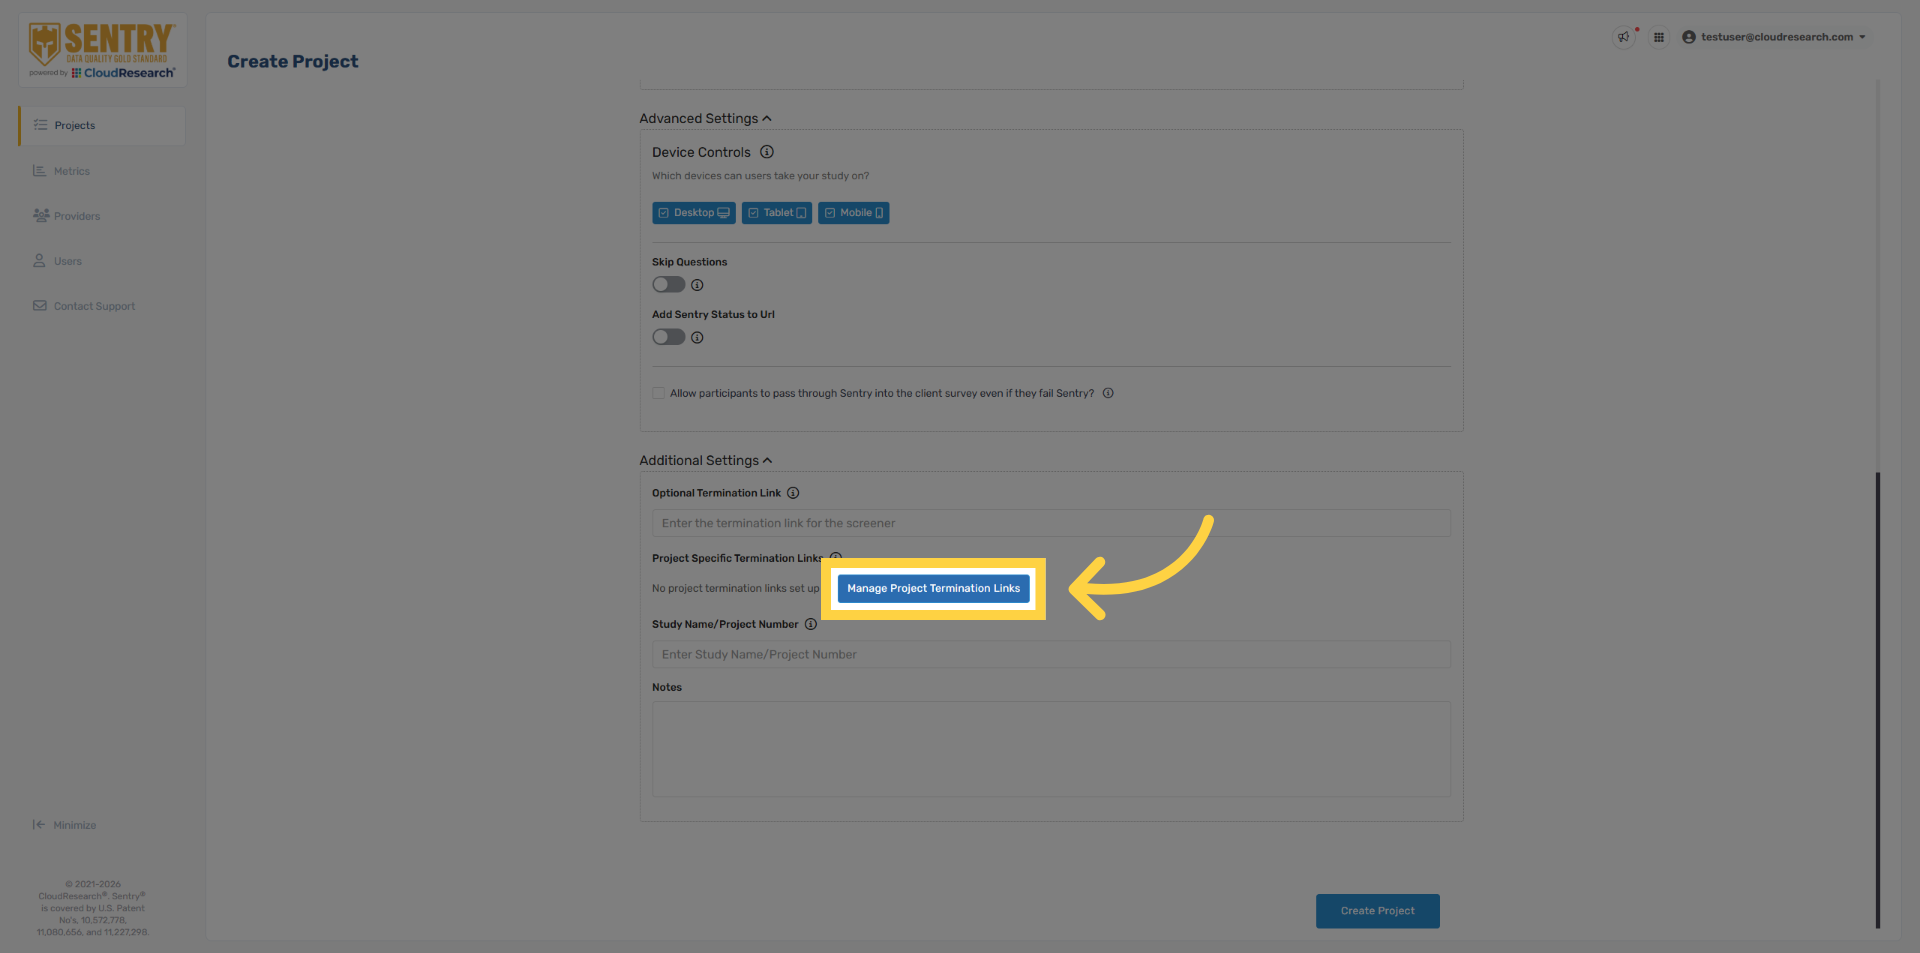
24. Manage Termination Links
Select Manage Project Termination Links.
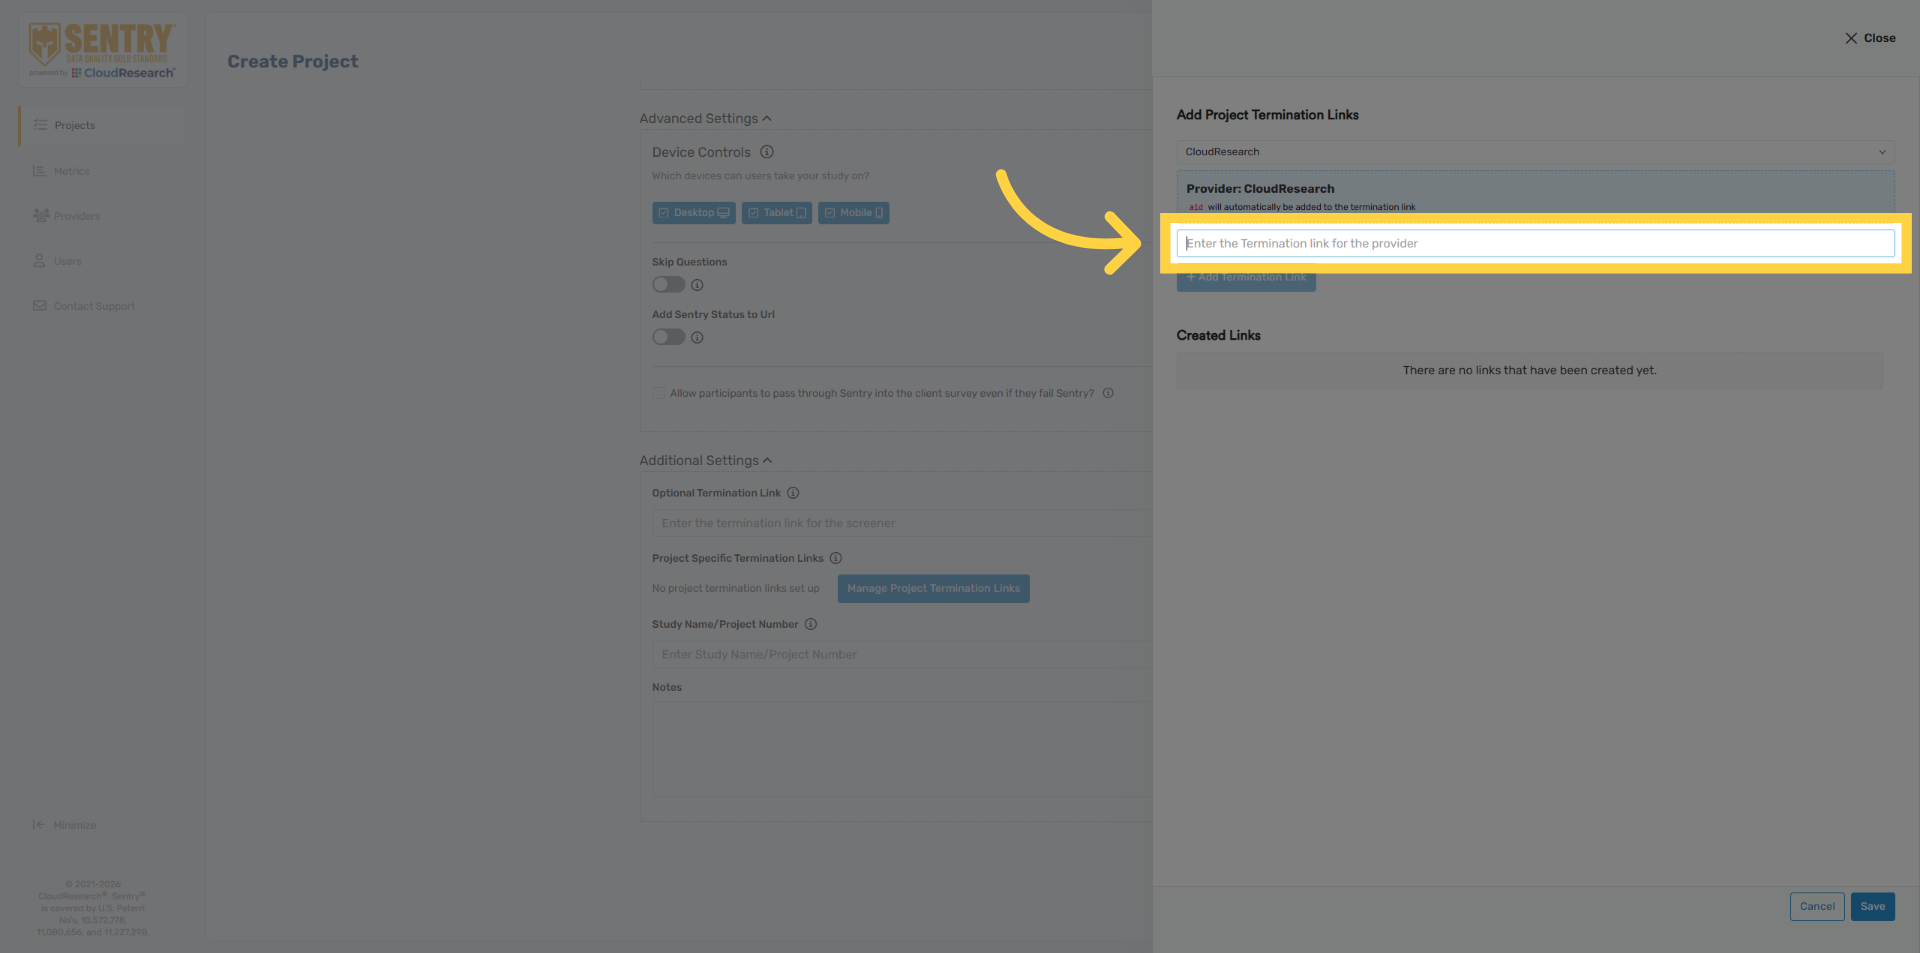
25. Access Provider Termination Links
Select the name of the provider from the dropdown menu
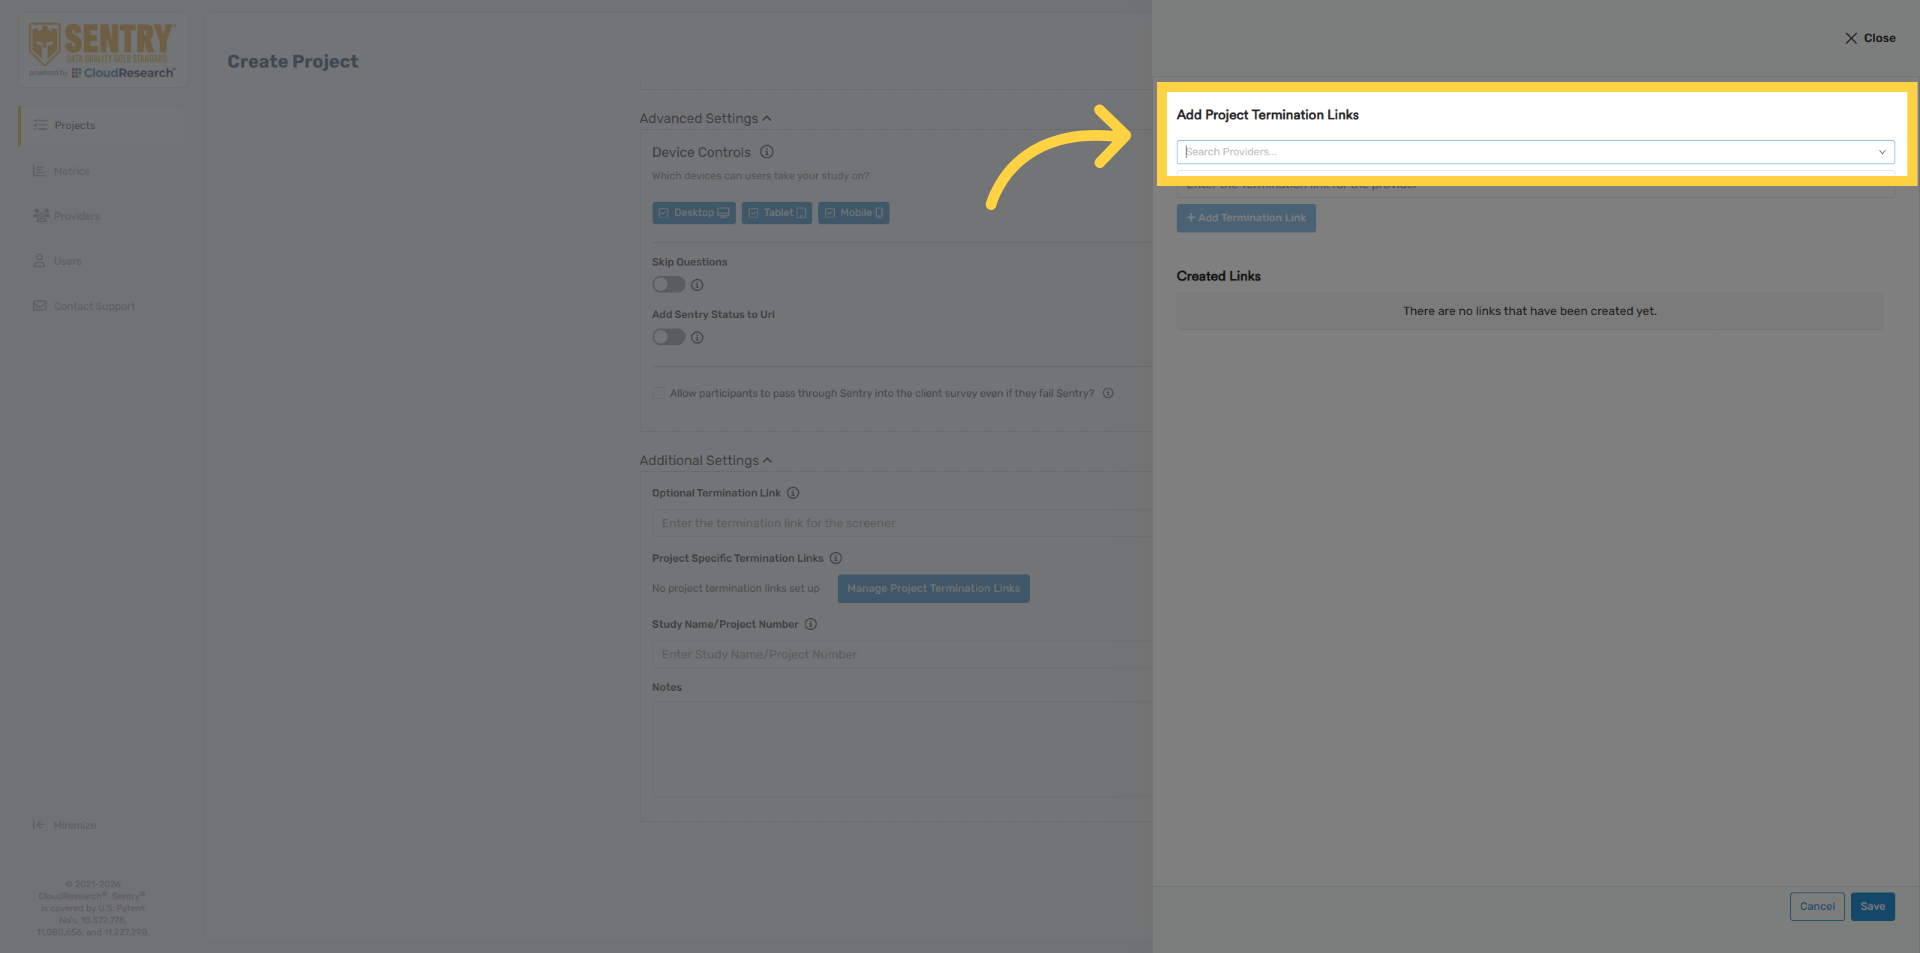
26. Enter Provider Termination Link
Enter the unique quality termination link for the selected provider. Remember to remove any URL variables that will be automatically passed in by your sample provider.
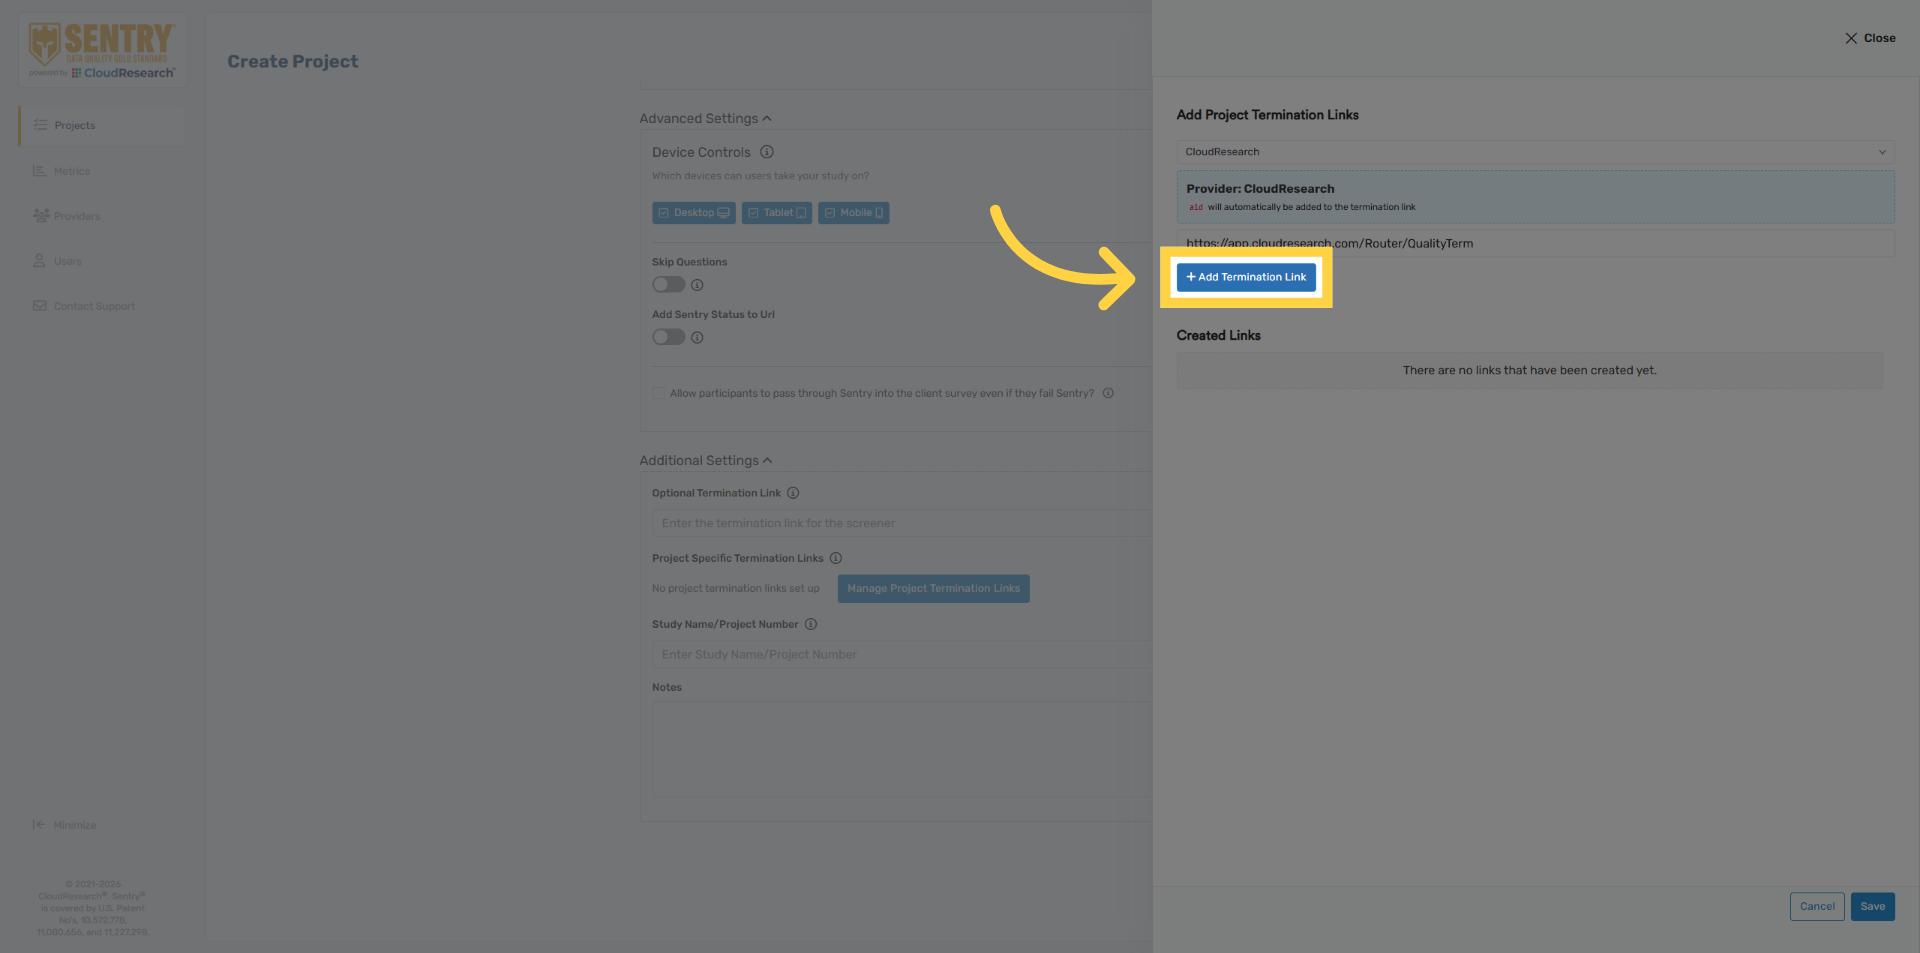
27. Add Termination Link
Click add termination link, once complete.
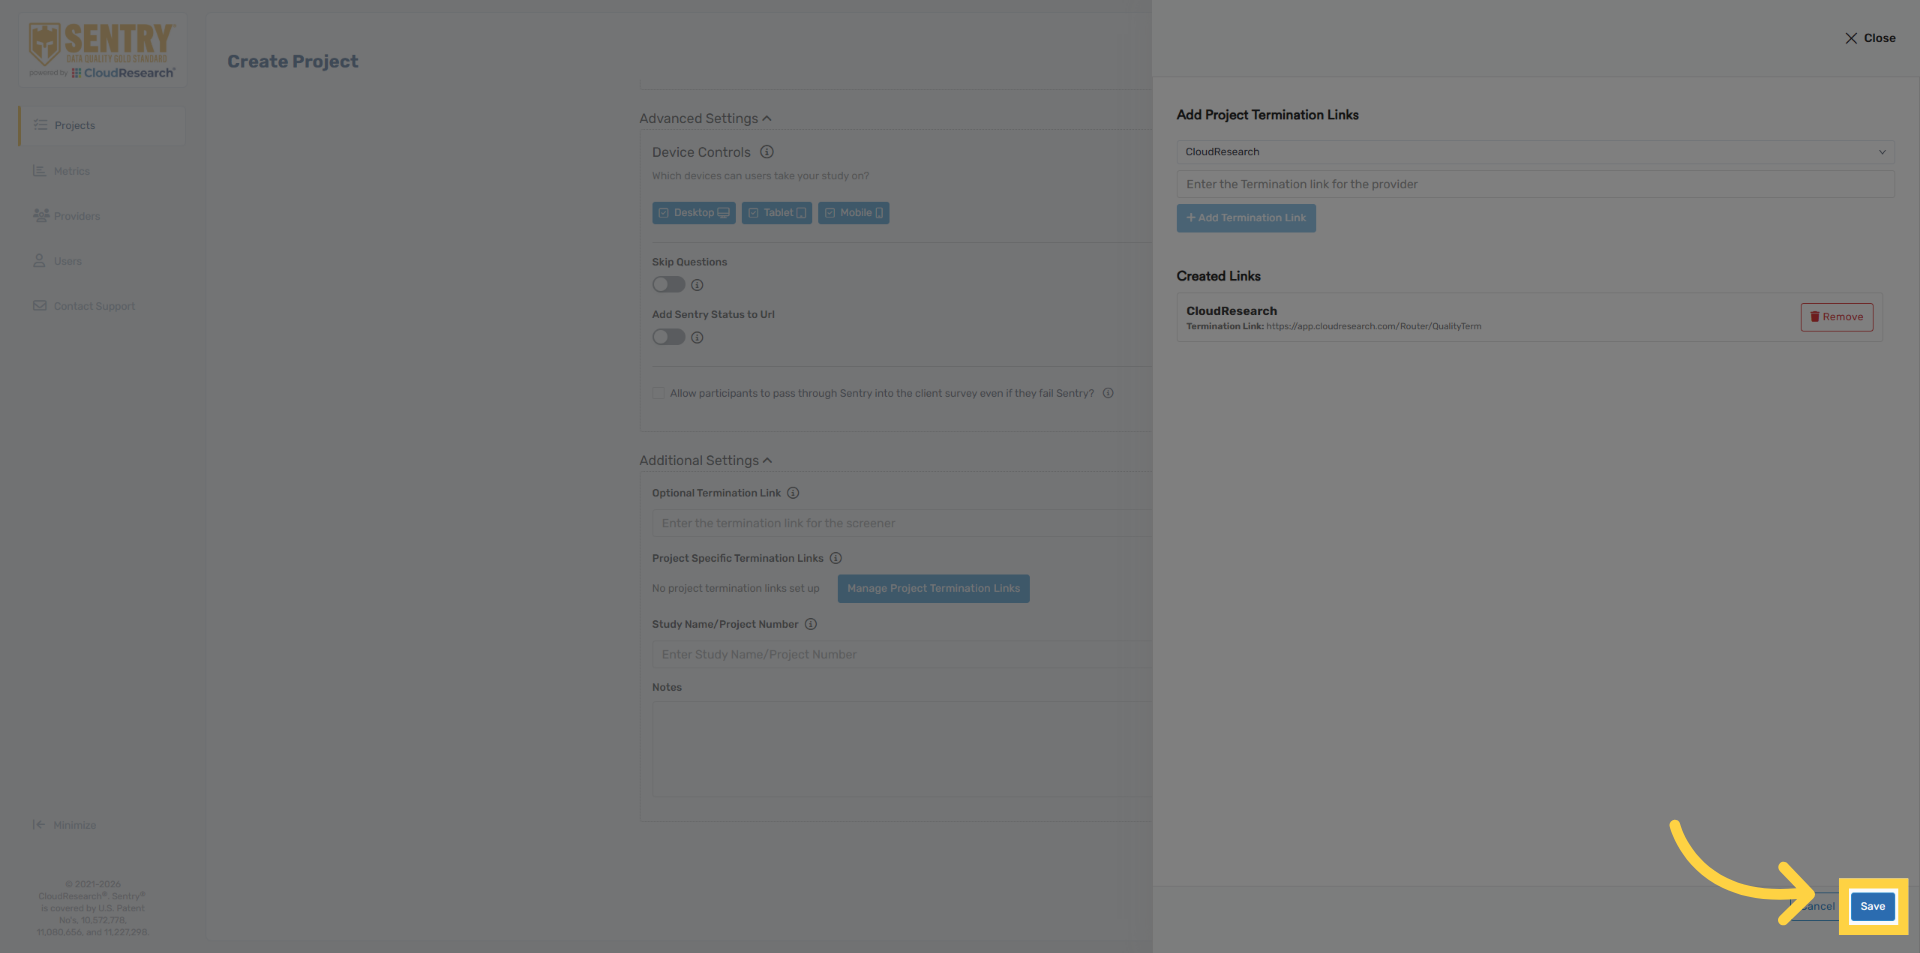
28. Save Termination Links
Click save to confirm termination links. Again, this final step is only necessary if your sample supplier uses project specific termination links.
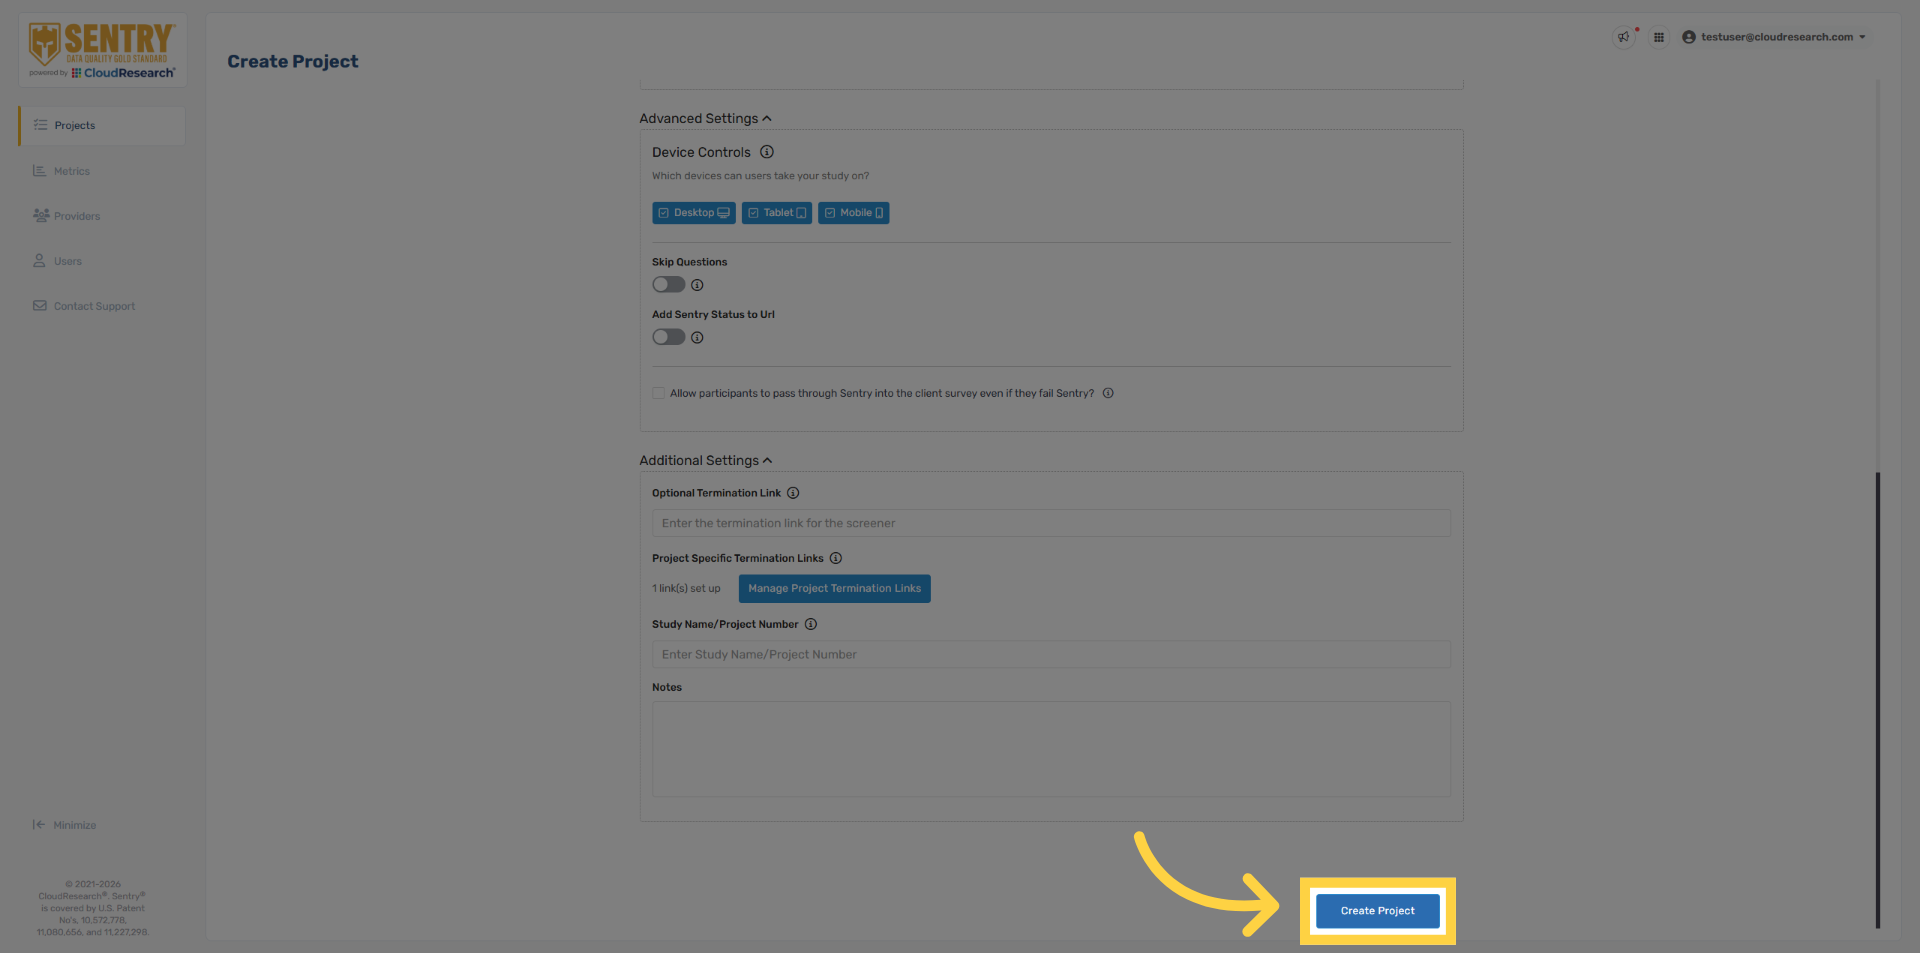
29. Create Project
Click create project to finalize setup.
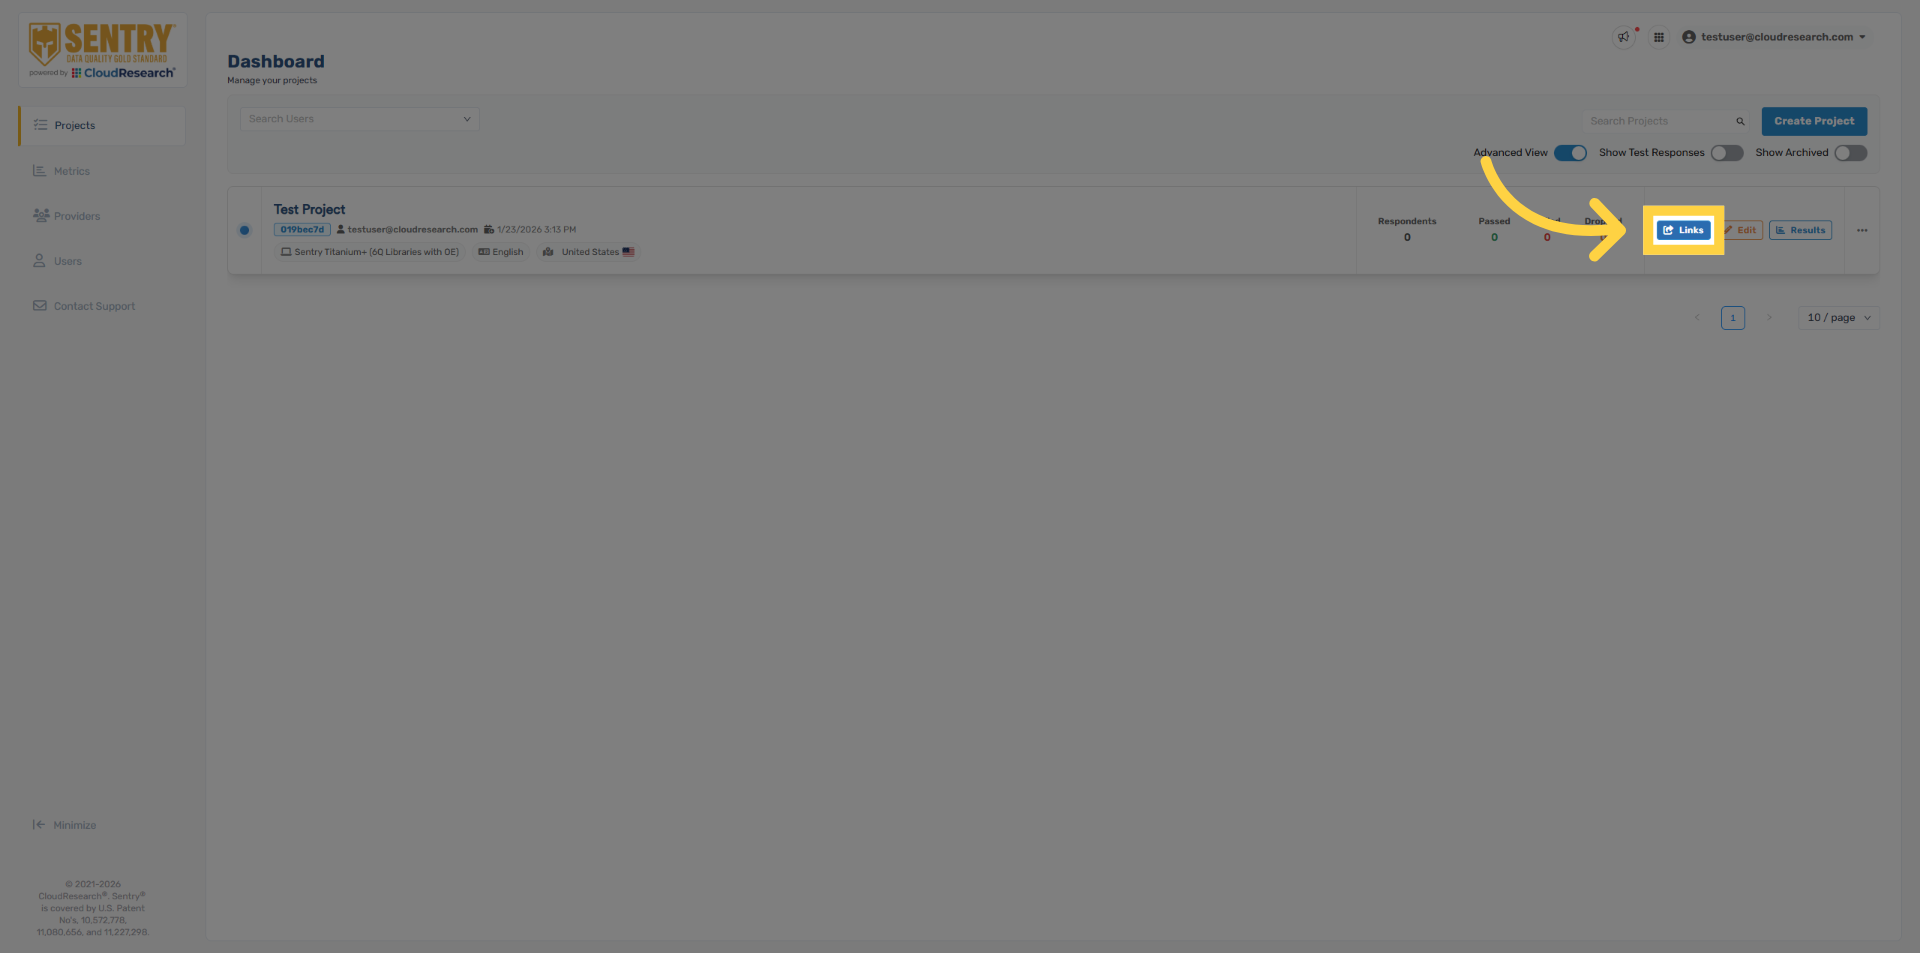
30. Open Links Section
Once the project is ready to field, click Links on the project panel.
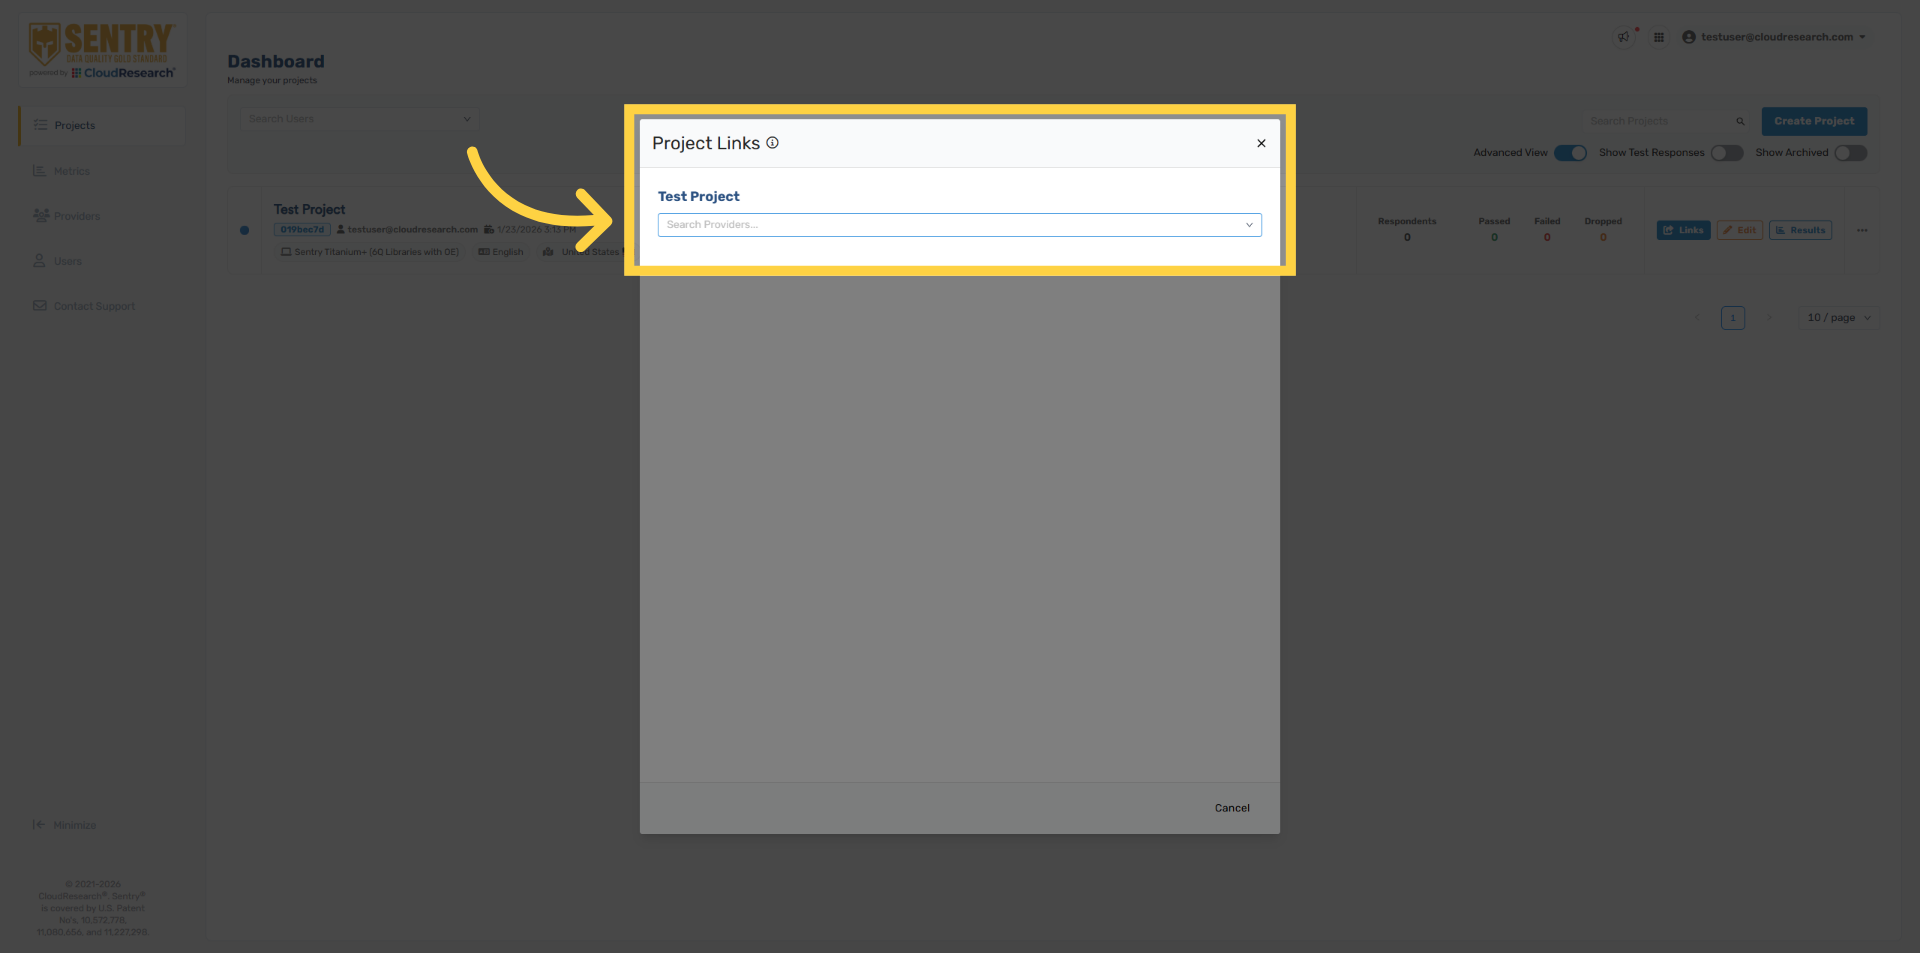
31. Select Provider Links
Use the dropdown to search for your sample provider
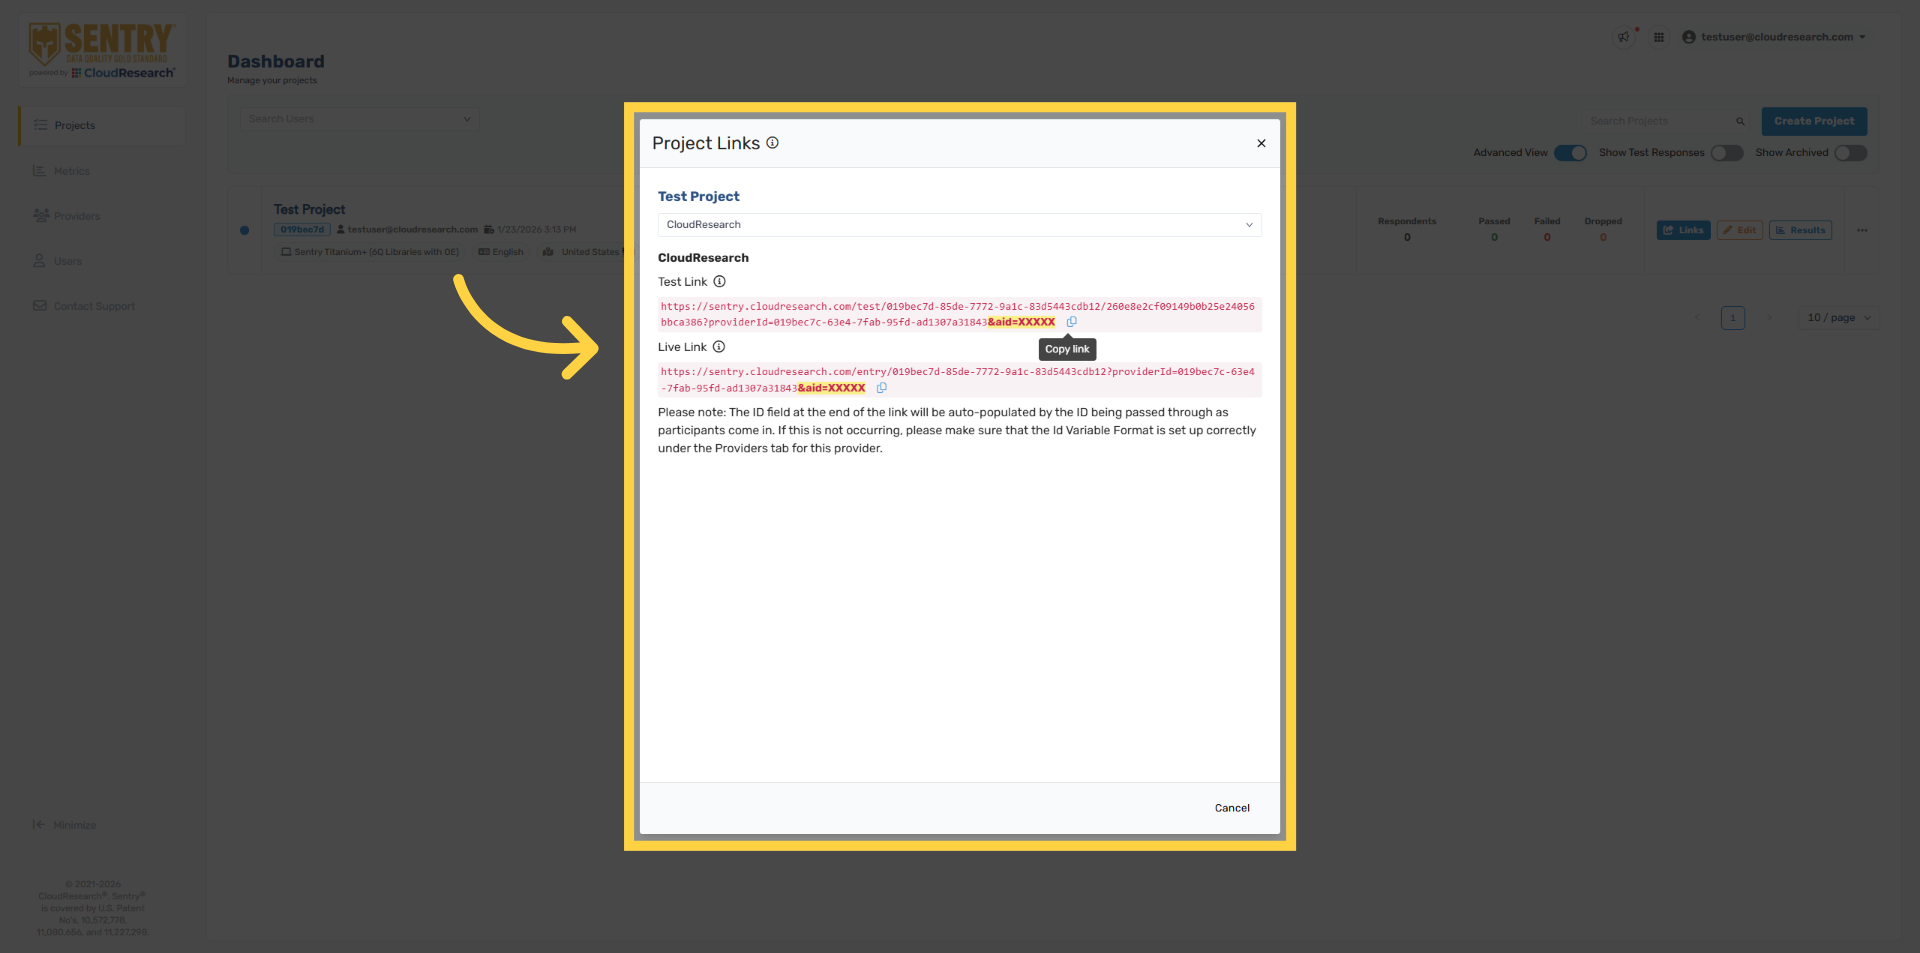
32. Access Project Links
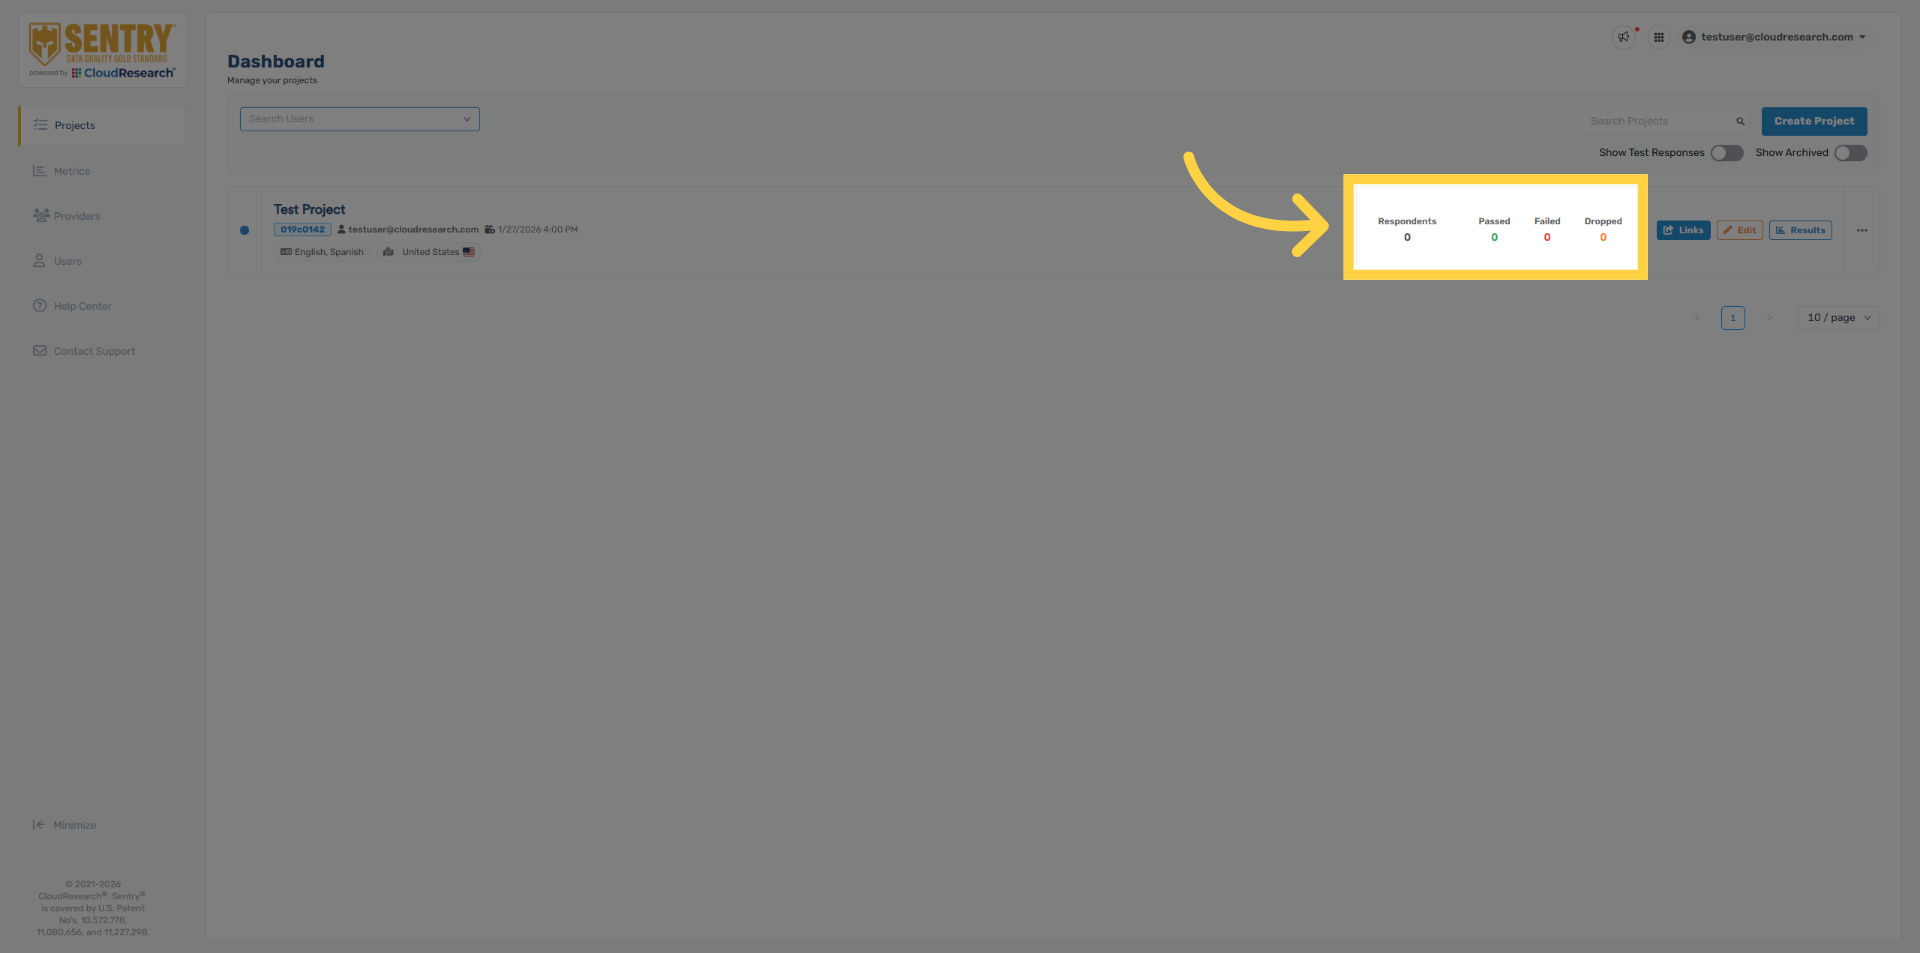
Sentry will generate new survey links for you to share with your sample providers. Each provider receives a unique Sentry link. These links remain static and will not change if you make edits within the Sentry project. It’s important to share both the live Link and the test link with your sample provider. When testing, a unique respondent ID must be used for each test entry. The most common testing issues are using the live link instead of the test link, reusing the same respondent ID across multiple tests, or not including the respondent ID variable in the URL.
33. Test Mode - Blue Bar
When accessing Sentry through the test link, a blue bar will appear at the top of the screen, letting you know that you are in test mode. The system also automatically disables the deduplication and location verification security. Allowing your team to test the link from any location, and as many times as necessary.
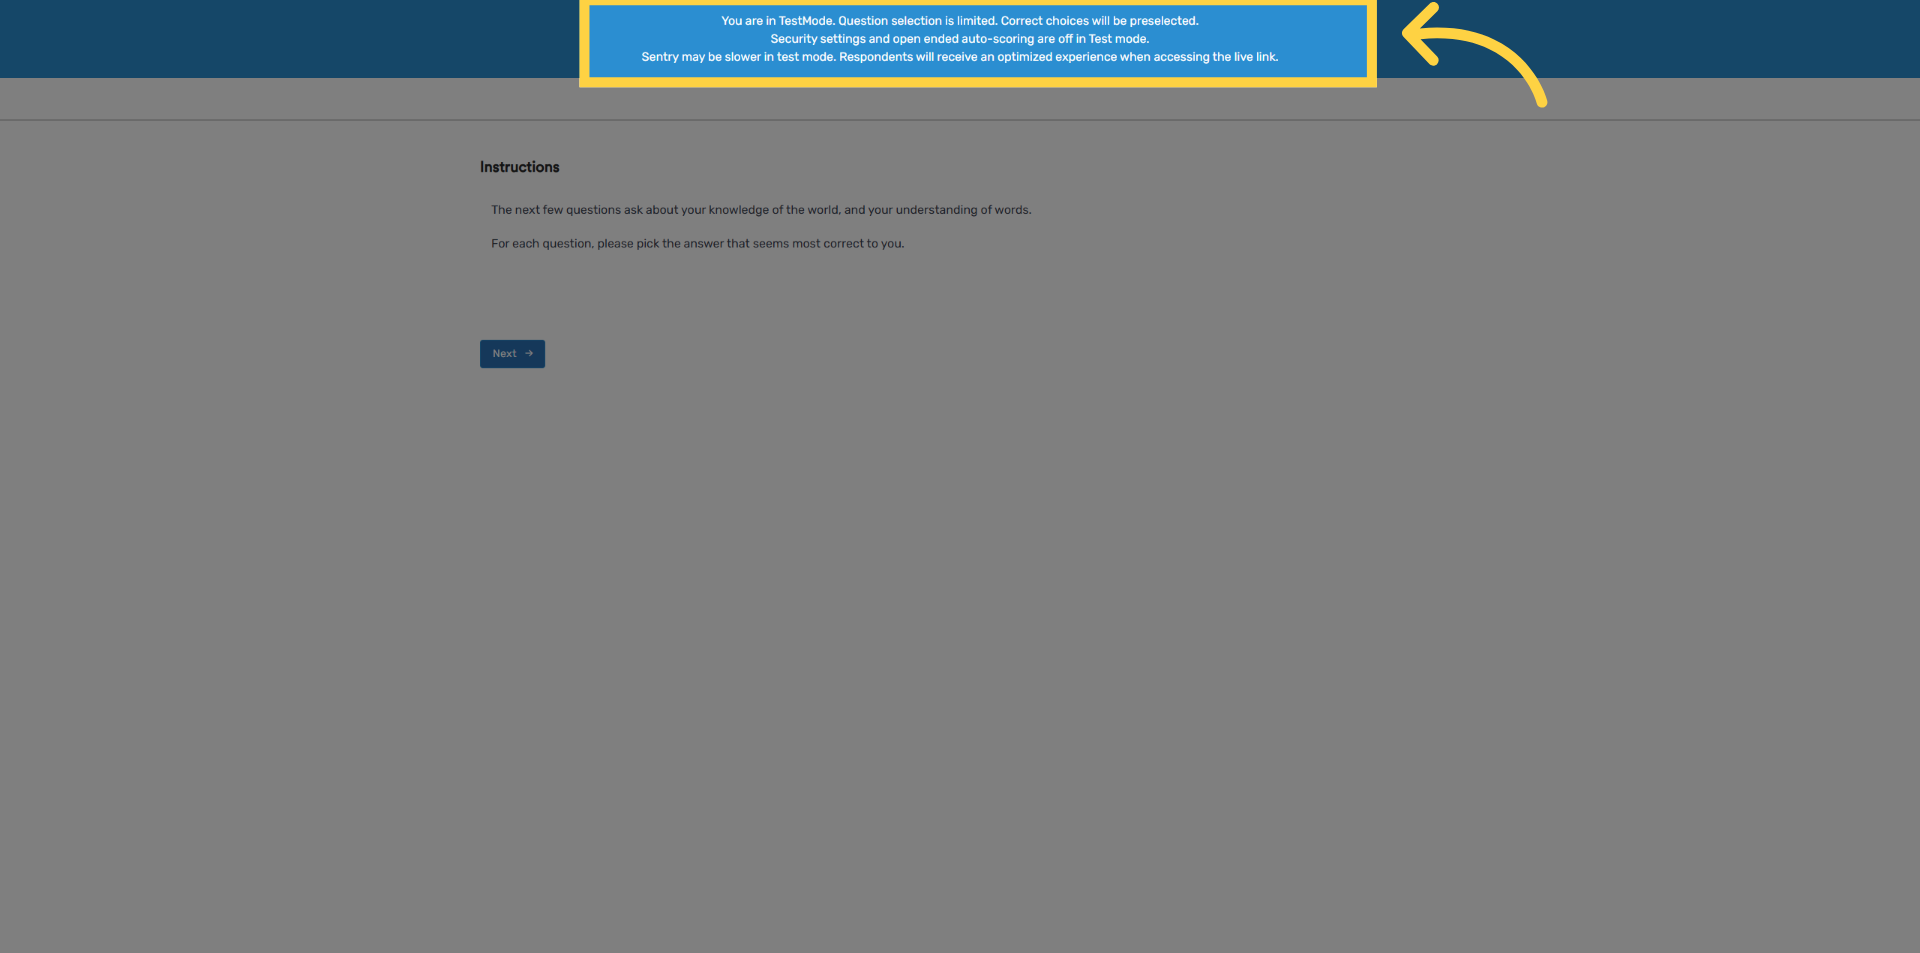
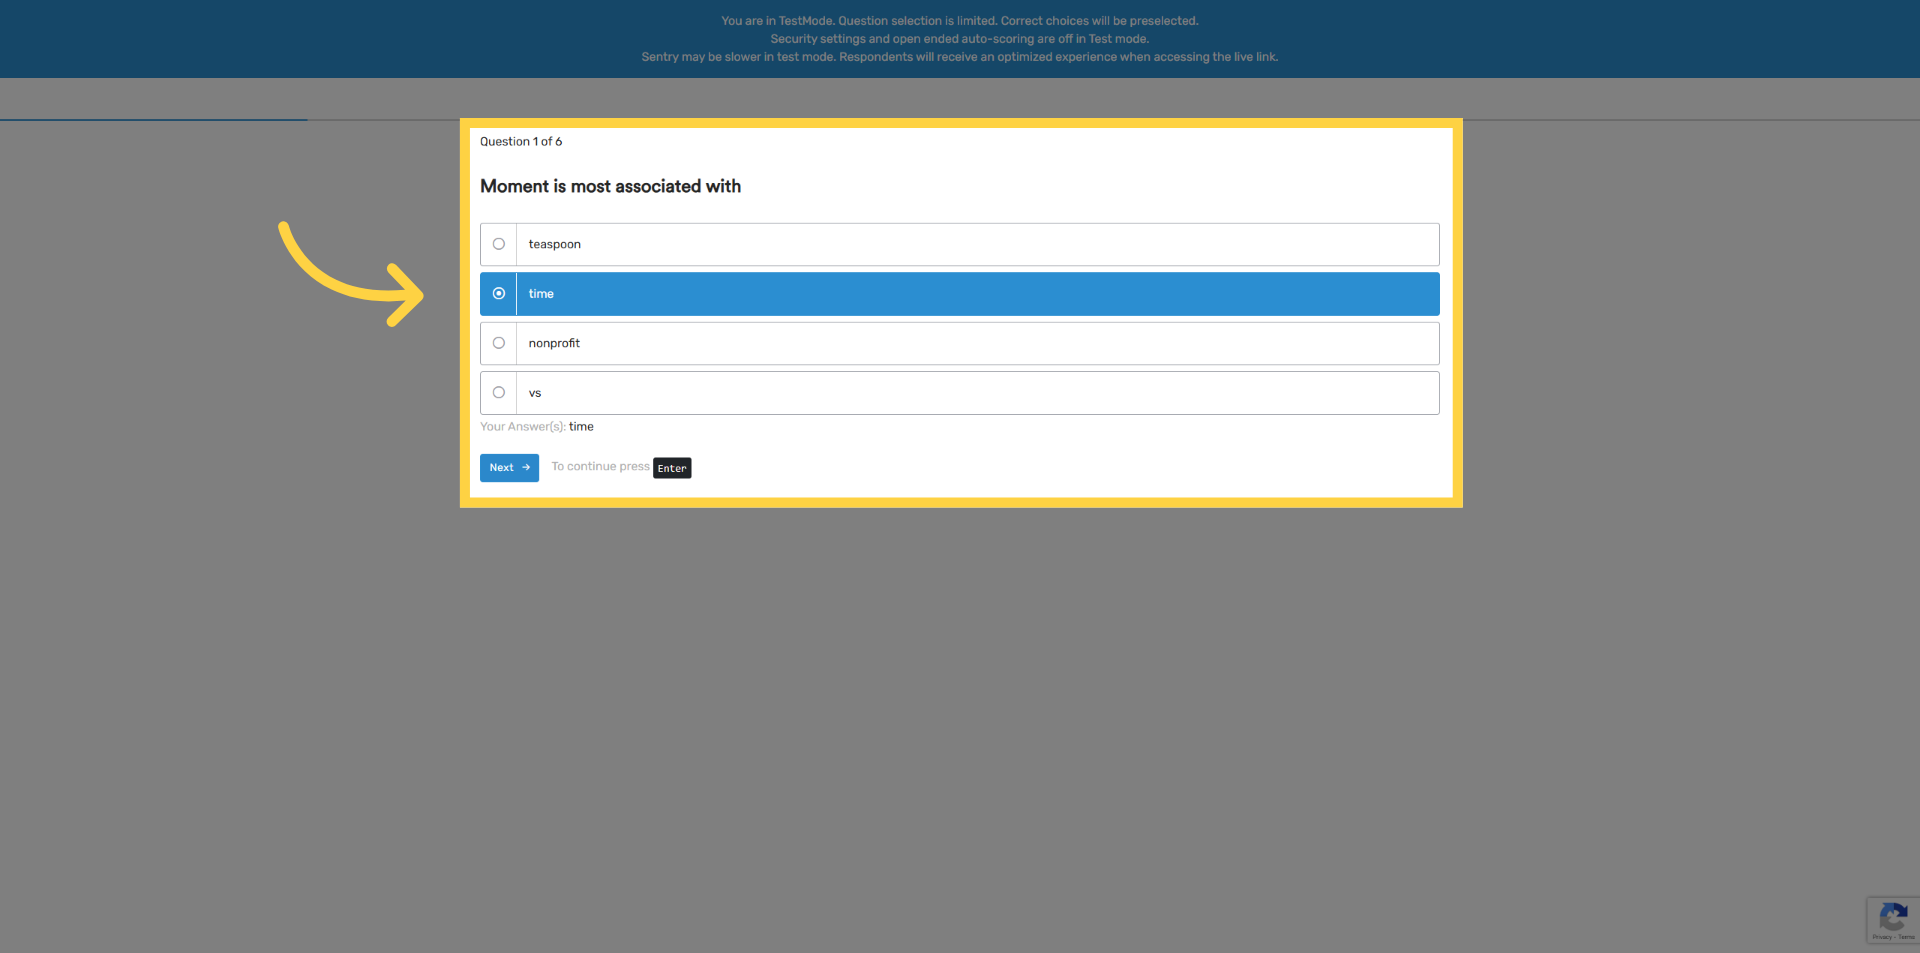
34. Correct Answers Highlighted
In test mode, the correct answer is automatically selected for all Sentry behavioral questions.
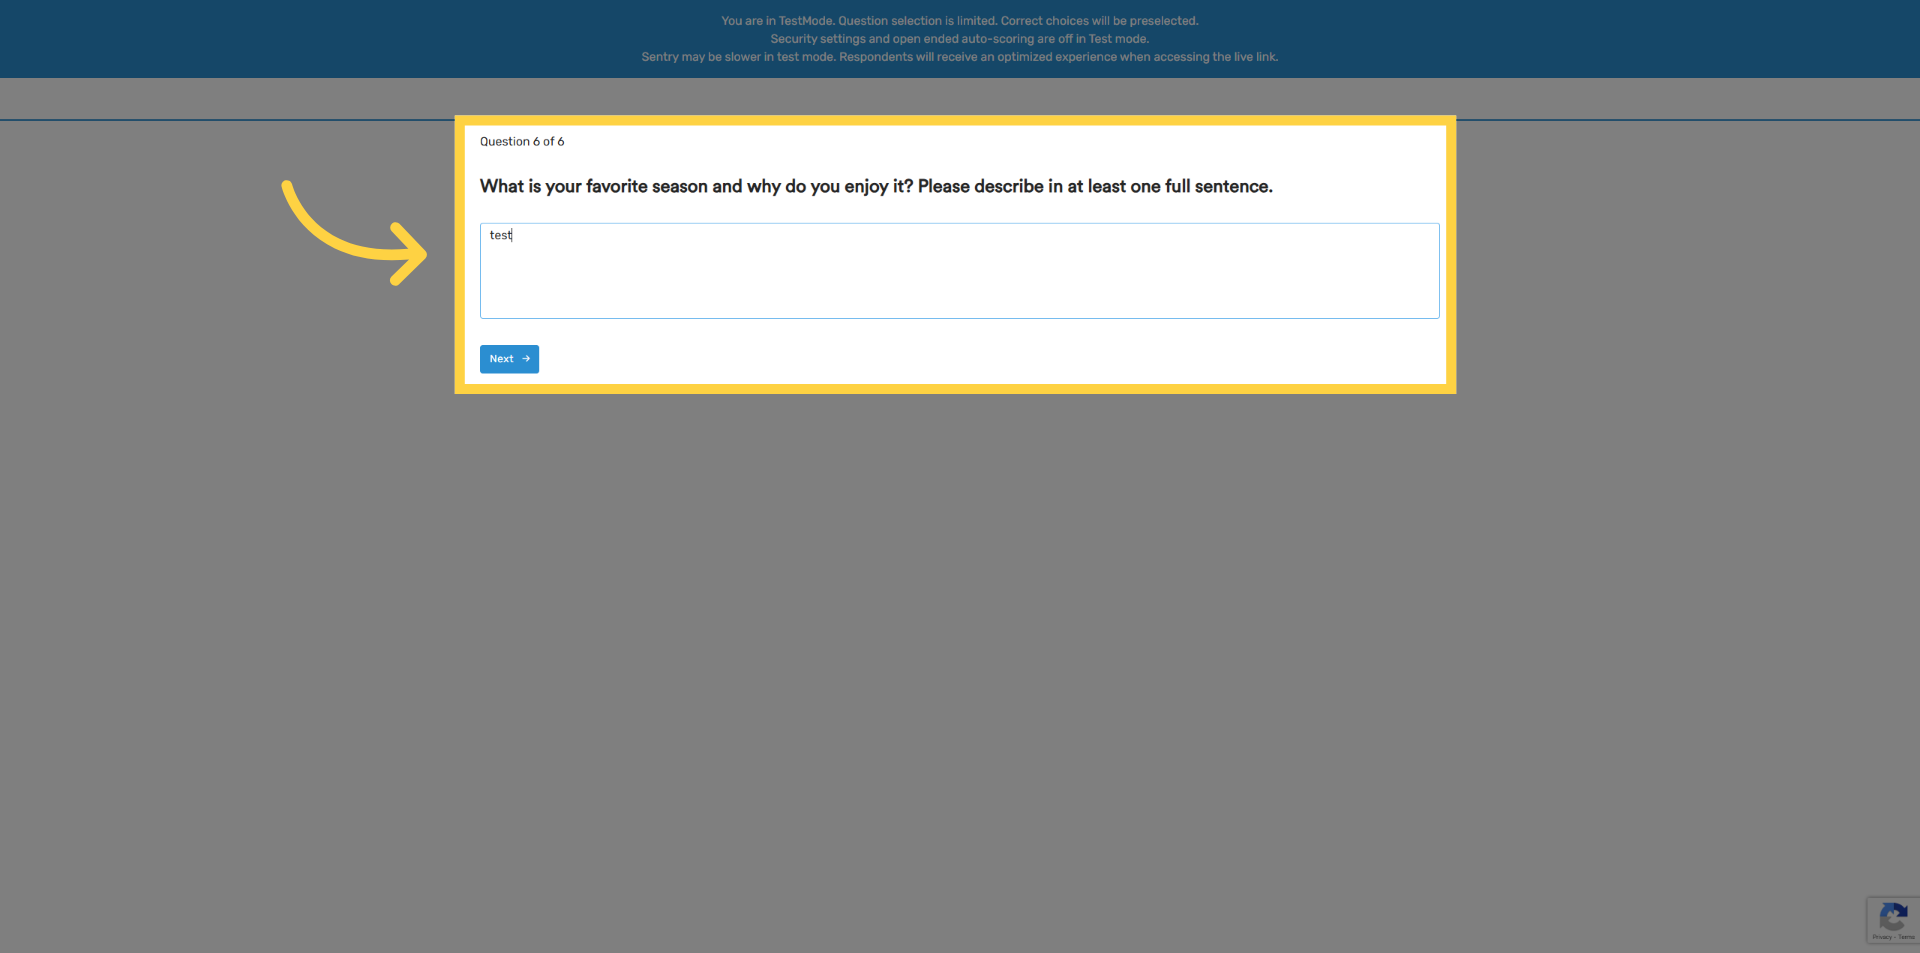
35. Open-End Response Grading Disabled
If your template includes an open-ended question, the open-ended response will not be graded.
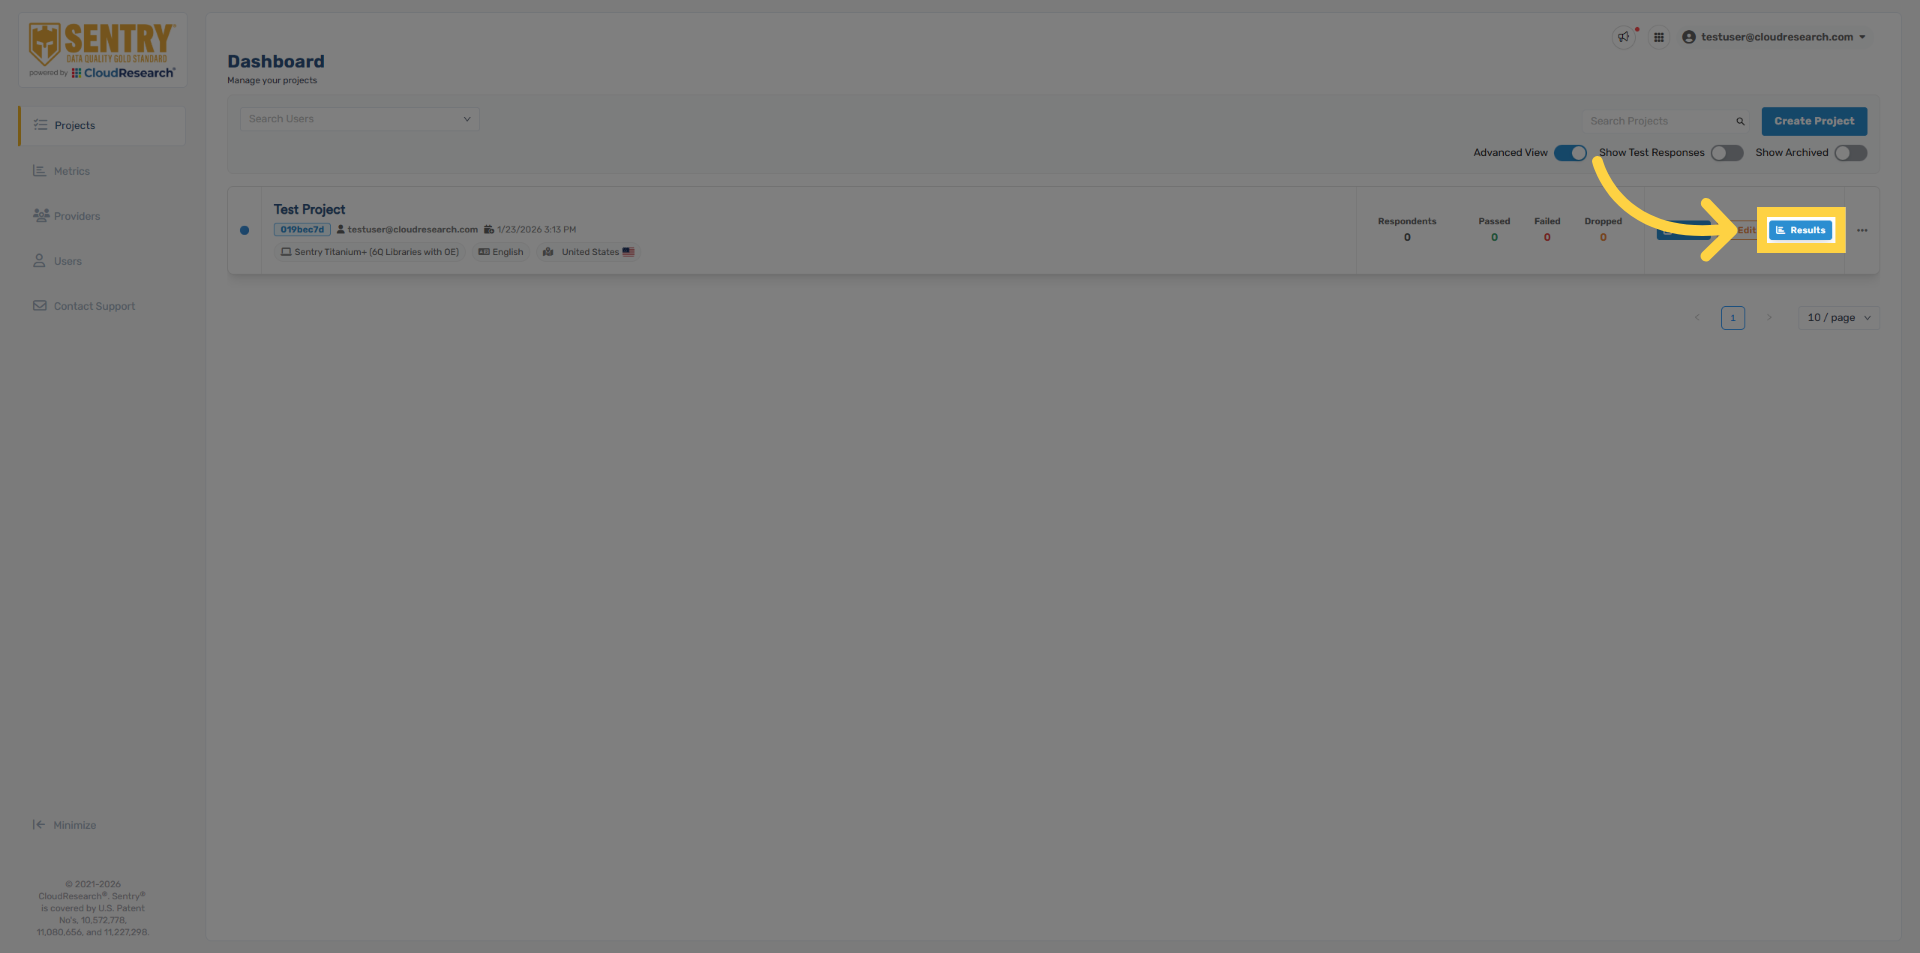
36. Test Results
Click Results to view your test responses.
37. Access Test Responses
Select show test responses at the top of the screen.

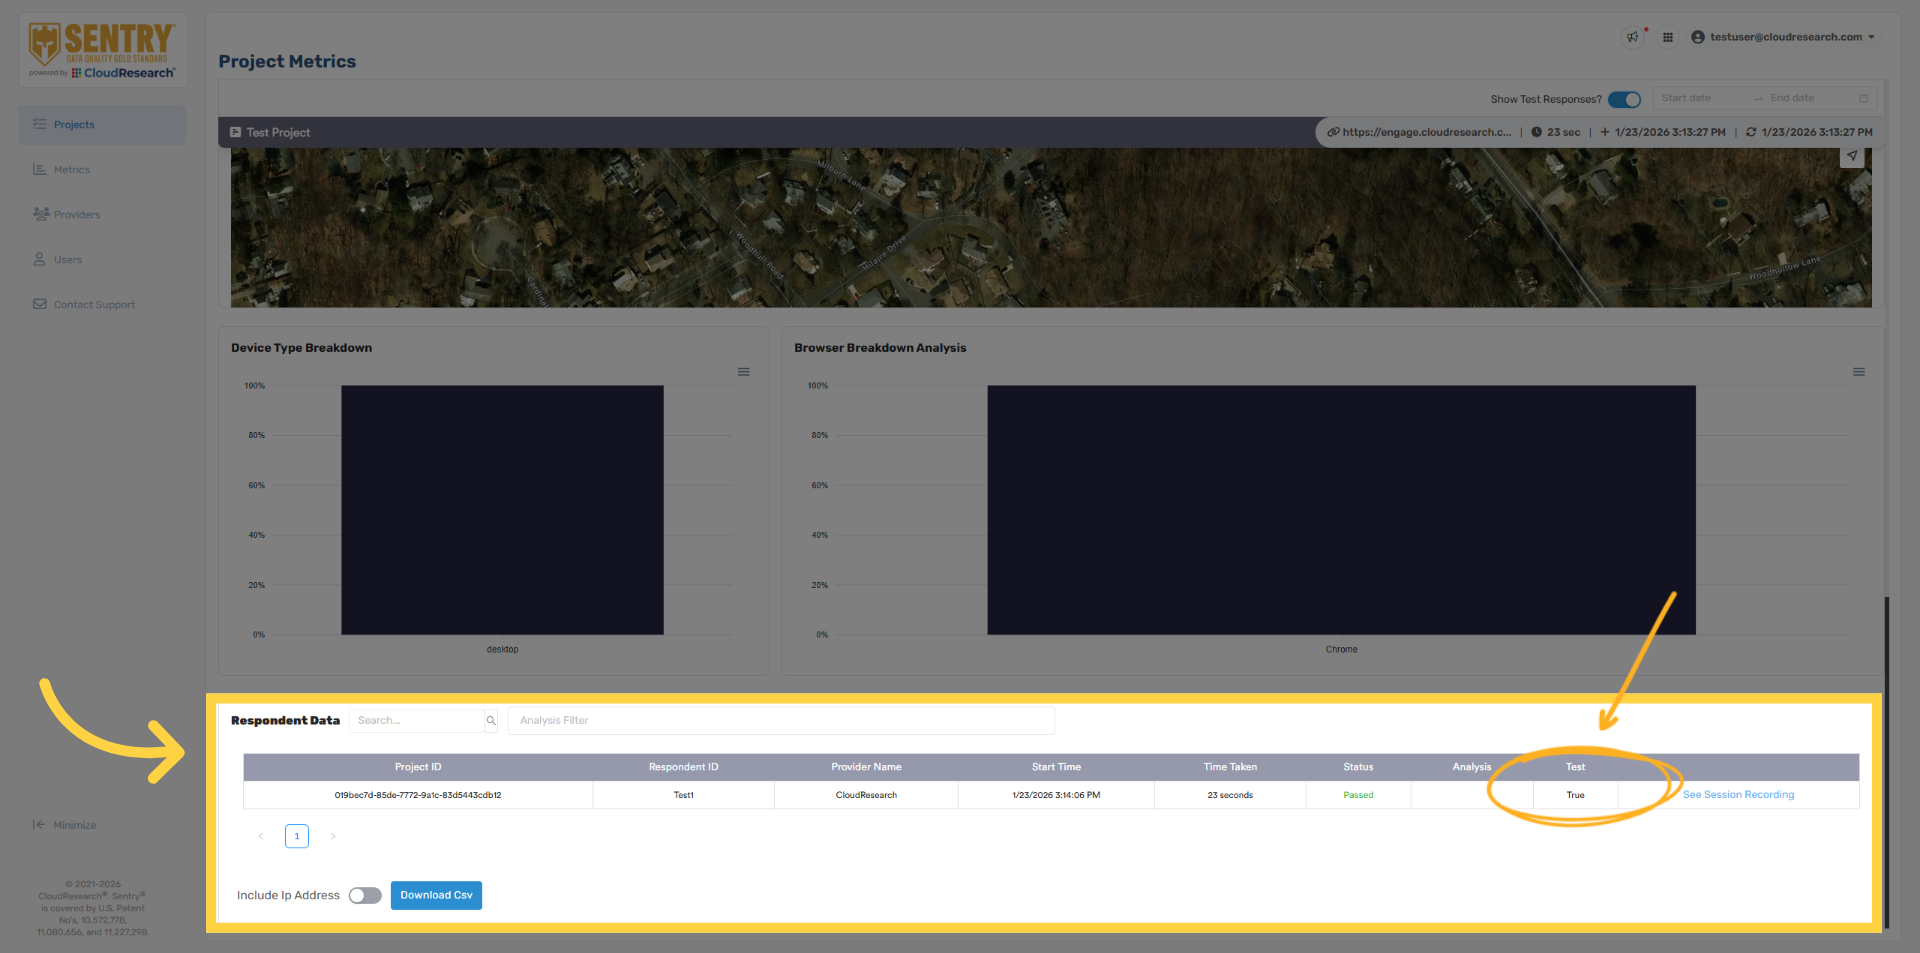
38. Navigate to Projects
Navigate to Respondent Data at the bottom of the Results page and locate the Test column. A value of True indicates the respondent entered through the test link, while False indicates the live link was used. Please note that the most common issue when testing Sentry is not using the test links. Verifying that the correct link was used is always the first step when troubleshooting.
39. Ready to launch
When you’re ready to launch, no further action is required in the Sentry platform. Your sample provider can simply begin sending traffic to the live Sentry link. All responses will appear on the dashboard, and in the Results page in real time.
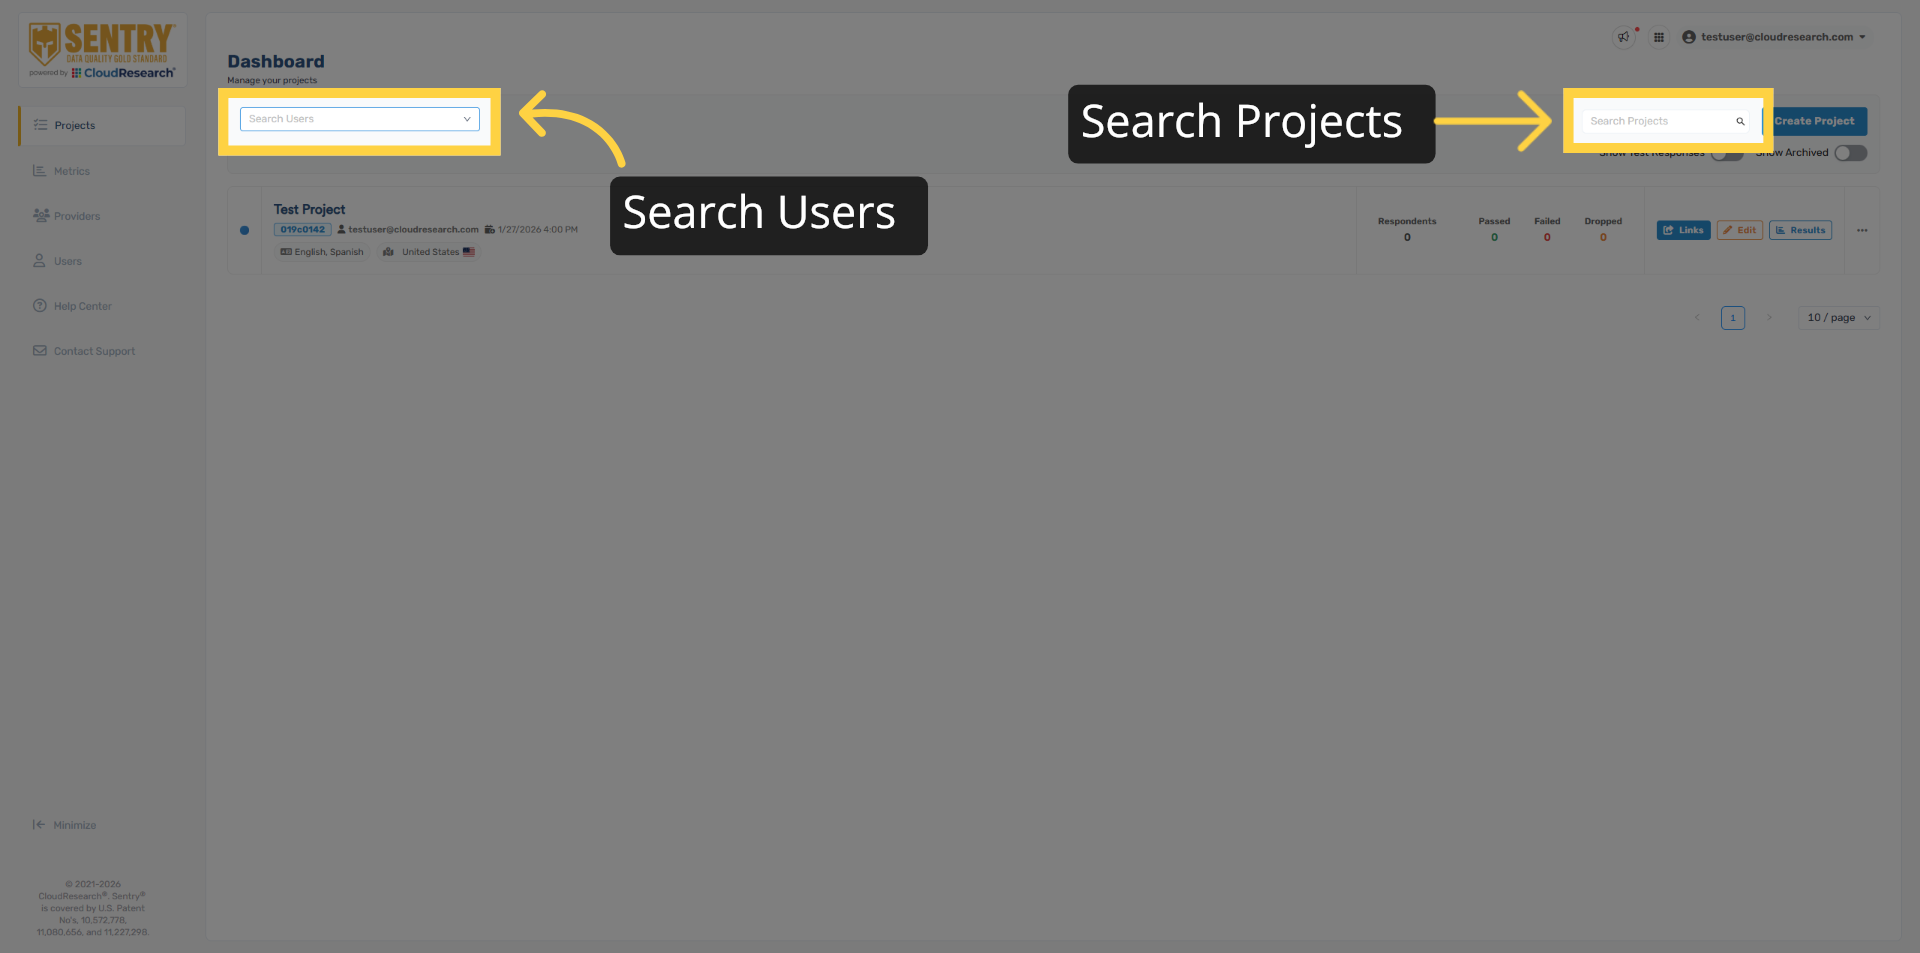
40. Search Users / Projects
Before we wrap up, let’s take a quick tour of the Project page. From here, you can access all Sentry projects within your organization. You can search by user using the dropdown at the top of the page, or search for a specific project using the project search bar in the top right. To search across your entire organization, make sure All Users is selected in the user dropdown.
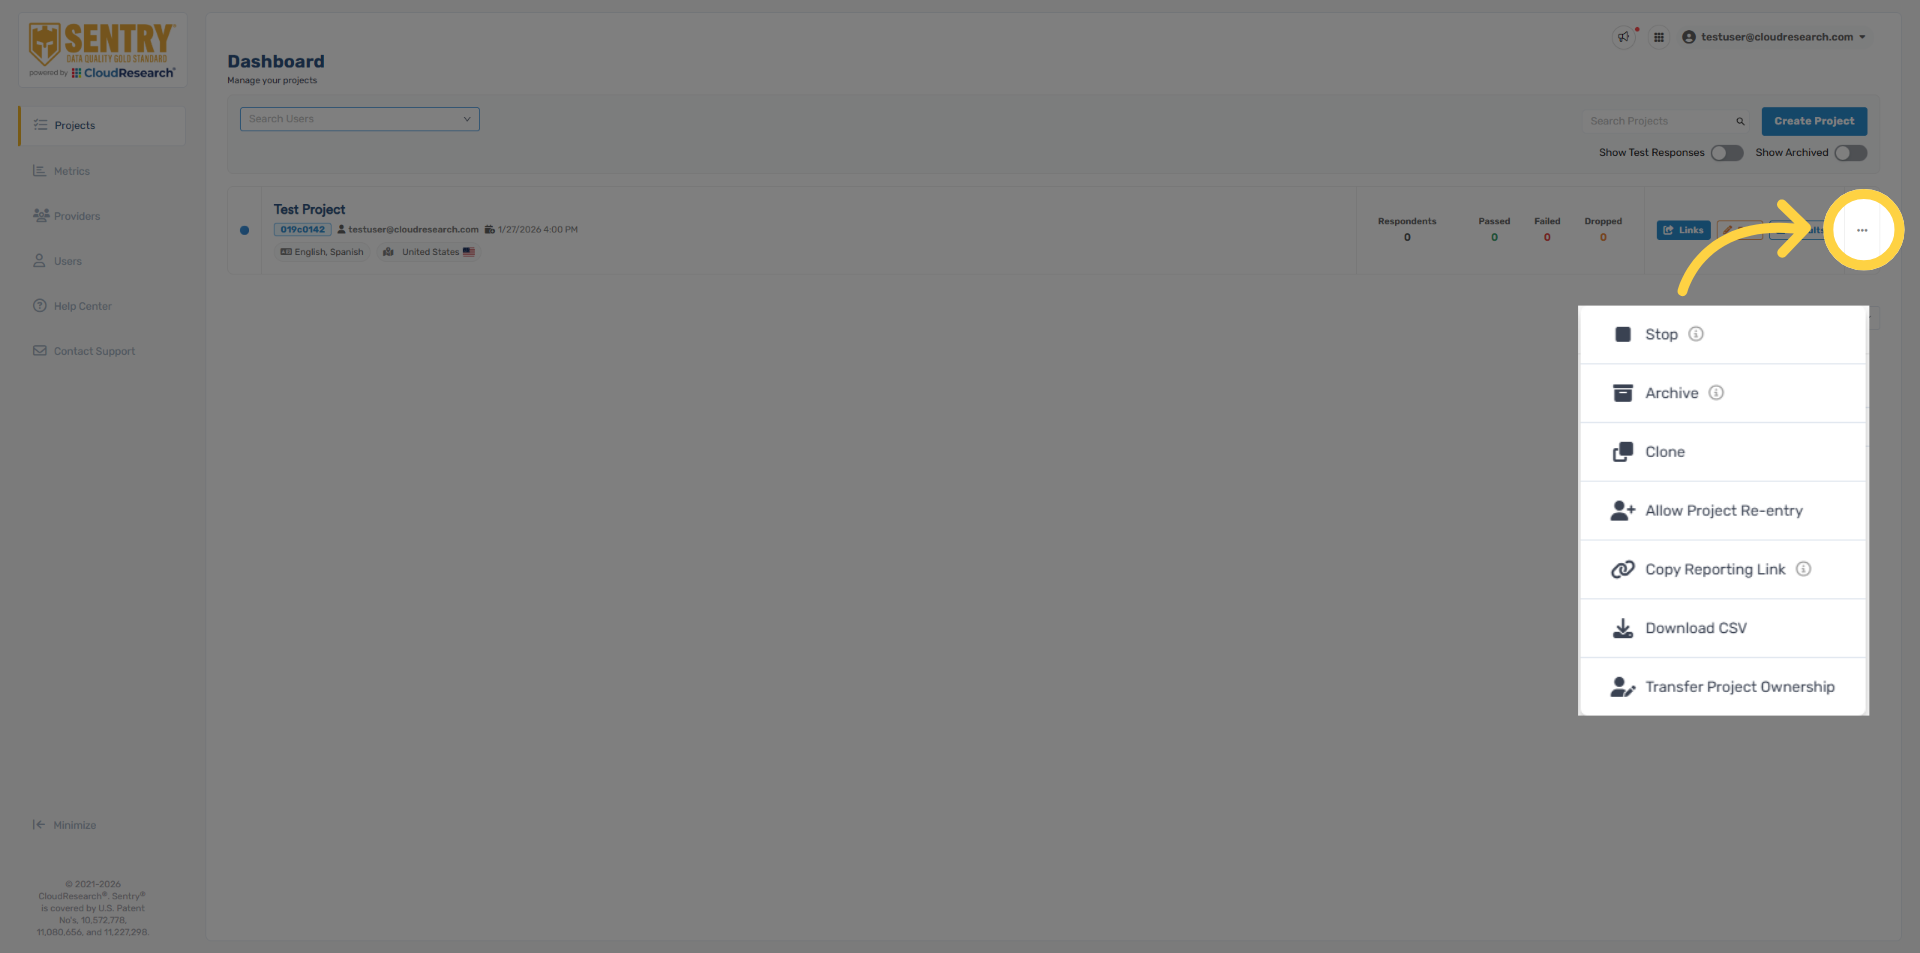
41. Project Ellipsis Options
Next to each project, you’ll see an ellipsis menu with additional options,, including cloning a project, downloading project data, and transferring project ownership. You’ll also find a Public Reporting Link, which is a shareable results page that can be accessed without a Sentry account.
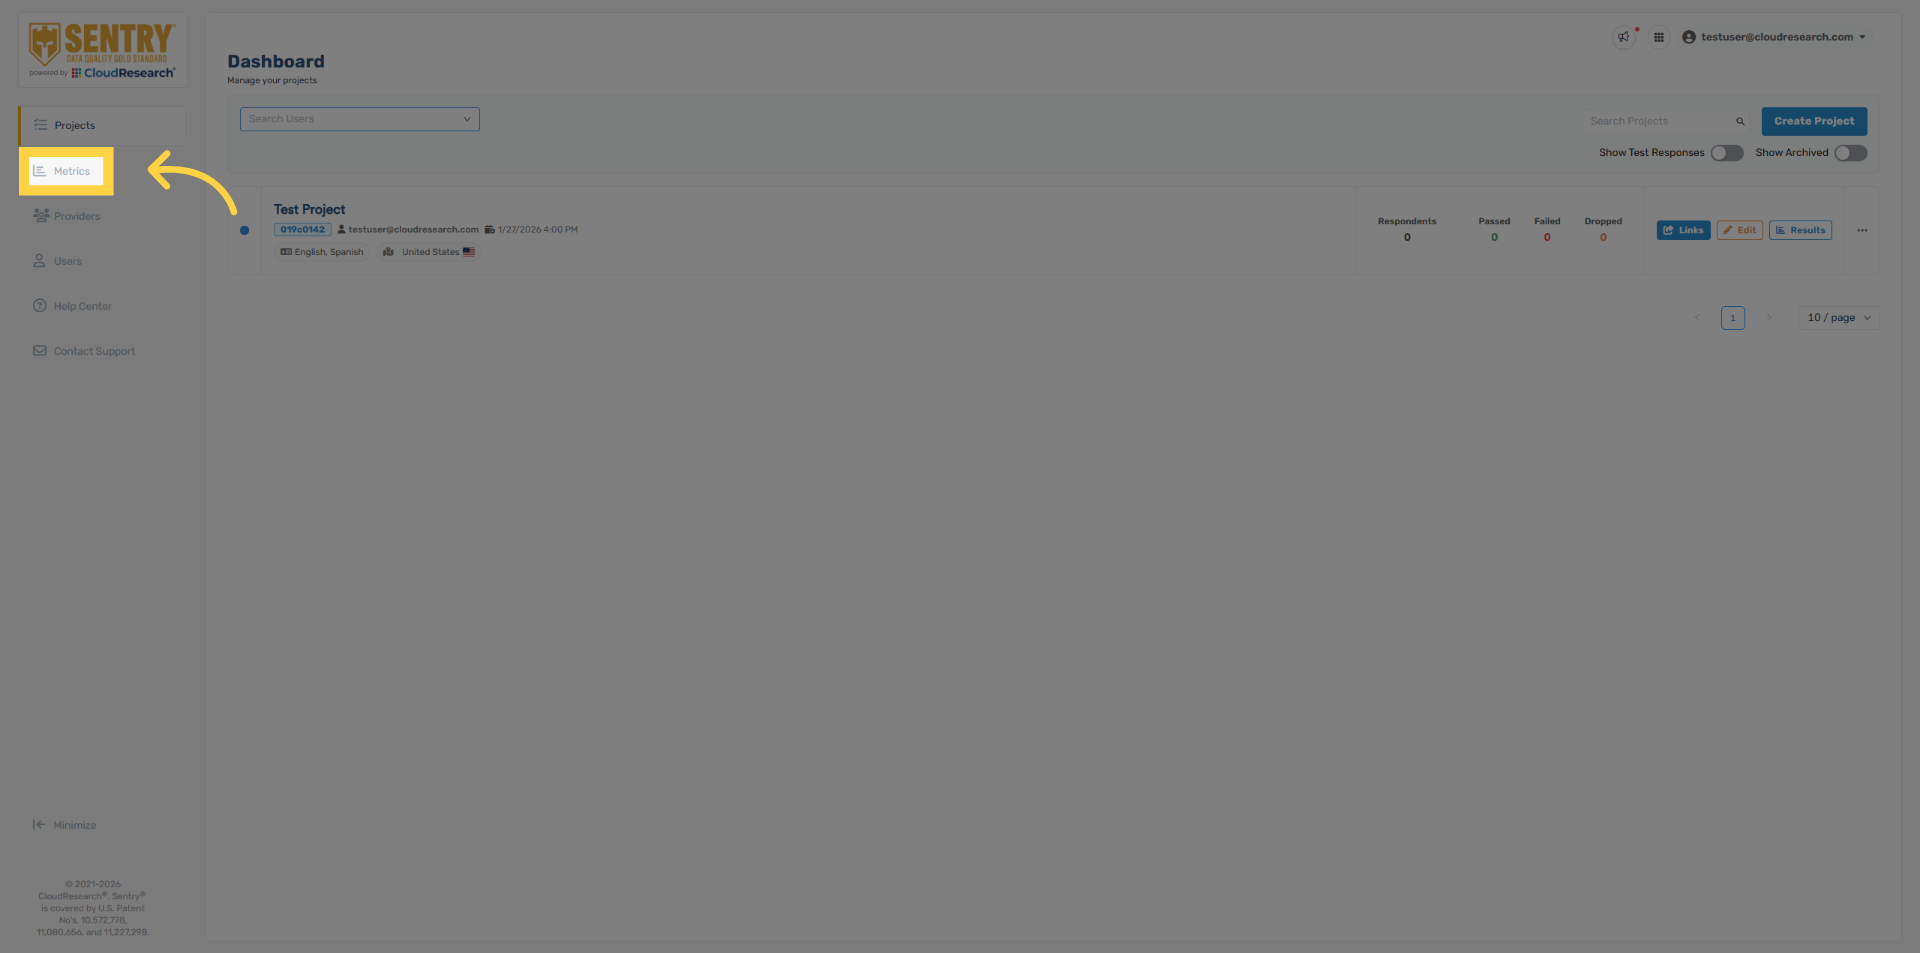
42. Metrics Page
If you’d like to view results across your entire organization, the Metrics page in the left sidebar provides aggregated reporting. From there, you can filter by provider, project, country, language, or template.
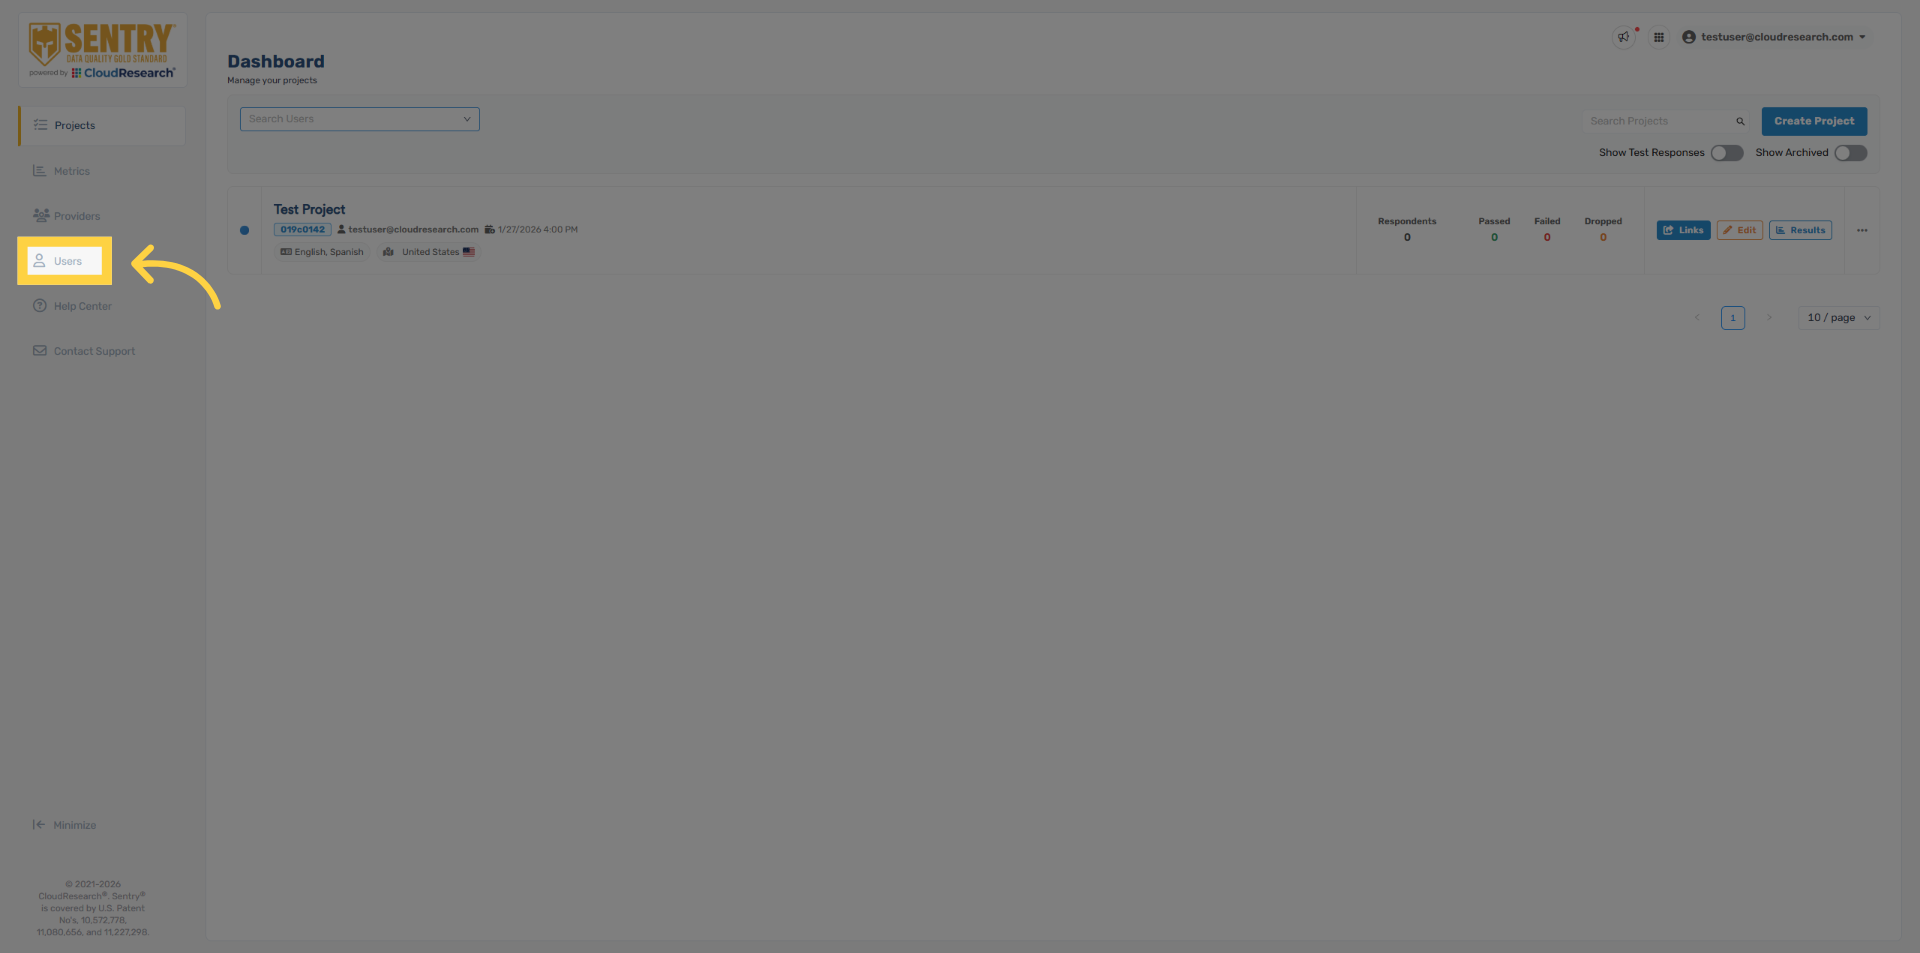
43. Admin Users Tab
For users with admin permissions, you can invite any number of additional members from your organization to Sentry, as well as assign new admins, by using the Users tab.
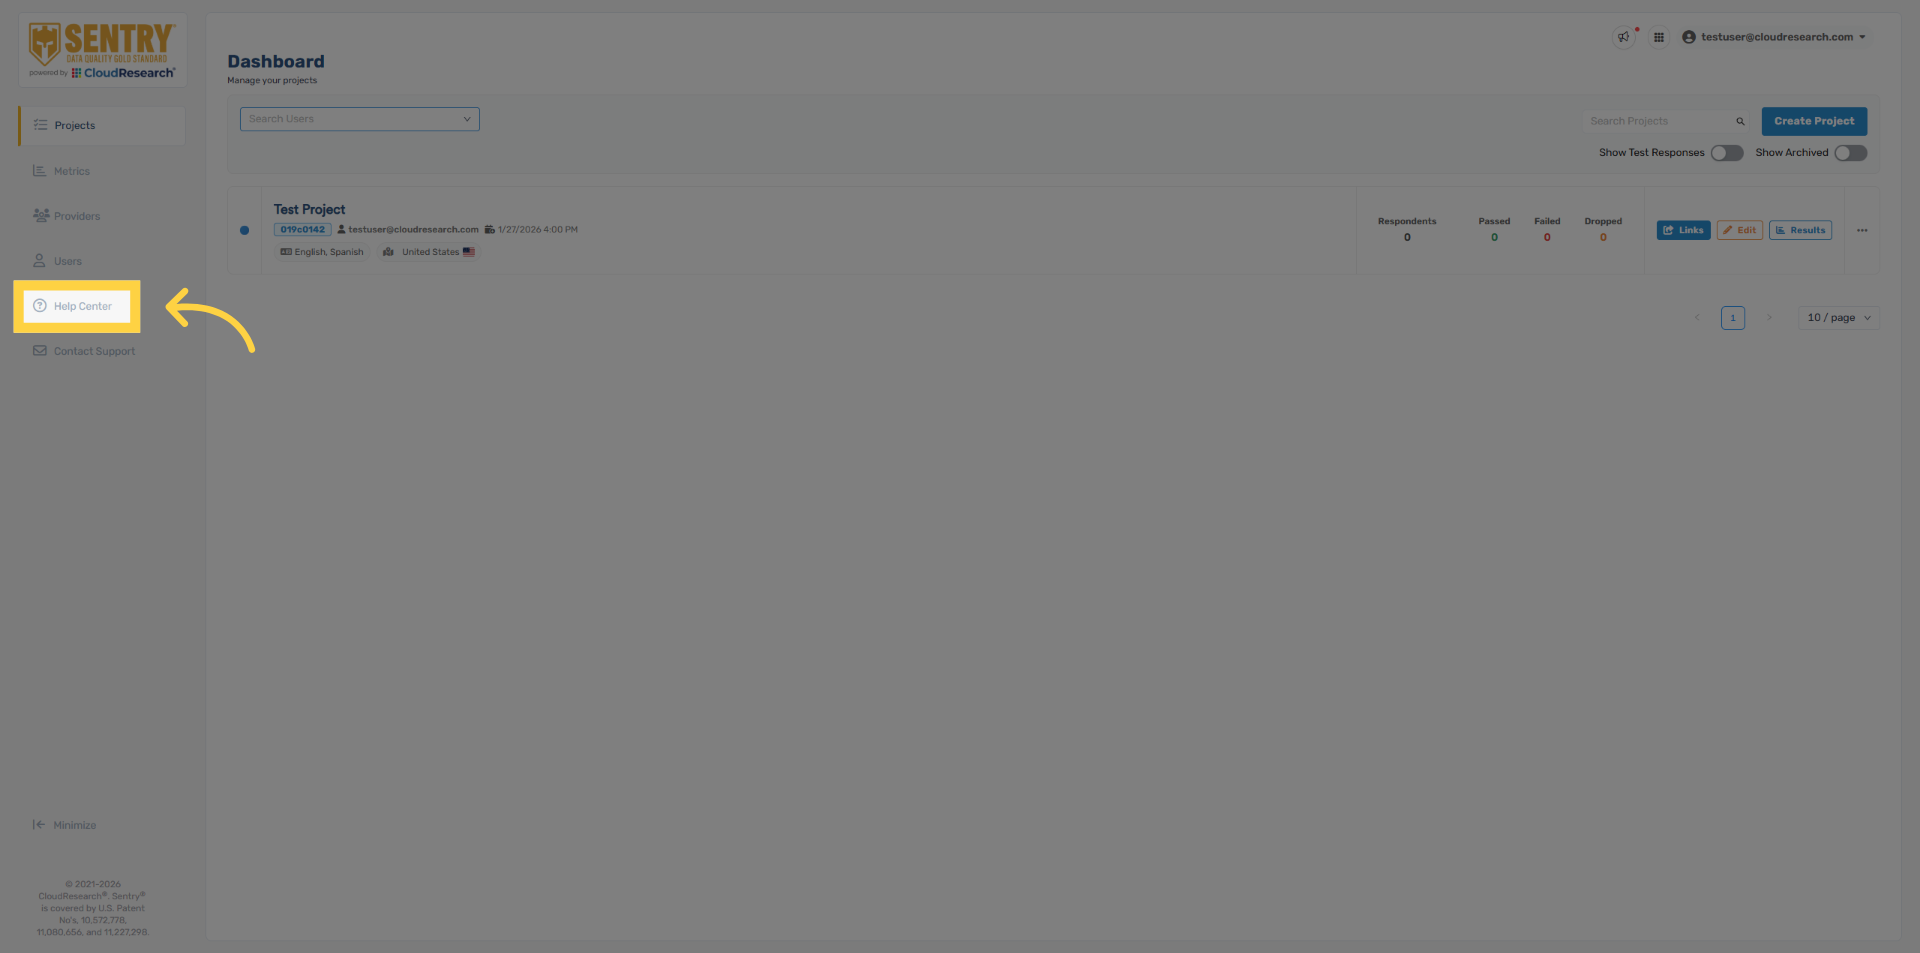
44. Help Center
For more information about Sentry, including detailed guides on specific features and troubleshooting resources, please visit our Help Center.
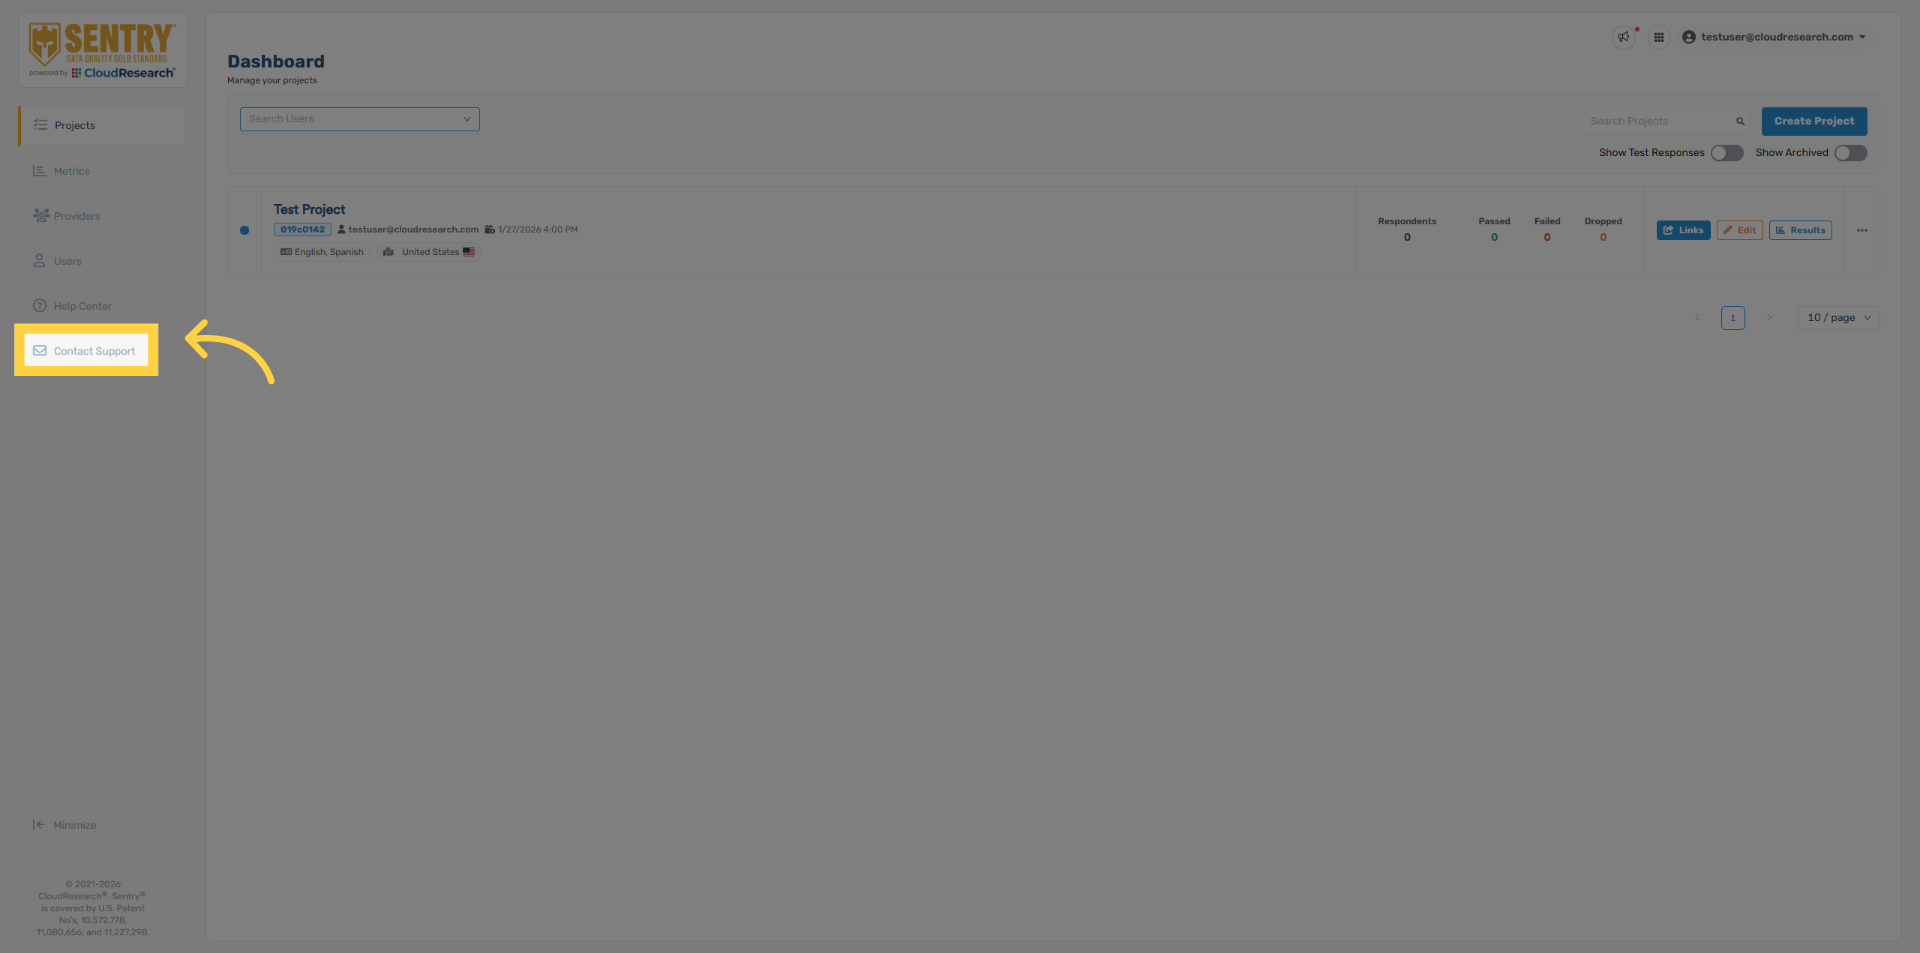
45. Support
And finally, if you ever need help, our team is available through the Contact Support option.
Thank you for taking the time to learn how to set up and launch a project in Sentry. If you have any questions, don’t hesitate to reach out to our support team. We’re here to help, especially as you get familiar with the platform.

Comments
0 comments
Please sign in to leave a comment.